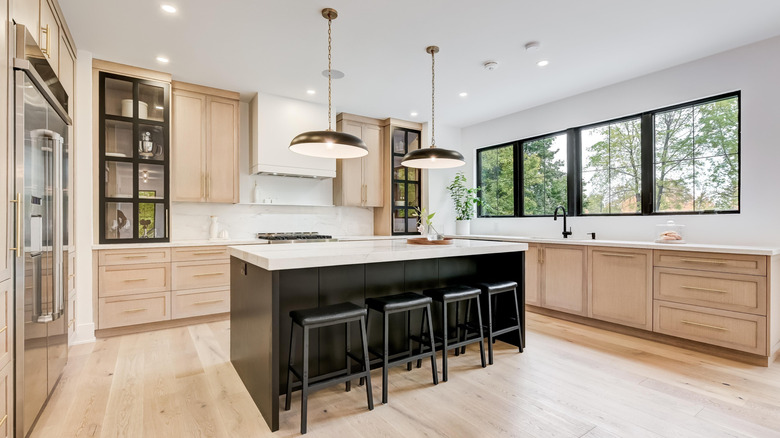
Add Instant Character To Any Kitchen With An Easy DIY
We may receive a commission on purchases made from links.
Here's an easy DIY cabinet hack you can do in your kitchen that will add instant character to the space at a deceptively low cost. Bead or pearl molding, also known as bobbin trim, is a surprisingly powerful way to elevate basic kitchen cabinets. These rows of tiny wooden beads instantly catch the eye, creating the kind of refined detail and architectural flair you'd normally only expect from high‑end custom cabinet work. Indeed, that's why bobbin trim is a recent trend that's grown incredibly popular across social media due to its flexibility in application and easy installation. After all, you don't need huge tools or much skill— just precise measuring, a few straight cuts, and some glue and paint to pull the project together.
If you're looking for a creative way to add a pop of color in your kitchen, this is a great way to do just that. You can add bobbin trim to cabinets after the fact, or you can paint the trim and cabinet doors together, creating a seamless look that feels intentional, not slapped on. And that's why this hack is too good to pass up. In the same way that DIY bobbin frames add a touch of intricate beauty to your wall art, bobbin trim can transform your ordinary cabinet faces into show‑stoppers. Pair it with fresh hardware or a bold cabinet color, and suddenly your kitchen feels custom‑crafted. This breezy yet powerful detail can define an entire space, so take your time and embrace the craftsmanship — or at least the illusion of it.
How to apply bobbin trim to kitchen cabinets
Adding bobbin trim to your kitchen cabinets is a simple process that makes a big visual impact, even if you have 100 ideas for your kitchen remodel. Start by ordering a set of unfinished wooden bobbin strips like the affordable Nuanchu 12 Pcs Decorative Beaded Wood Trim Half Wooden Beads from Amazon. Each strip is under 16 inches long and can be easily cut to suit the application. But before gluing anything, measure the outer edges of your cabinet doors and drawer fronts, and pre-cut your bobbin pieces to size. Dry-fit them along the border to check placement and pattern. This is your chance to adjust spacing and avoid any uneven gaps. Once you're happy with the fit, you can also label the back of each trim piece with a pencil to remember what goes where.
To install, run a thin bead of wood glue along the back of each piece, press it firmly into place, and hold for a few seconds. You don't need nails; glue is strong enough, just make sure not to over-glue it. Work one side at a time and let each section dry before moving on to the next. After the glue sets, paint the trim to match your cabinets. For the cleanest finish, paint the trim after it's installed so the seams disappear into the cabinet surface. It's the same approach demonstrated in the video featured above, where the trim was glued, then painted by hand for a seamless, high-end look without a high-end price.
Extra tips to nail the look
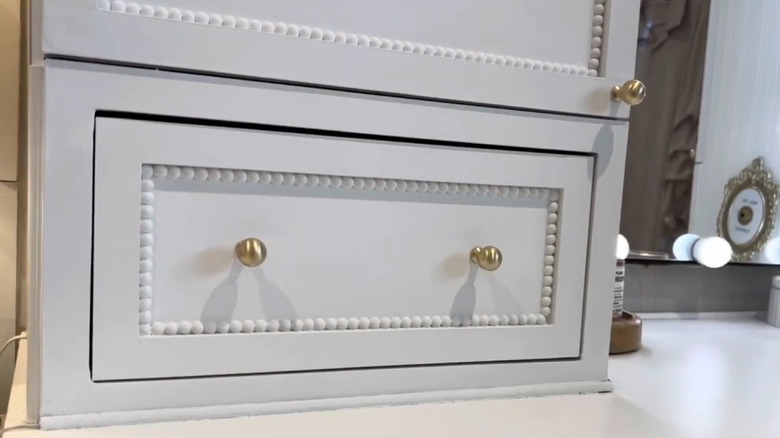
Once your trim is glued in place, it's time to paint it to your desired color. You'll get the cleanest, most professional result if you wait until the trim is fully dry before starting. Using the same paint color and finish as your cabinets, apply one or two coats directly over the trim. A small angled brush helps get into the rounded edges of the bobbin detail. If your cabinet surface is clean and in good shape, you can skip the primer. Just make sure to wipe away dust and glue before painting. Painting after installation gives the best bond and helps everything blend, rather than leaving visible seams or uneven edges. However, you may prefer to paint and match the trim before installing, especially if you're installing it on older cabinets that you're not repainting alongside the new trim.
Regardless, if you want your cabinets to really stand out, this is the moment to go beyond just adding trim. Swap your old hardware for a modern style or paint your cabinets a bold, rich tone to complement the new texture. And if you're feeling confident after finishing the beadwork, you may be ready to try the simplest method for installing cabinet crown molding for beginners. Crown molding adds height and polish to the tops of your cabinets, giving your kitchen that "finished" look without the cost of full renovation. Like bobbin trim, it's all about details and small changes that create big results.