How Often Should You Really Be Cleaning Your Mattress? (& The Best Way To Do It)
Spring cleaning your home each year might be a job many people dread, but they're happy when it's done. If cleaning your mattress isn't a job you have in mind when spring rolls around, it should be — after all, your mattress could have as many as 10 million dust mites inside it. (Dust mites are microscopic, insect-like pests that feed on dead human skin cells.) To make you even more disgusted, the average person produces 26 gallons of sweat at night each year, some of which soaks into the mattress.
If you're sufficiently grossed out, you might be thinking cleaning the mattress each spring isn't enough. And you'd be right. Although advice about how often you should clean your mattress varies, cleaning it at least every six months is a good starting point for vacuuming and airing it out, according to a sleep science coach speaking to Today. On the other end of the range, a microbiologist in The Conversation suggests vacuuming it weekly and allowing the mattress to air out every few days.
Personal preference plays a big role in determining how often you want to clean it. If you have pets sleeping in the bed, you might want to vacuum once a week to catch pet hair. People with allergy problems may want to clean monthly or more often. One way to avoid having to clean it as often is by installing a high-quality mattress protector. Learn more about the steps required to deep clean a mattress, as well as some options for removing stubborn stains.
How to give a mattress a general deep clean
Once you choose the best mattress, you want to be sure it will provide good value by lasting a long time. A clean mattress should give you greater longevity than one that you rarely deep clean. Before starting the cleaning process, read through the instructions from the manufacturer for any special considerations you should follow while doing a deep clean. (Make the most of this time and wash all the bedding while you're deep cleaning the mattress.)
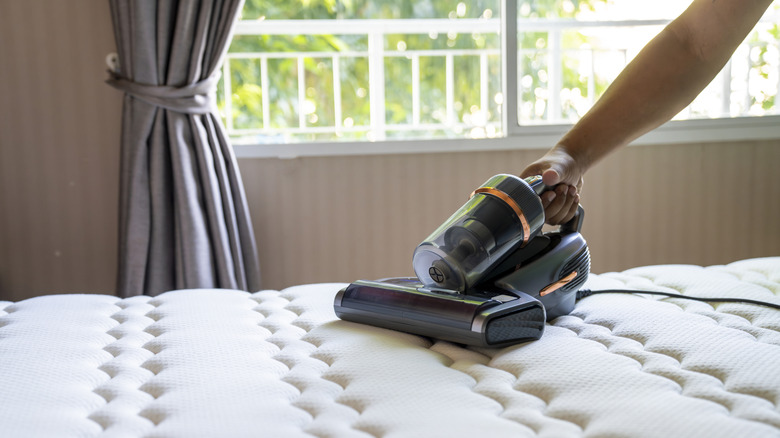
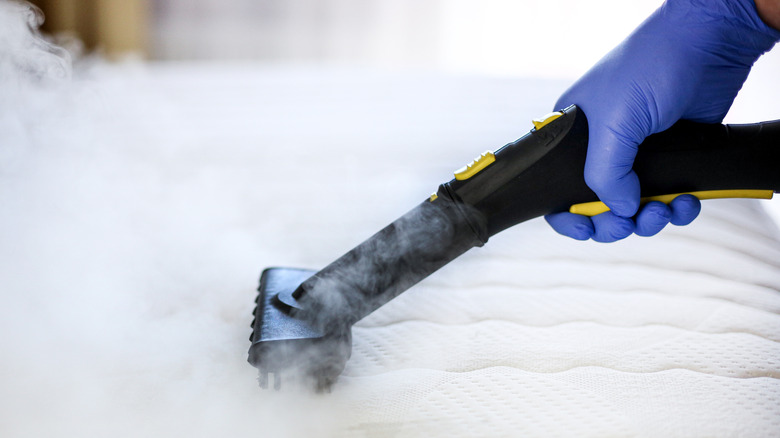
Start by vacuuming the surface and sides of the mattress. If you have an upholstery attachment for the vacuum, you should use it. (Don't leave any of those dust mites behind!) Lightly sprinkle a layer of upholstery deodorizer across the surface; baking soda will work nicely, too. Leave it on the surface for a few hours, if possible, before vacuuming it. Some people recommend using a garment steamer over the top of the surface next, as the steam will kill any remaining dust mites. Let it dry and then vacuum again.
If you have a mattress that's made to flip, you should do it at this point and repeat the steps. If you have a single-sided mattress, just lift it up and vacuum the lower side. Let the mattress air out by opening all the windows to create a cross breeze that lets the materials in the mattress breathe for a few hours before placing your mattress protector and clean fitted sheets back on.
How to remove various stains from your mattress
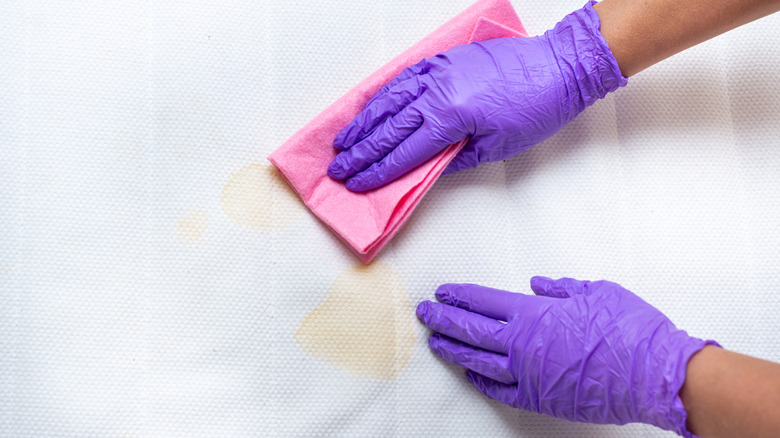
If the mattress has stains after you vacuum it, you can take a few different steps to try to remove them, based on the stain you have. One of the most common problems is needing to remove sweat stains when cleaning a mattress. They have a yellowish color and a musty odor. One option to clean these is by mixing 1/4 cup of hydrogen peroxide, 1 tablespoon of liquid dish soap, and 1 tablespoon of salt. Spread this paste onto the stain with an unused toothbrush. Let it dry in place before scraping it away.
Blood stains are also possible on a mattress. Older stains may look brown, while fresher stains (which are easier to clean) may have a brighter red color. If the stain is fresher, use a rag soaked in cold water to dab it. Change the rag as needed. Do not rub the rag over the blood, as this can spread it around and make the problem worse.
If the blood stain is stubborn and won't come out with cold water alone, you have some other options. Dampen the blood stain with cold water. Mix 1/2 cup of hydrogen peroxide, 1/2 cup of cornstarch, and 1 tablespoon of salt. Immediately apply the paste, and let it sit until the paste stops bubbling. Then pat the area with a clean cloth to soak up the paste. Let the area dry.