Expert Tips For Perfecting Quarry Tile Floor Installation At Home
We may receive a commission on purchases made from links.
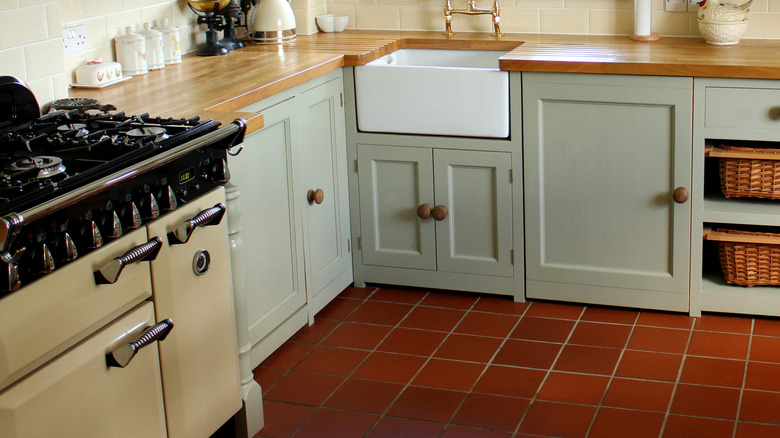
While there are multiple budget-friendly ways to give your floors an upgrade, they don't beat installing new tiles if you want to refresh your interiors. Alas, you'll have to spend anywhere between $8 and $20 per square foot if you contract a professional, which could burn a significant hole in your pocket. Considering this, you can either delay the project for an indefinite period or go the DIY route. If you choose the latter option, there are a few must-know tips for a perfect tile floor installation. This is especially important when you opt for specific kinds of tiles, like quarry. It's because "quarry tiles are dense, unglazed, and extremely durable. But they're also less forgiving than ceramic or porcelain," reveals Carmine Argano, owner of Creative Design Ceramic Tile & Bath, which offers hardwood flooring on Long Island, in his exclusive interview with House Digest.
When prompted to share the secret to perfectly installing them at home, Argano explains, "Installing quarry tile floors is all about proper prep and using the right materials." To elaborate, you'll have to examine your subfloor to ascertain that there are no cracks marring its surface. Planning your layout is also important for a seamless installation. Then, you just need to apply your chosen adhesive and put the tiles in place. Grout application after the floor is set is necessary, too. Although laying quarry pieces is slightly different from other kinds, following our expert's advice, avoiding common mistakes, and exercising a little bit of patience will make the process easier.
Prep the subfloor and plan your layout before installing quarry floor tiles
The first step is to properly prepare your subfloor for laying tiles. This is because "the subfloor needs to be completely clean, dry, and level," advises Argano in his exclusive interview with House Digest. Since cobwebs, dust, grease, or debris can make it difficult for your quarry floor tiles to remain in place for long, sweep and vacuum the surface. In case there's a lot of dust and you need to use a damp mop for thorough cleaning, let your subfloor dry completely before moving forward, or you risk moisture damage. "For concrete subfloors, check for cracks or unevenness. Use a floor patch compound if needed," says the tile expert. DAP's Ready-to-Use Floor Patch & Leveler is a good option. However, Argano recommends, "For wood subfloors, you'll want a cement backer board installed and taped properly with mesh and thin-set [mortar]."
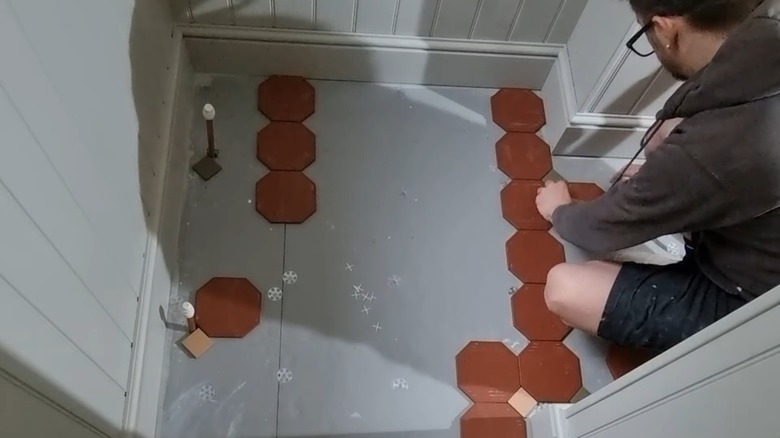
Once your subfloor is level, plan out your tile's layout. Begin by calculating your floor's surface area. This will help you determine the number of tiles you need to order. When you have them, Argano says, "Dry-lay the tiles first. This lets you plan your layout, see where cuts will fall, and avoid thin slivers at the walls." Try out different combinations to find a pattern you like and won't get bored with anytime soon. For a realistic experience, Argano suggests, "Snap chalk lines to create a grid. This keeps rows straight and symmetrical." Don't forget to snap a picture of your finalized design. This simple action will help you avoid confusion later.
Steps to follow when installing quarry tiles on your subfloor
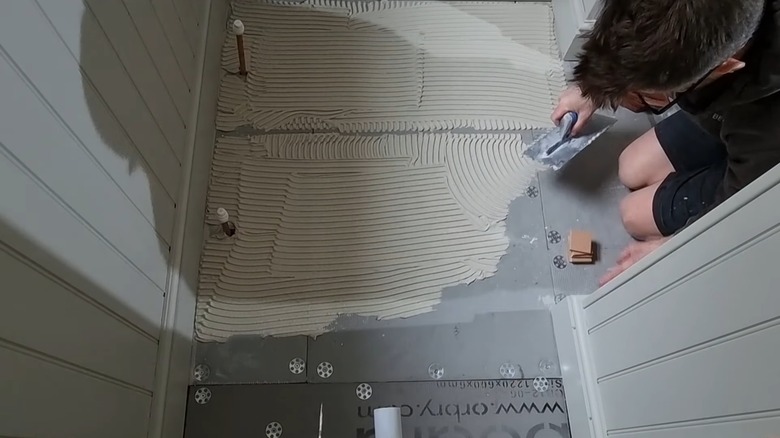
After your subfloor is level and the cracks have been filled, it's time for mortar application. But not just any paste will do. "Use a high-quality modified thin-set mortar made for dense tile," recommends Argano in his exclusive chat with House Digest. Mix it (you can skip this step if you choose a pre-mixed version) as per the instructions on the packet and apply with a ½-inch notch trowel. Divide your floor into small sections and spread the paste over one area at a time, or the paste will harden by the time you set the tile. Moreover, "Back-butter tiles if needed, as quarry tiles can be slightly uneven on the bottom," explains Argano. Simply put, apply a little mortar to the back of your tiles so they set in better.
When done, Argano says, "Set each tile firmly into the mortar, with at least ¼-inch grout joints." Apply a little pressure to each square so it adheres well. While you work, "Use tile spacers and periodically check with a level to keep everything even," the tile expert advises. If you notice wonky pieces, gently move them in place with a rubber mallet. To fit them into tight corners, take precise measurements and use a wet saw. Now, "Let the tiles cure for at least 24 to 48 hours before grouting," Argano recommends. This will allow them sufficient time to adhere to your subfloor. Once the time is up, "Use a sanded grout for the wider joints. Once dry, apply a penetrating tile and grout sealer, especially important for unglazed quarry tile to reduce staining and water absorption," instructs Argano.
Tips to easily install quarry floor tiles in your home

Although you want to follow the above instructions closely, Argano has a few tricks up his sleeve that will make the process smoother. Sharing the first tip in his exclusive House Digest interview, he suggests springing for a few extra tiles. Although this will increase the overall cost of the project, "Quarry tile lots often have subtle color variation. Buying 10 to15 percent extra helps with blending and future repairs." Another tip is to use dedicated leveling spacers when laying these tiles on your floor. "Because of their thickness and rougher edges, standard spacers don't always keep quarry tile level. So, opt for T-Lock or Raimondi-style leveling clips," suggests Argano. We like Perfect Level Master's Red T-Lock Wedges.
You also want to pre-seal the tiles before grouting. This is because "quarry tile is porous. A coat of penetrating sealer before grouting can help avoid haze stains and make cleanup much easier," explains the flooring expert. Otherwise, you'll have to go over each tile with a damp microfiber cloth to keep them looking new and achieve a professional-level finish. While you're free to pick any layout you want, Argano supports a staggered tile pattern to boost your floor's aesthetic appeal. "If your space allows, a running bond (brick pattern) reduces visible imperfections and looks great in kitchens or mudrooms." Lastly, keep a rubber mallet handy. "Light taps with a mallet help seat the tiles without cracking them. This ensures better contact with the mortar bed," he says.
Difference between installing quarry tiles and other types of floor tiles
Even though quarry tiles belong to the ceramic family, their installation is slightly different from others. This is primarily due to their density. "Quarry tiles are thicker and denser than ceramic. That means they require stronger mortar and cutting tools," Argano tells House Digest in his exclusive interview. Moreover, their surface texture is another way they differ from other floor tiles. "They're unglazed, so they don't have the same slippery surface — great for traction but also harder to clean," he explains. This is why you should pre-seal them before grouting.
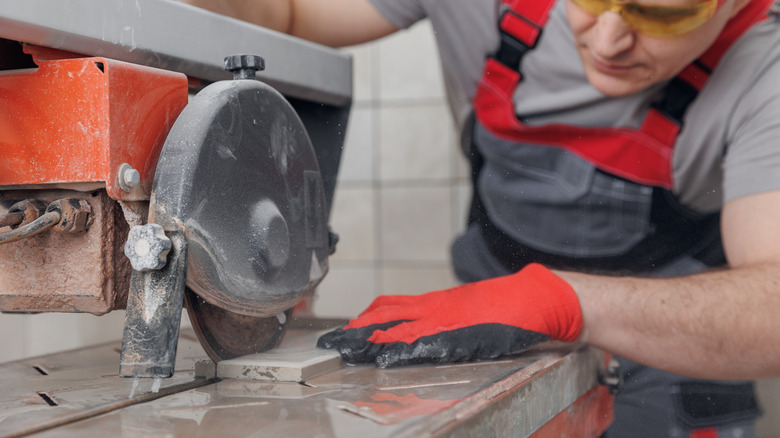
The way you cut them to fit around awkward corners is different, too. "You'll need a high-torque wet saw with a quality diamond blade. Snap cutters won't work here," warns Argano. If you don't have the power tool handy, ask your friends and family if they have one you can borrow. Alternatively, rent one from a trusted store, like Home Depot. Additionally, a quarry floor's grout joints vary from others. "Joints are wider than typical tile jobs, usually ¼-inch to ⅜-inch. Tight joints are not recommended," says Argano. These tiles also require more time during installation. Their speed is "slower than ceramic because of the added weight, thickness, and layout precision required."
Common mistakes to avoid when installing quarry floor tiles
Since they're a bit of a diva and require special attention, try avoiding a few common mistakes for a perfect quarry tile floor installation. First up is not picking the right mortar, since this will bond your tiles to the subfloor. "Regular thin-set isn't strong enough," cautions Argano in his exclusive interview with House Digest. Instead, "Use a mortar specifically rated for dense or quarry tile." Another mistake you want to steer clear of is not establishing a layout grid before laying tiles. "Without a grid, the layout can drift fast. Chalk lines are your best friend here," Argano recommends. And though you'll have to spend more time and effort drawing a series of lines, you won't have regrets later.
Moreover, you don't want to bear the consequences of inconsistent troweling. Argano says, "With heavier tiles, if the mortar bed isn't uniform, you'll get hollow spots. Comb your mortar evenly" to avoid witnessing the warning signs of a bad tile installation. You don't want to overlook sealing, either. "Unglazed tile absorbs stains fast, especially in kitchens. Always seal before and after grouting," says the tiling expert. This will also prevent your quarry tiles from readily absorbing water and bearing moisture damage. Plus, use dedicated tools to avoid mismatched grout joints. "Trying to do tight grout lines will lead to uneven spacing due to the tile's natural variation. Use spacers designed for wider gaps," concludes Argano.