12 Mistakes To Avoid When Growing Garden Favorite Hostas
We may receive a commission on purchases made from links.
Hostas are one of those garden staples that feel almost foolproof. They're hardy, they come back year after year, and they don't seem to ask for much — until they suddenly do. Whether it's sunburned leaves, sad-looking clumps, or a buffet line of slugs, hostas have their limits. And while they're often labeled as "low-maintenance," that doesn't mean they're no-maintenance. In other words, successfully caring for hosta plants takes some work, even if they're not as finicky as some other garden favorites.
The good news, however, is that most common mistakes that can kill your hostas are fixable or even avoidable if you catch them early. So, we're breaking down 12 of the most common mistakes gardeners make with hostas, including what those missteps actually do to the plant and how to get things back on track if you've already made one (or a few). If your hostas aren't looking as lush and full as you hoped, this guide is your best place to start.
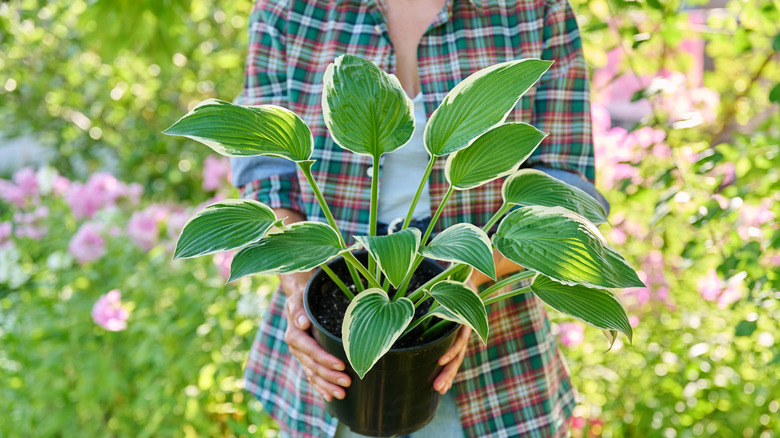
Choosing the wrong hosta (or putting it in the wrong spot)
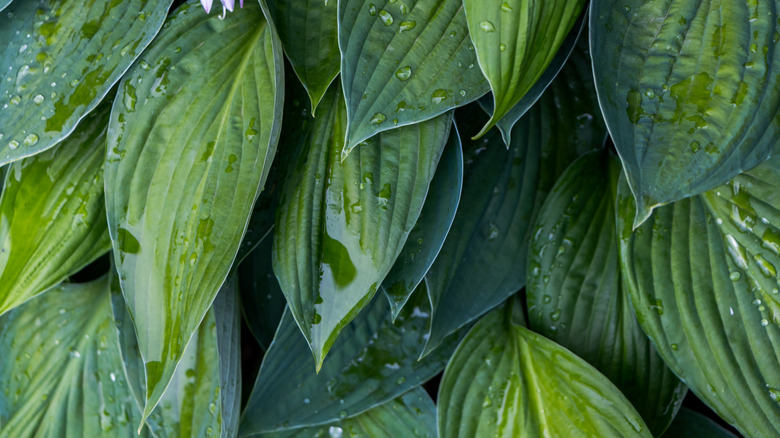
It's easy to forget that not all hostas like the same setup. Some stay small, others get huge. Some do okay with a bit of sun, others just fry. If the spot's too sunny or the soil's dried out, your hosta's leaves could get scorched, their edges may begin to curl, or the whole plant just looks tired. The plant tags will usually tell you where they need to go or what conditions are best, but let's be honest: it's easy to grab one and stick it in the ground without double-checking.
Sometimes even the most experienced gardeners get it wrong, so don't feel bad if you messed this up — plus, the problem is probably fixable. While you should definitely check up on the ideal location for the specific hosta variety you have, in general, hostas like shade and moisture. Therefore, the easiest solution is to try moving your hosta to a spot that's a little shadier, keep the soil moist (but not waterlogged), and add some mulch to keep its roots cool while it settles in and recovers. Hostas are pretty resilient and can bounce back if you give them some time; just treat it like a post-op recovery room and give them as much good stuff as possible so they avoid stress.
Planting hostas in a dry, exposed area
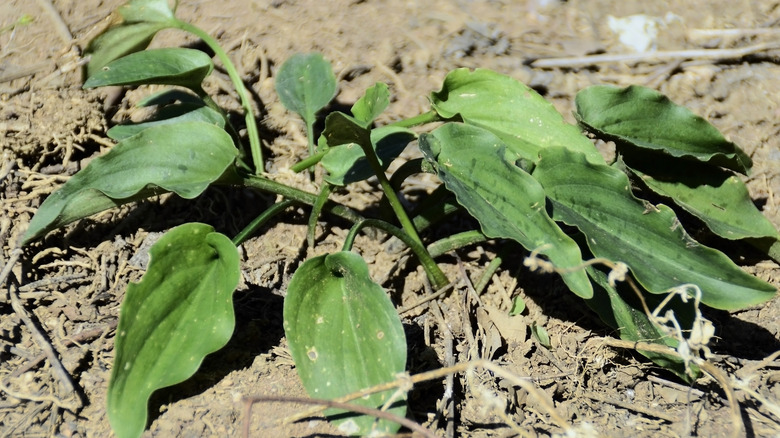
We know that hostas are pretty resilient, but there's a limit to their hardiness, and the arid, exposed areas can be detrimental for the long-term happiness of your plant. Hostas need fertile, well-draining soil and some wind protection so they can grow strong roots to anchor those big bushes securely. Hostas also need soil that's slightly acidic, but aren't as picky about it as blueberries or rhododendrons. Still, tossing your hosta plant into the wrong type of soil or in a spot that's fully exposed to the elements means you're setting it up for a struggle and may end up with a sad plant.
The first thing to do is get a soil test to check both the nutrient and pH levels of your soil, then adjust from there. You can always amend the soil with things like compost that improve the structure. But when it comes to adding fertilizer, going in blindly and just adding too much or too little of something won't help your hosta thrive. In terms of exposure, you can add a small border or wall around the planting site to shield them from wind damage or soil erosion, or plant taller plants around them to break up the wind's strength before it hits your hosta.
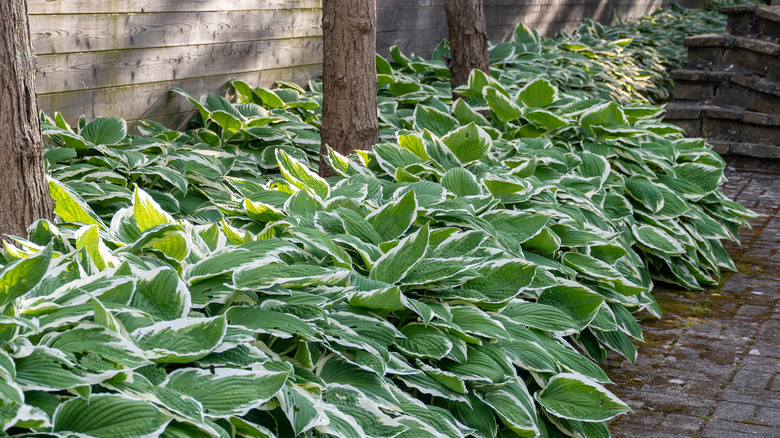
Not accounting for their mature sizes, especially in mixed hosta plantings
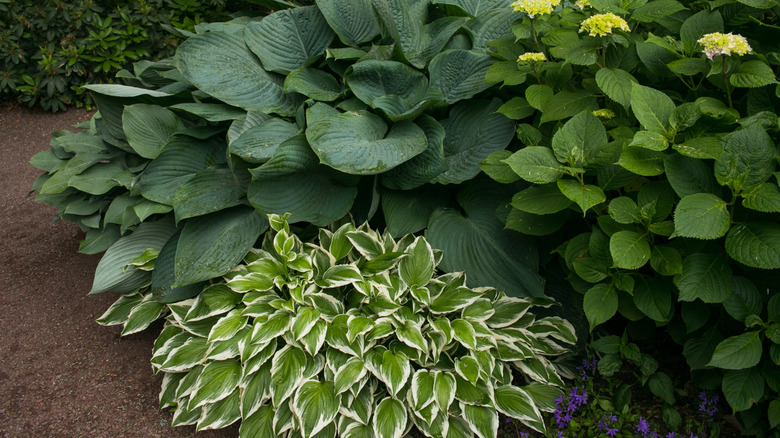
It's easy to forget how different hostas can be when you're picking them out at the plant nursery because they can all seem about the same size. But give them a season or two and suddenly the one in the back is double the size of the others and shading everything out. Some hostas are meant to stay small and polite, while others will spread like they own the place. Typically that's not a big problem for a landscape, unless you planted them all the same distance apart.
The best thing to do is just check the plant's tag and follow its spacing recommendations. Sure, your landscape might look a little bare the first season but crowding the plants now just means trouble later, especially once the big varieties start flexing their foliage. However, if you must have a full, lush garden ASAP, try filling in the gaps with a few beautiful shade-loving annual flowers like impatiens or begonias. They'll be gone by the next season and picking up a few spent annuals is way easier than having to dig up a full-grown hosta and try to find it a new home.
Failing to tailor your hosta watering routine in response to the weather
Hostas can get a bit dramatic about their water routine, particularly when heavy rains are happening. Think of them like big, Goldilocks bushes that need their watering just right. While too little water can be problematic, too much water can make them unhappy too, as they won't put up with overly soggy conditions forever. For instance, if you end up giving them a big watering after a rainstorm you could end up drowning their roots.
To nail your hostas' watering routine, you need to shoot for giving them around an inch of water per week. First, check your weekly weather forecast; are there showers on the horizon? If so, hold off and let nature literally take its course. If not, then head out with the hose or sprinkler and give them a good drink. Hostas do best when they're watered deeply once in awhile rather than a light sprinkling every day, so moisten the soil thoroughly when things are getting dry and then keep an eye on it. To help you gauge the moisture content of the soil at the root level, a moisture meter can be a super handy tool to have on hand, you can pick up something like this Hydrofarm 3-Way pH, Light & Moisture Meter for under $10 on Amazon. The more you pay attention to the actual moisture content of the soil, instead of an arbitrary irrigation schedule, the more likely you'll be rewarded with some seriously lush plants.
Not reacting quickly to signs of disease
Everyone loves hostas because they're tough as steel, but that doesn't mean they're impenetrable. Though rare, hostas can catch some fungal infections and end up sick; there's even a disease with the foreboding name of "hosta virus X," that has no cure, so don't take your hosta's resilience for granted. Sadly, waiting too long could mean you're too late to do anything to save your plants.
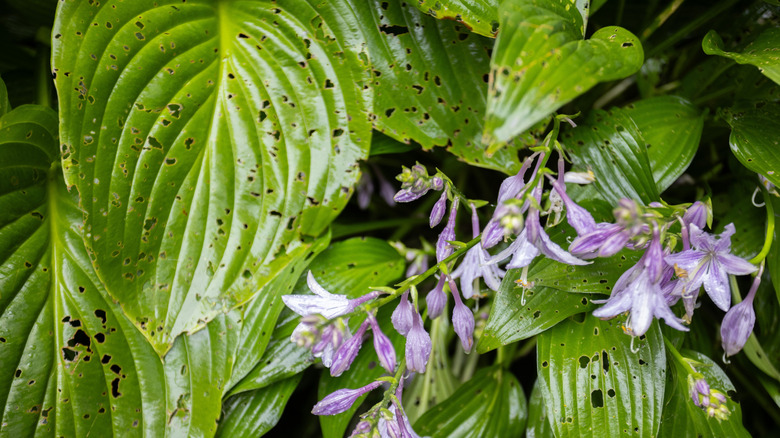
Signs your hosta has contracted something funky will most likely show up on its leaves. Watch out for a mosaic discoloration, twists with brown spots, spots with white middles and brown borders, or if they just look in tatters. If you start to notice anything looking a little weird, act quickly and remove all of the infected leaves, even if that means cutting the plant down to the soil line. Increase the air circulation around what's left, and don't compost the removed leaves, instead bag and dispose of them. You can also try a fungicide but these are usually better at preventative care than for fighting outbreaks.
Not preparing for deer, rabbit, and slug damage
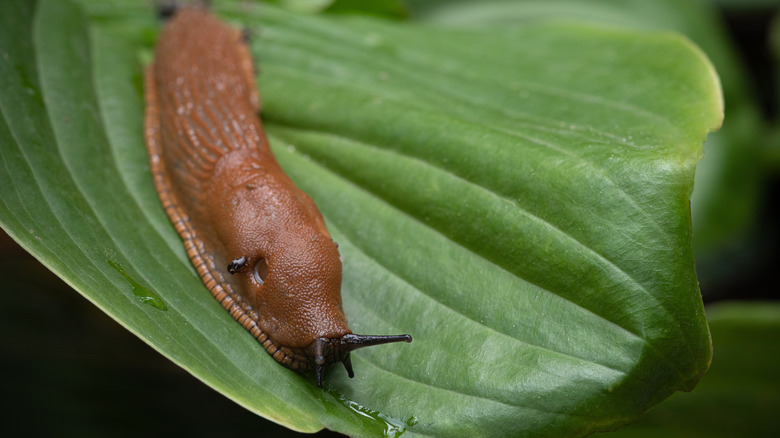
We're not the only ones who love hostas; deer, rabbits, and slugs find them absolutely delicious. While rabbits aren't as enamored as the others, slugs are a total pain to deal with and it's really not easy to prevent deer from eating hostas because they're sneakier than you think. Your best defense is staying proactive and making it as difficult for critters to get at your hosta plants.
Baking soda is a garden hack for keeping slugs away that you can try. Spreading a layer of sharp sand around the base or creating a barrier with copper tape are two other tricks to test drive. Some people advise sprinkling salt to deter slugs, but this could do more damage to your soil than you think. Deer and rabbits are tricky; there are some natural methods to keep deer out of your yard but none of them are 100% effective because hungry animals are, well, hungry. If you know you have deer or rabbits around, unfortunately, your best bet is to just skip hostas altogether (we know; we're sorry, too), or plant them in an area that has a tall and impenetrable enough fence or other enclosure that will keep wildlife out. Hostas can also be grown as big-leafed houseplants to add drama to your home, so consider cultivating them as an indoor plant if deer and rabbit pressure is ultra-high in your area.
Burying the crown too deeply
Many people think hostas are a plant-it-and-forget-it kinda species — and while that's somewhat true, you need to start them off the right way by planting them at the correct depth. If you don't pay attention to the depth of the planting site, you risk burying the crown too deeply. When the crown is too deep, its tissues can rot under the moist soil, leaving the plant vulnerable to pests and disease, eventually killing it off completely.
So, what's the best planting depth for your hosta? Each hosta is a little different but a good rule of thumb is to plant at a depth so that the crown is level with the top of the soil. You'll want it to be exposed just a little, so keep mulch and excess soil out of the crown's way, too.
Giving it way too much mulch
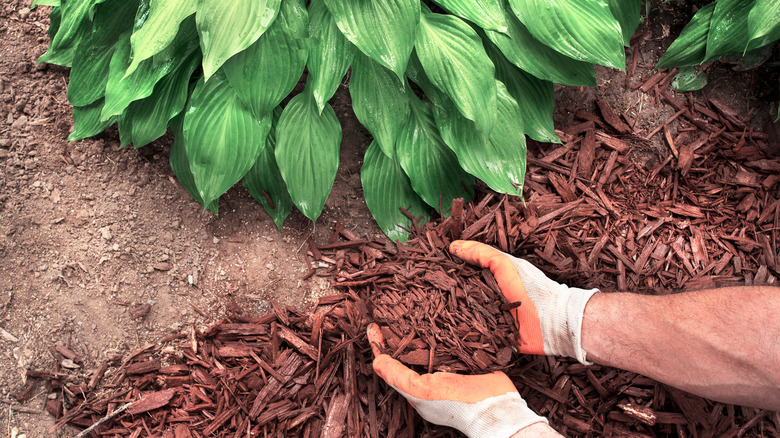
While hostas look amazing in mulched beds and can benefit from having mulch around, too much of a good thing can end up hurting your plants. All of that sun protection and moisture retention mulch gives can be a haven for slugs and even voles. Voles in particular are big fans of an overabundance of mulch because it gives them a loose material they can burrow through and make little hidey holes that let them sneak around your yard, wreaking havoc and eating the crowns and roots of your beautiful hostas. Slugs are deemed hosta enemy number one, so anything you can do to make your yard less inviting and help keep after-hours feasting on your hostas to a minimum is worth considering.
To get all of the pros of mulch without the cons, don't add more than 3 inches' worth around your plants. Remember to keep the mulch off of the crown, too, so that it doesn't develop crown rot. The type of mulch you use doesn't particularly matter, though shredded leaves are more habitable for slugs, so you may want to avoid using that if you're in a neighborhood that's prone to slug infestations.
Planting them near trees with shallow roots
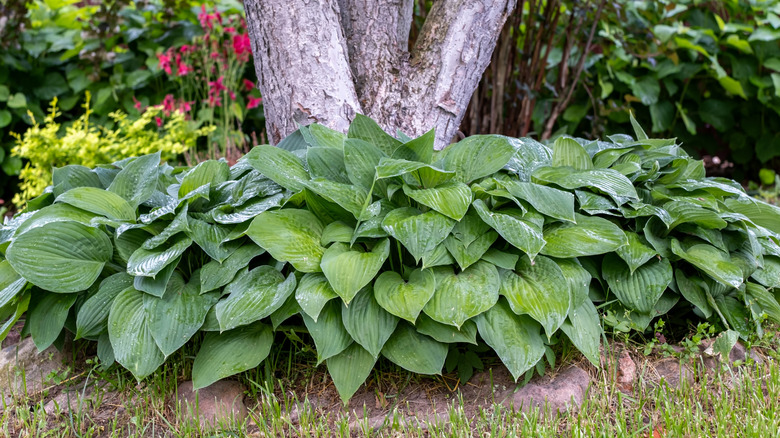
Many people love to plant hostas under their trees because they're so good at flourishing in the canopy's shade. But not every tree is a good hosta companion, especially if they have shallow roots. The hostas can competes with the tree's roots for nutrients, leaving both plants slightly stressed. Like humans, the more stress they have to deal with, the more vulnerable they become to illness or injury.
Maples, willows, sycamores, and certain types of ash are known for shallow roots, so you may need to reconsider your planting strategy. If you haven't yet begun planting and want to pair your hosta with a tree, stick to trees that grow deep taproots, like oaks, beech, and hickory species. On the other hand, if you've already got a shallow-rooted tree, stick to shade-loving plants that also have shallow roots and won't compete as much with your tree, like Christmas fern (Polystichum acrostichoides), maidenhair fern (Adiantum), or coral bells (Heuchera). Finally, if you're looking at a tree in your garden and wondering if it's a good one to plant hostas underneath — examine the area. Do the other plants there look happy? If nothing wants to grow there (not even weeds), then your hostas probably won't either.
Never dividing that massive clump of hosta
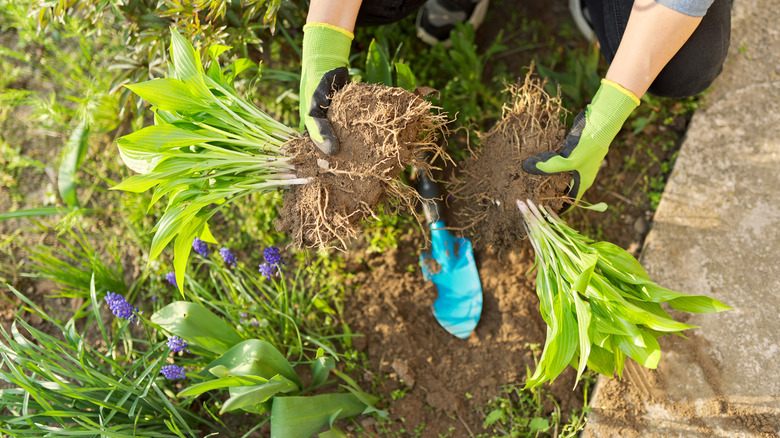
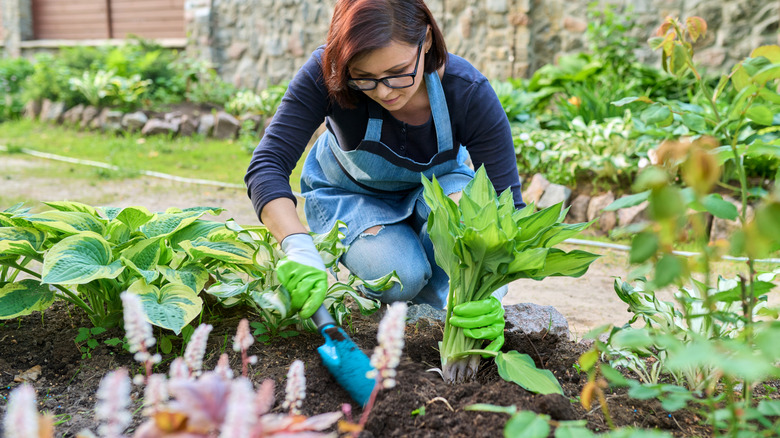
We love the look of a big, bushy hosta, but they may eventually need a little more breathing room. You may have even taken steps to ensure a mass planting has enough room between the individual specimens, but this problem is more about a hosta overcrowding itself more than its neighbors. While hostas can happily grow into a large clump and remain that way for years, at a certain point you might find that it's become a little less vigorous, develops a bit of a bare center, or even starts to look patchy.
Luckily, dividing doesn't have to happen often, maybe every four or five years. If your hosta plant starts to look uncomfortably massive or a bit patchy and sad, then it's probably time for some division. Plus, doing it before they become absolute giants can make the task a little easier. Not only will you give your mature hostas space to spread out, but you've now got free bonus plants, too; it's a win-win! Wait until the fall, though, so that they have time to settle in before their next growing season. The easiest way to divide a planted hosta is to either dig up the clump and then divide the root ball into smaller clumps that have a few crowns each, or spade off clumps from the edge. In our experience, you may tend to lose a few leaves, but it's just the cost of doing divisions and it won't affect the health of your old or new hostas. If it's really big, you may be able to get more than one division, but know that the more divisions you make, the harder it will be for the original plant to recover.
Not pruning it back before winter

Leaving your hosta alone before the first frost can set your plant up for failure. If you let it sit through winter with a bunch of dead, damp leaves, you're giving slugs a great spot to incubate their eggs, and slug babies will get hungry come spring. Plus, the fewer damaged leaves your hosta has to support, the more it can focus on fortifying healthy parts right before its long winter's nap.
Pruning should happen right around the first frost for your area, right before laying down a winter's ration of mulch. Use sharp pruning shears so that you don't shred the leaves, and clip off any dead or damaged foliage. Make sure you don't leave it on the ground as slugs will find it faster than you think. If the foliage died off for normal reasons, like sun damage or age, then you can add it to your compost heap. But, if you're clipping off foliage that's damaged due to bacterial or fungal infections, like we mentioned earlier, it's better to put it in the trash instead so that nothing icky spreads to your compost.
Giving it too much fertilizer, especially nitrogen
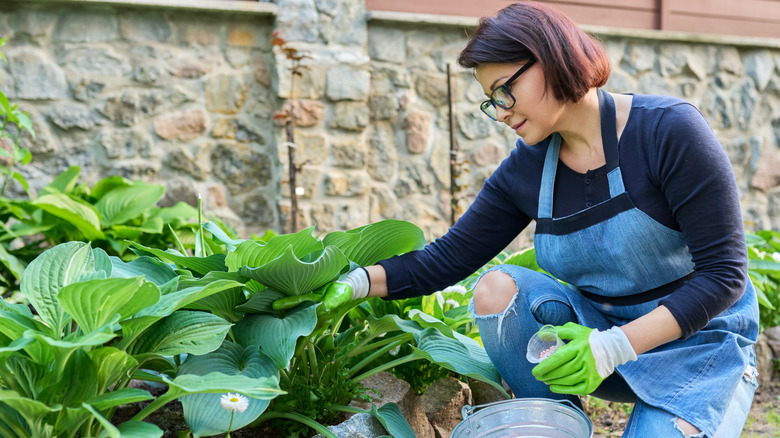
Everyone wants to give their plants the best start possible, so you may toss your hostas some fertilizer every now and then. But if you're not careful with the amount or type, you could be setting your hosta up for failure. Excessive quantities of fertilizer, particularly nitrogen-rich blends, can overload hostas' systems. The result is probably the opposite of what you were going for — limp, weak leaves that are susceptible to fungal or foliar diseases.
If your soil is light on nutrients and you want to give your hostas a little plant food, stick to slow-release fertilizers. A balanced 10-10-10 blend, like Gardenwise's All-Purpose Slow Release Granular Fertilizer is a great option because it's less intense than a 20-20-20 blend and slowly pushes out macronutrients your plants need throughout the growing season. Apply your fertilizer in the spring, right before the hosta kicks off its new growth, and don't go crazy. For a 125 square foot garden bed, you need no more than one-eighth of a pound, evenly spread.