DIY Your Own Mushroom Decor With This Adorable Craft
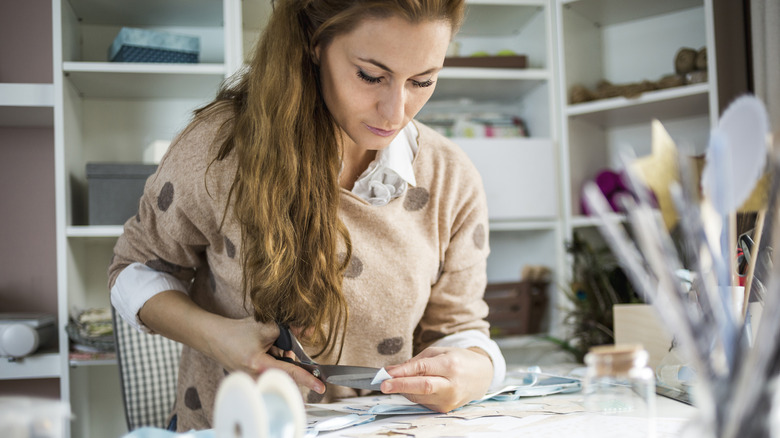
If you're looking to transform your space for fall, there's no better place to start than with a simple, affordable DIY. Indeed, it's easy to create fall decor on a budget with a few basic supplies and some imagination. One particularly fun project is turning everyday construction paper into an Instagrammable honeycomb mushroom. While pre-made pieces can sell for as much as $20 a pack or more, crafting your own will only cost a couple of dollars and require just three items: paper, scissors, and glue.
Start with about 16 sheets of brown craft paper. You can use other types of paper as well or adjust the number of sheets slightly to get the look you want. Fold each sheet in half vertically to create long and thin rectangles. Trace the outline of half a mushroom on one of the sheets, and cut it out. When drawing the shape, make sure it covers as much of the surface area as possible, as this will give the final DIY optimal sturdiness.
Now, use the cut-out as a stencil to trim the remaining 15 pieces of paper, creating a stack of identical mushrooms. At this point, you can get creative with color, painting your mushrooms white and red, adding black polka dots, or choosing a palette that best matches your aesthetic. Alternatively, you can work with the mushrooms just as they are to create a sophisticated, single-tone result that almost looks like it's made out of wood.
Crafting adorable mushrooms with just three supplies
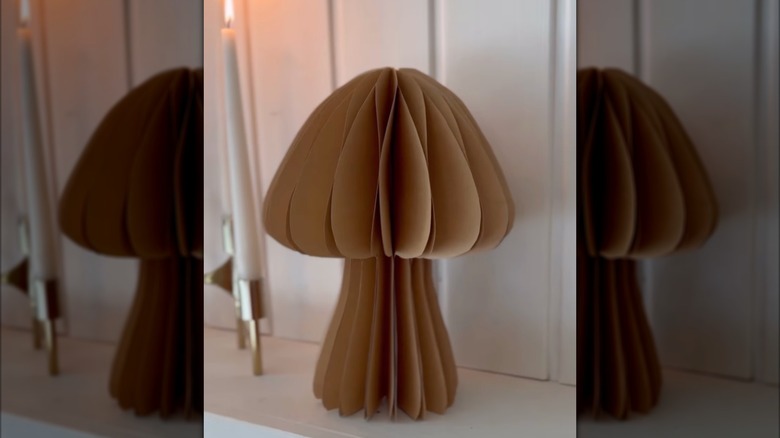
Once all 16 mushrooms are cut and decorated, refold them down the middle, and glue them shut with a handy glue roller. Run a single strip of glue horizontally across the middle of each mushroom's bulb, press down, and let dry, then stack all of the half-mushrooms on top of one another. As you do so, glue the various layers together by applying a strip of glue across the top of the bulb and another across the top of the stem. The location of the glue application is important for getting the honeycomb effect. Once finished, lift up your DIY, and gently part the individual layers until you've wholly opened up the shape, using two final strips of glue to fasten the walls of the outermost mushrooms together. You can make several mushrooms in different sizes and shapes for unique groupings.
You can keep the mushroom theme going by crafting an accompanying series of mini ornaments. We love to reuse basic toilet paper rolls to make cute DIYs, but in this case, toilet paper itself can make some adorable decor. Soak about 50 squares of toilet paper in warm water until they start coming apart, then squeeze out the water, add a third of a bottle of white Elmer's glue, and mix to achieve the consistency of a paste. Use this DIY mixture to shape mushroom tops and bottoms, and let them dry fully before gluing them together. Finally, use red and white paint or a mix of brown hues to decorate the mini mushrooms, gluing on fake moss for added effect. Place your creations in a basket full of moss next to your honeycomb mushroom, or use eye hooks to transform them into hanging ornaments.