Transform An Old Pan Into A Cute Home Storage Solution With A Fun DIY Upcycle
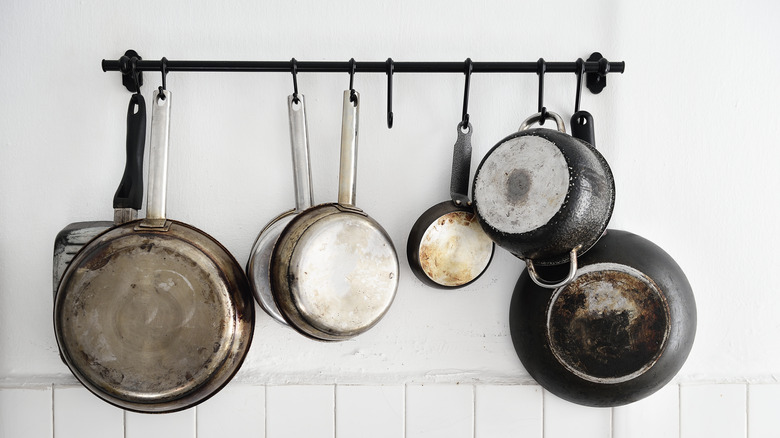
Scratches, dents, and strangely deformed bottoms are all fair reasons to ditch an old cooking pan. Once the replacement pan comes out of the box, trashing the old one is just not good form. You might be able to recycle it, but why not reuse it instead? There are scores of amazing ways to repurpose pots and pans to use in your house. A pan in nearly any form can become a storage container to harness tabletop clutter, rein in rolling fruits, or display bathroom essentials. A few rustic touches like a burlap lining, dried grapevine trim, and wooden feet will perfectly disguise the pan's culinary roots.
Start this project with a pan and a piece of burlap that's large enough to cover the interior of the pan. Add black paint, four large, round or square wooden beads or drawer knobs to serve as feet. Trim the edges with foraged grapevines if you can find them, or purchase a product like Kidlearn Natural Grapevine Twig Garland on Amazon. Grab sandpaper, protective gear, Mod Podge, and E6000 –an ideal glue for forming a strong bond between different materials.
If your pan has one long handle, remove it to make the container more versatile. Many handles can come off easily by removing a screw or two. However, if the pot has a handle on each side, keep them; they'll add portability to your upcycle. Cover the unsightly metal with a wrapping of jute twine, or give it a soft patina by using Rub N' Buff in a color that complements the other materials you've chosen.
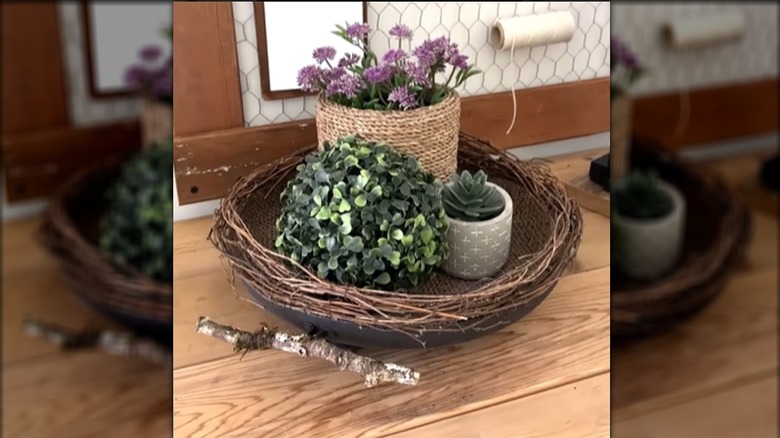
Pan-to-basket upcycle
Before painting and gluing, you'll want to wash the pan and treat the surfaces to a rub-down with sandpaper. If the pan is coated with a non-stick material, there are legitimate concerns that the substance is toxic. If sanding, set your pan on a piece of newspaper outside, wear a mask and goggles, and sweep any stray residue onto the newspaper to throw away when you're finished.
Cover the interior and sides of the pot in a few coats of black paint, or swap out the basic color for Rub N' Buff or another color of paint. Also, paint the wooden pieces that will serve as feet for the container. Once dry, coat the interior of the pan with Mod Podge, and smooth the burlap over the glue. Cut away the excess fabric. Salvage the scraps as part of your own DIY compost; they'll add valuable nutrients to your future soil. Glue the feet to the underside of the pan as well as the grapevine trim around the opening. Let the glue dry and cure for 24 hours before using the pan for storage.
If your pot has them, either cover the set of handles in jute twine or Rub N' Buff. Eliminating a handle most likely left you with holes on the side of the pan. These can be hidden with a faux-handle made from a bark-covered stick. Send a screw through the midsection of the stick and through one of the leftover holes. While the stick won't function as a true handle, it will add a touch of sylvan charm to your creation.