DIY A One-Of-A-Kind Twisty Wood Table To Instantly Upgrade Any Room

We may receive a commission on purchases made from links.
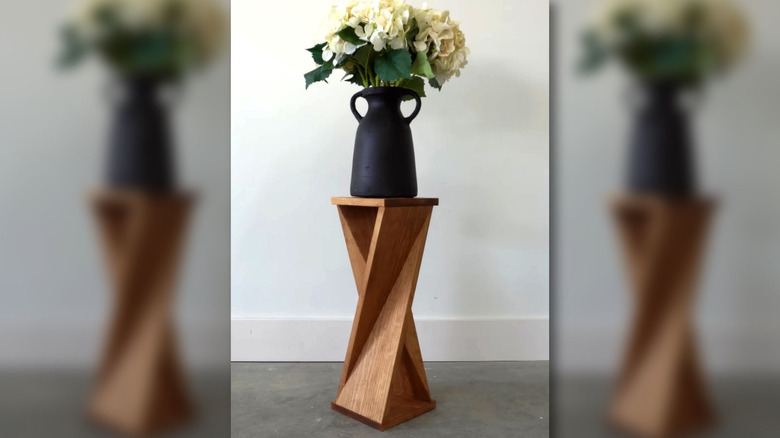
Some might argue you can never have too many side tables. You might, however, be tired of the traditional kind with four legs and a tabletop. If you're looking for something more modern, geometric, and bespoke, stop endlessly searching the web and the aisles of your local furniture store. You can make just such a side table at home. With the proper tools and a little carpentry know-how, you can build a twisty wood table out of a single 1-by-8-foot board and an hour of your time.
This piece is a geometric, modernist interpretation of the traditional side table. Turning the table changes how its flat faces reflect light and cast shadow, making it almost an optical illusion. Despite how intimidating this complex structure may appear at first glance, it is, in fact, an approachable woodworking project that even beginners can do. Keep firmly in mind this adage: measure twice and cut once. You will be dealing with angled cuts that, once made, can't be taken back. Luckily, even small mistakes can add to the table's charm, since you can easily adjust its size or style to suit your preferences.
Preparation and getting started
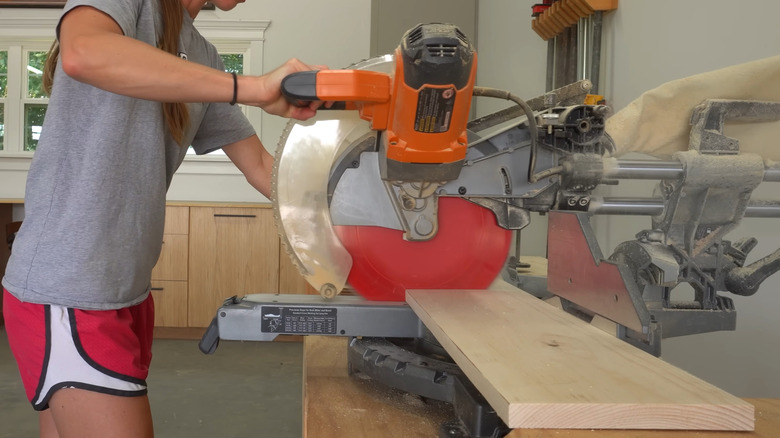
There's plenty of flexibility when it comes to measurements for this table. As a standard size, you can opt for a 1-by-8-foot board, but the width measurement can be changed if you want a wider or narrower table. This project does require large power tools like a circular saw and a table saw, but these are not as frightening as they may seem at first. Still, you should always follow proper woodworking safety precautions when working on a home project, so make sure you have safety goggles, earplugs, and a mask when using these tools.
To achieve the "twisted" effect, you'll need to make 45-degree angle cuts in your board. This can be done with either a handheld circular saw or a table saw. A circular saw is easier to handle and more space-friendly, but a table saw – with the help of a jig made from spare wood – provides more reliable, repeatable cuts. You will need pocket-hole screws for the jig, which you can make using a pocket-hole tool, like this Kreg KPHJ320 Pocket-Hole Jig available on Amazon.
Cutting and assembling your new table
Like with the table's width, the height is flexible. If there's a particular chair or sofa you'd like to place it next to, you can use that furniture's arm height as a guide for the height of your table. Using your circular or table saw, cut your 1-by-8-foot board diagonally, separating it into four triangular pieces that fit opposite each other at 45 degrees. Then, Sand all the pieces down with 150-grit sandpaper, moving up to 220-grit for a smooth surface. Before assembling, apply a thin layer of wood glue on the inner sides of the angled cut, then secure them with brad nails. Wipe away any excess wood glue that squeezes out and leave the two legs to dry.
Once everything is dry, cut off the ends of the two twisted legs with a circular saw so they sit flat against the boards that will form the table's top and bottom. Take the rest of your 1-by-8-foot board and determine how large you'd like the top and bottom to be, then cut out equal-sized squares. Sand those like you did the other pieces, and attach them using screws. For a seamless look, you can use dowels to join the legs to the top and bottom boards. Finish your table with a stunning wood stain and paint color combo, and you'll have a striking piece that complements any room.