12 Things To Know Before Pressure Washing A Concrete Driveway
We may receive a commission on purchases made from links.
Whether you're a pro with a pressure washer or you've never used one before, there are certain things you need to know before pressure washing a concrete driveway, specifically. While you can pressure wash other surfaces around your home's exterior (although sometimes you need to know when to soft wash instead of pressure wash), concrete is often an entirely different beast.
Because it's porous, there are certain precautions you have to take with concrete, especially if it's newer and hasn't cured all the way, or it's older and has too many cracks and chips. Concrete also needs to be resealed on occasion, which can impact the process of pressure washing. Sure, all the normal precautions to take when pressure washing your house apply, like wearing protective clothing and keeping kids and pets clear of your workspace. However, concrete needs more than just a quick spray-down due to its nature. You'll need some knowledge and a little bit of strategy. Making sure you read across these tips before work starts will give you results that last.
Test a small area before pressure washing the entire driveway
Just as with any new cleaning method, the best way to pressure wash your driveway is to start by doing a small section first. Testing things out allows for a few things to happen. First, you can make sure you can handle the machine without any issues. Pressure washers can kick back when first started, so testing gives you a feel for the force and distance needed, which is especially important if you're new to using one.
Next, you can also be sure the concrete reacts well to the pressure of the spray. If it doesn't, you can adjust the PSI so that it cleans to the level you would like. If your driveway is painted, you'll also know if the paint chips based on your current technique, before you destroy your entire driveway. Choose a low-traffic corner near the edge of the driveway for your test area. Start with a wider nozzle, which will have a lower PSI, and gradually choose narrower ones (or, on some models, narrowing the nozzle itself) until you find the pressure that lifts dirt without leaving streaks or scarring the surface.
Use the correct setting on the machine
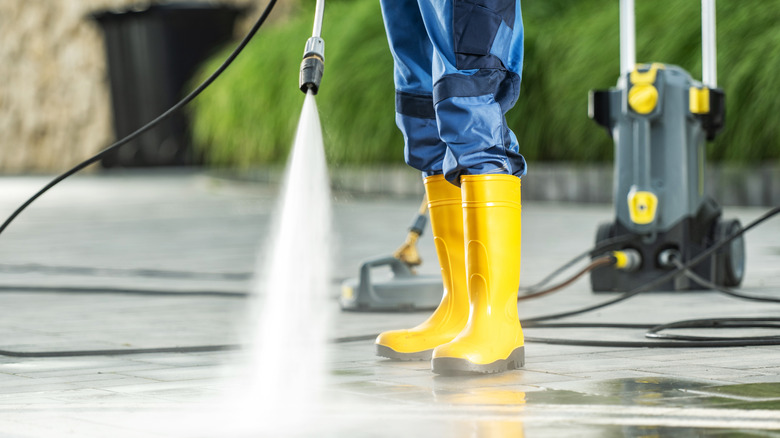
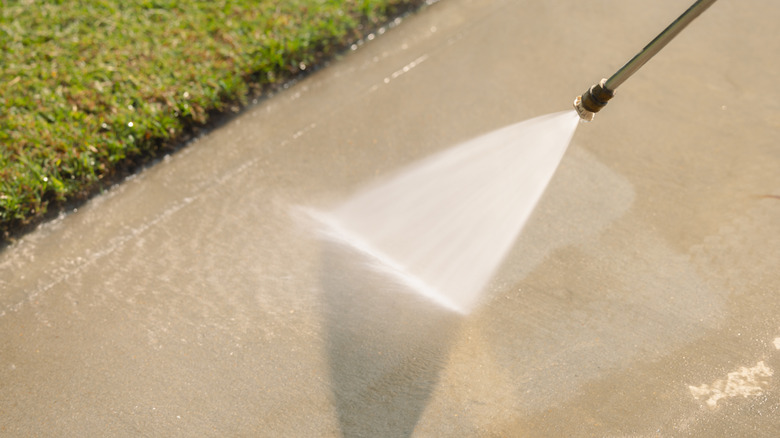
When it comes to pressure washing concrete, setting your machine to the right PSI (pounds per square inch) is key to getting great results without damaging the surface. Most commercial pressure washers range between 2,000 and 3,000 PSI. The higher the PSI, the stronger the spray; however, stronger isn't always better! Too much pressure can etch or pit the concrete, leaving permanent marks.
Start on the lower end (around 2,000 PSI) and, as mentioned, test a small area first. If it's not lifting dirt or stains effectively, slowly increase the pressure until you find that sweet spot — usually somewhere in the 2,500 to 2,800 range for most driveways. Use a mid-range nozzle tip (25 degrees) for an even clean without streaks. Typically, wands come in different colors depending on their uses. In many cases, the best tip for concrete driveways is the green one. Then, while you're spraying, keep the wand about a foot from the surface. Remember, steady movement is key. Don't linger too long in one spot, or you risk uneven cleaning and visible lines.
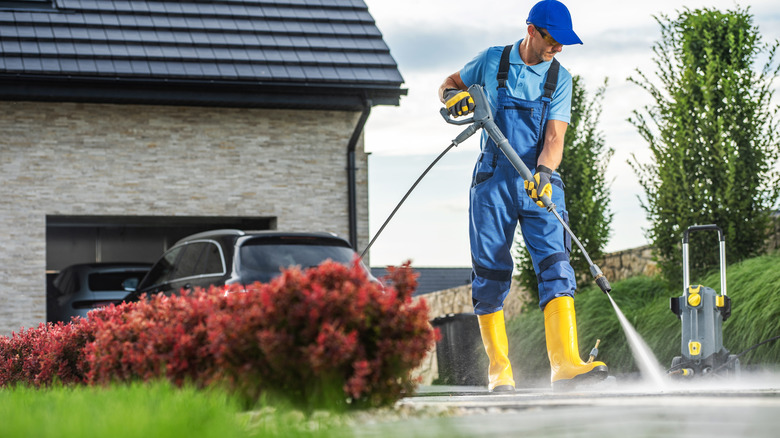
Wear protective clothing when pressure washing
One of the mistakes everyone makes when pressure washing is forgetting to wear the correct PPE. It's important to wear protective clothing when using a pressure washer to avoid major injury. First, always wear closed-toed shoes. It's even better if they have rubber soles, as they typically have better traction on wet surfaces and can provide a bit of grounding, too. Slipping while holding the powerful jet stream can leave you vulnerable to injury. Next, chuck on some eye protection like the NoCry Clear Safety Glasses. Wearing these makes sure that dust and larger debris, like small rocks, don't irritate your eyes while you're working.
Experts also recommend wearing long pants and a raincoat (something like the FROGG TOGGS Men's Ultra-Lite2 2-Layer Waterproof Breathable Rain Suit) because even though you're cleaning the driveway, the mist coming off the pressure stream often means you're going to get pretty wet, although this is just a matter of comfort. For safety, however, wearing long pants and long sleeves in another material is a non-negotiable, as if there should be an accident and you come into contact with the water — the more layers between you and it, the less damage it can do.
Make sure pets and kids are out of the area
Pressure washing your driveway works so well because of the high intensity of the spray. This same spray can also cause serious injury if it's used on something it's not intended for. To keep everyone in your family safe, make sure pets and kids are out of the area before you start work. By doing this, you won't be startled by someone you didn't know was in the work area, causing you to lose control of the appliance's spray.
Small children and pets also can't understand that the water is dangerous, so they might attempt to interact with it like a regular hose, or take the nozzle from you — both things that can cause serious harm to both them and you. Remember, never point the nozzle at a person or pet, even as a joke, or allow a child to operate the machine. They could easily lose control of the powerful jet spray, causing great harm to both you and your property.
Know the age of your concrete before you start work
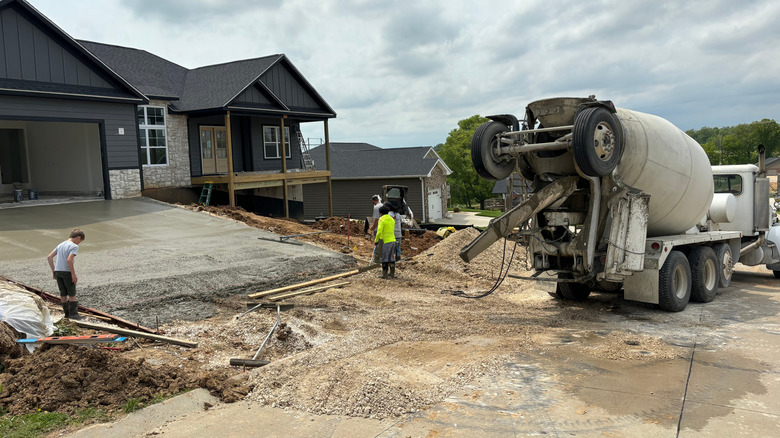
If you have recently resurfaced your driveway, or even just patched up a few cracks, and are eager to pressure wash away the rest of the blemishes, you need to wait in order to be successful! This is because newly-poured concrete driveways need at least thirty full days to totally cure before you can pressure wash them. During the curing process, the cement on your new driveway continues to hydrate. It's a chemical reaction between water and cement that forms strong, durable bonds.
Proper curing prevents the surface from drying out too quickly later on, which helps reduce cracking in the future and makes the concrete last longer overall. Blasting your driveway with a high-power stream during this vulnerable process will undo all of your hard work! Even after the waiting period, experts recommend using a lower PSI the first time you pressure wash — just in case. On the other end of the spectrum, older or cracked concrete driveways also may need lower pressure to avoid worsening damage as the material is compromised. In either case, knowing the general age and condition of your concrete before you begin the chore can save you from accidentally making more work for yourself.
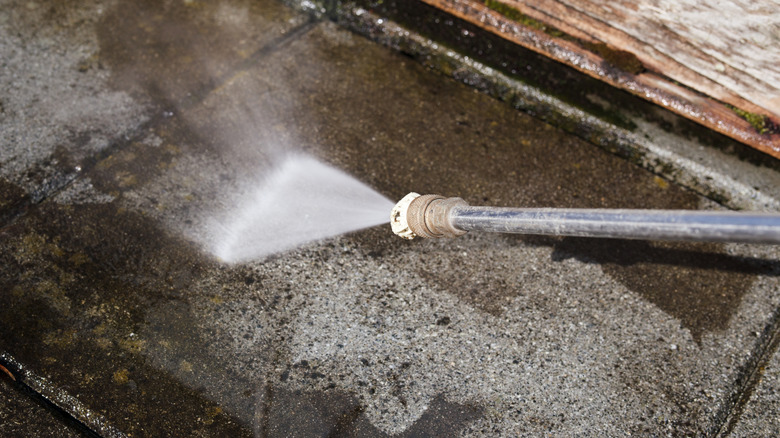
Sweep your concrete and clear the driveway of all debris
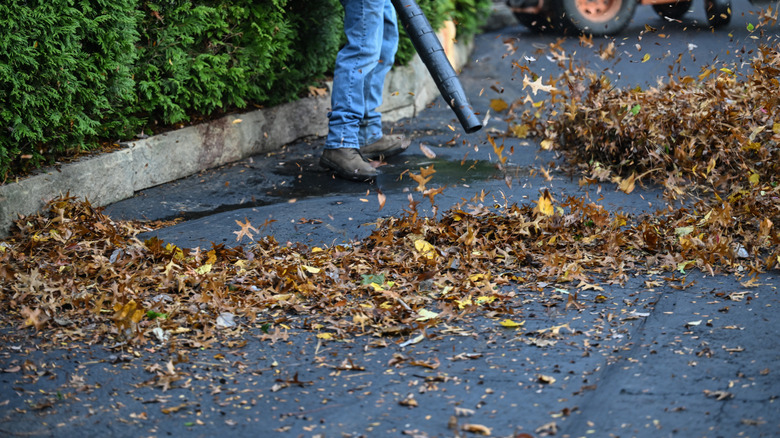
Before you pressure wash your concrete driveway to get the deeper stains out, you need to pre-clean it! Think of this as your prep stage, kind of like sanding before painting. The cleaner the surface is to start, the more evenly your pressure washing will lift stains and reveal the true color of your concrete. Plus, by sweeping your driveway prior to beginning work, you'll remove things like small stones, little sticks, and even bits of mulch or forgotten bits of metal, like screws or bolts. Getting these out of the way is important because when they are hit by the high-pressure stream of water, they can ricochet dangerously. This can injure you, or ruin something nearby — like denting your car or cracking a window on your house.
If you don't feel like sweeping or have a larger driveway that would make this chore take too long, you can also use a leafblower as a bit of a time-saving hack. Blowing all the debris off your patio and down your driveway into the street (or into a pile to bag up for trash pick up!) accomplishes the same goal without all the strain.
Pre-treating concrete can help get tough stains out
Just like with any other type of stain, pre-treating the grime on your concrete driveway before pressure washing it is a great way to see good results. For oil stains, degreaser works the best. First, cover the section of concrete in hot water, which will help to lift the oil off of it, since oil and water don't mix. Then, you can use a degreaser like CHOMP! Concrete Oil Stain Remover, which will emulsify the oil. This means it breaks the oil down into tiny droplets that can mix with water and be rinsed away instead of soaking deeper into the concrete. When it's time for pressure washing, you'll seemingly blast the stains away.
If you are dealing with rust stains, experts recommend using acidic cleaners. If you want to go the DIY route, lemon juice and vinegar are both acidic. However, if you need something more industrial, look for cleaners that have oxalic acid or trisodium phosphate in them, like MAXTITE Oxalic Acid. However, test these on a small portion of the concrete to see how they react before using them everywhere. When using industrial cleaners like this, you should also always wear gloves to protect your hands from injury. You might have heard you can just use bleach in instances like this. And while you technically can, it's not the best choice because it's pretty corrosive and can strip off concrete sealant.
Use a surface cleaning attachment to easily cover more area
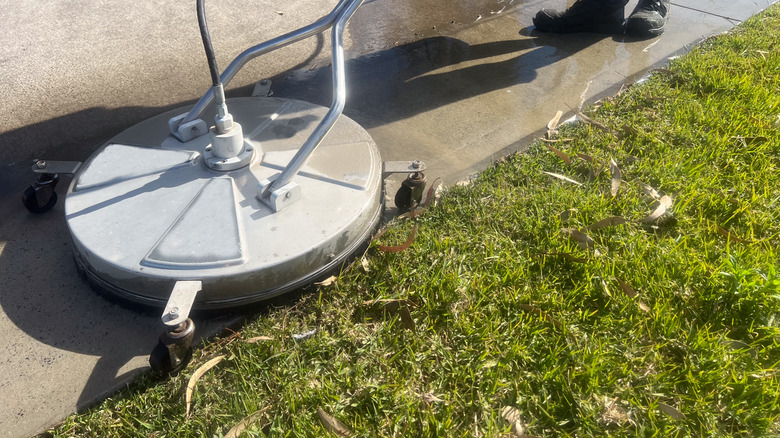
If you're tackling a large driveway, a surface cleaner attachment can be a game-changer to help you cover more area, faster. These round tools connect directly to your pressure washer wand and use rotating nozzles underneath a protective housing to clean wide sections of concrete quickly. Unlike a single nozzle, which can leave visible streaks or uneven patches, a surface cleaner maintains a consistent distance and pressure. Using one can also cut your cleaning time in half while reducing fatigue, since you won't have to constantly sweep the wand back and forth. If you are renting tools from Lowe's or another home improvement store, see if you can rent this attachment, too. Surface cleaners easily attach to existing pressure washers, so if you already own a machine, consider something like the Hourleey 14" Pressure Washer Surface Cleaner to add to yours.
For best results, choose a surface cleaner that matches your washer's PSI and GPM rating, and move it slowly and steadily, overlapping each pass slightly. Avoid pressing down with a heavy hand. Instead, let the spinning jets do most of the work. Once you've finished, you can use a regular nozzle to rinse the edges of your driveway and any tight corners the attachment couldn't reach.
Use caution around expansion joints, especially if they are caulked
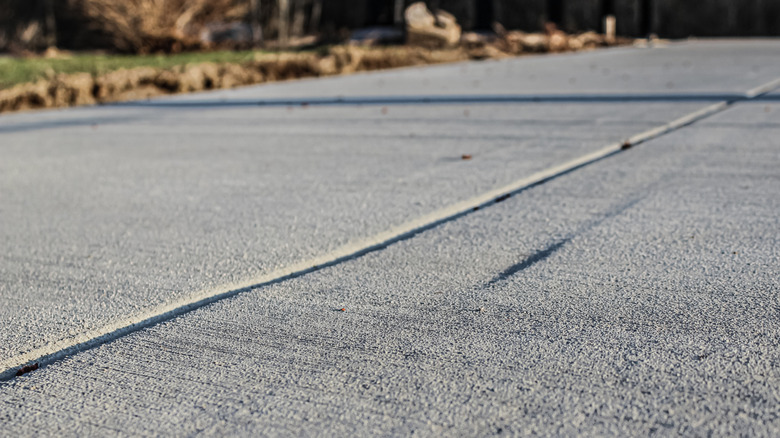
Expansion joints are those narrow gaps you see running across the sections of your driveway. They are what allow the concrete to expand and contract with temperature changes, so it doesn't crack. Many are filled with flexible caulk to keep things like sticks and stones out, but that material can be easily damaged if you're not careful when pressure washing. A strong spray can blast the caulk right out of the joint, or push lodged debris even deeper into the crevice, leaving your driveway exposed to water infiltration that can cause cracking or shifting later.
When cleaning near these joints, switch to a lower-pressure setting or a wider spray nozzle. Keep the wand at least a foot away from the caulked line and use smooth, sweeping motions rather than direct, concentrated passes. For stubborn dirt or weeds that collect in the joints, use a soft brush or plastic scraper, like the Zenith by Danco Crack and Crevice Cleaner, instead of trying to blast them out with water pressure. If you notice old or cracked caulk during cleaning, plan to reapply a new layer once the surface is completely dry, like SIKA Sikaflex Self-Leveling Sealant.
If you've made a crack worse, take the time to repair it
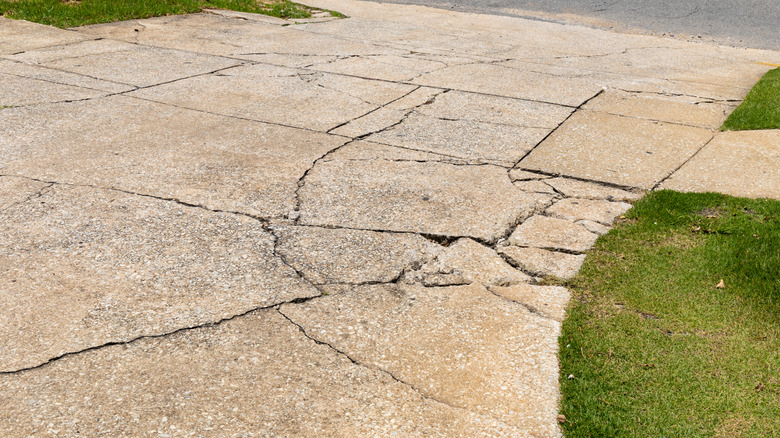
Pressure washing can sometimes expose small cracks that were already forming in your concrete driveway. However, it's actually one of the essential tasks that can help prevent a driveway from cracking, as an ounce of prevention is worth a pound of cure. However, if they already exist, don't ignore them because even hairline cracks can allow water to seep in, leading to freeze-thaw damage or crumbling edges over time. Before you reseal the entire surface, take a few minutes to patch those problem spots properly.
Start by cleaning out the crack thoroughly. Use a stiff brush or compressed air to remove loose debris and dirt, then rinse and let it dry completely. For smaller cracks, use a ready-mix concrete patch or a polyurethane concrete crack filler, like SIKA Sikaflex Crack Flex Sealant, squeezing it in with a caulking gun and smoothing it out with a putty knife. For larger gaps, you may need to use a concrete repair mix or patching compound. Allow the repair to cure fully before applying the sealer. This typically takes 24 hours, depending on the product. This simple repair step locks out water and will extend your driveway's lifespan, making all the work you did pressure washing worth it.
Use low-pressure washers with an adjustable nozzle for painted driveways
If your concrete driveway is painted, pressure washing requires a gentler touch. High pressure can easily strip away the paint, leaving behind patchy, uneven sections that would double your efforts, as you have to repaint them later on. To preserve your painted finish, use a pressure washer with an adjustable PSI setting or a low-pressure electric model designed for delicate surfaces. Start around 1,200–1,500 PSI and use a wide-angle nozzle (40 or even 65 degrees) to diffuse the spray. Always test a smaller, more hidden section first to see how the paint reacts before moving to more visible areas. Keep the nozzle at least 12 to 18 inches from the surface, and move in smooth, consistent strokes rather than focusing on one spot for too long, so you don't blast the paint off.
If you encounter stubborn dirt or mildew, apply a gentle detergent and let it sit for a few minutes before rinsing, as this reduces the need for high pressure. You might, however, still need to use a little elbow grease and a brush with stiff bristles. Of course, just like for sealed driveways, there is a possibility you might need to touch up paint after pressure washing due to damage.
Reseal your concrete after pressure washing for long-term protection
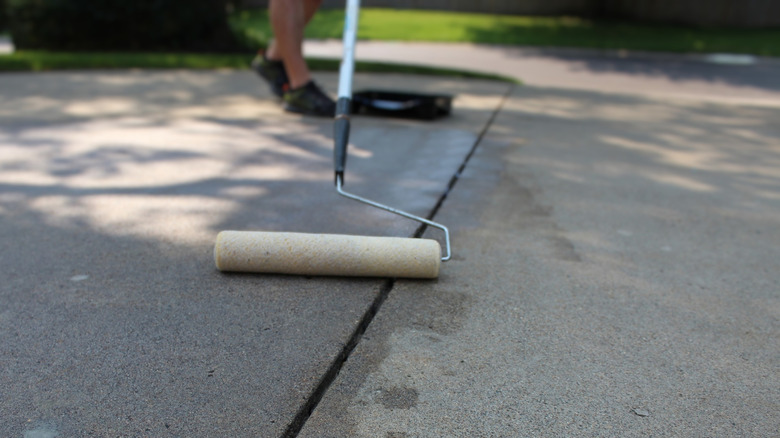
Once your driveway is pressure-washed and fully dry, take the extra step to reseal it! In fact, you should always pressure wash your driveway before sealing it. This way, it'll stay looking fresh for years instead of just a few weeks. Pressure washing opens the pores of the concrete, which makes it more vulnerable to stains, water absorption, and freeze-thaw damage. A good sealer closes those pores back up and creates a barrier that repels things like dirt, moisture, and motor oil.
Before applying the sealer, make sure the surface is completely dry because even small patches of moisture can trap water under the sealer and cause peeling later. Use a roller or pump sprayer for even coverage, and apply the sealant in thin, overlapping coats rather than one heavy layer. Most homeowners find that two coats offer the best balance between durability and appearance. Something like MasonryDefender Concrete Sealer for Driveways, which is clear and non-glossy, is often a preferred choice, as it won't change the color of your driveway. According to the manufacturer, one gallon covers 90 to 150 square feet. Typically, you'll need to reapply every two to three years, or after each time you pressure wash.