12 Time-Saving Hacks For Painting Your Home More Efficiently
We may receive a commission on purchases made from links.
Few projects can instill as much fear in a homeowner as a paintwork job can. While the actual painting itself can seem a daunting task, adding in the prep work and then the cleanup can make it a monumental one. While it's one of the most transformative DIY upgrades you can tackle, it's also one of the easiest to put off because of the prep, the mess, and the time it usually takes to get everything looking smooth and consistent.
However, an efficient paint job is absolutely possible with a few smart tricks that cut down on setup, application, and cleanup time without sacrificing the final result. It's all about using clever but simple ways to speed up each stage of the process. Many of these wall painting hacks for quick results (that still look amazing) rely on small tweaks — using more efficient tools, rethinking how you prep a room, or streamlining repetitive tasks that typically slow you down. Then, there are the clever products you'll find in most garden centers and hardware stores that have been specifically designed to make the entire event of painting simpler and faster. In this article, you'll find 12 time-saving hacks that make painting feel far more manageable, even if you're tackling multiple rooms or refreshing an entire home. From using pre-taped sheeting and disposable paint tray liners to an airless sprayer and the surprising use for a rubber band, here's everything you need to know.
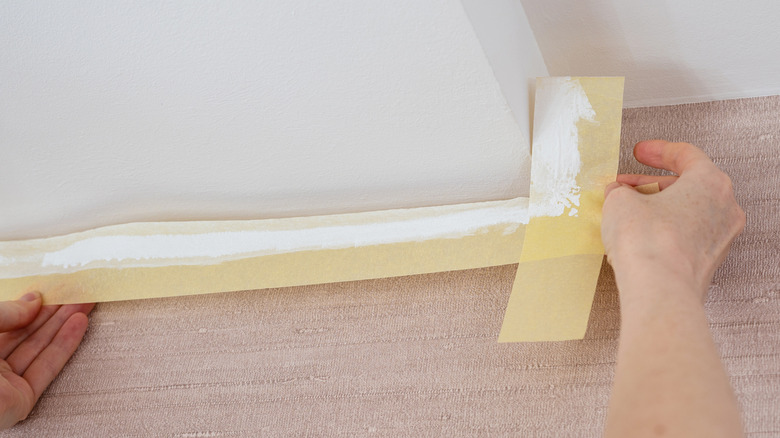
Use pre-taped plastic sheeting for quick masking

Prepping a room before painting can easily take longer than the painting itself, especially when you're trying to protect floors, trim, cabinets, or awkward surfaces. If you don't do this properly, you'll spend many hours trying to get dried paint off these surfaces. To speed up this important prep process, go for pre-taped plastic sheeting (like this Painters Plastic Sheeting from Tangibay). While the usual choice is separate rolls of tape and plastic, this product combines both so you can stick the tape where you need it and simply pull the attached sheet downward to cover large areas in seconds. It clings lightly to surfaces and drapes cleanly, which means fewer readjustments and far less frustration before you even open the paint tin.
One of the biggest advantages of this product is how much surface area you can protect at once. If you're using traditional masking, this most often involves laying drop cloths, cutting pieces of plastic to size, or having to reposition tape around tricky edges. If you use pre-taped sheeting, a single roll can cover everything from skirting boards to full door frames. It's especially handy for kitchens and bathrooms where you're working around appliances or built-ins. This product is also great for the cleanup. Instead of having to remove short pieces of masking from every nook and cranny, you simply peel the tape away and gather the plastic in one go. With it, you'll remove the dust, paint splatters, and debris all at once.
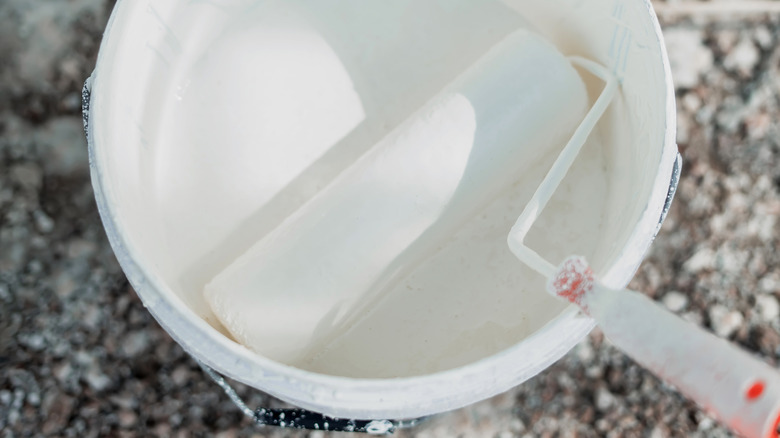
Use a paint tray with disposable liners for faster cleanup
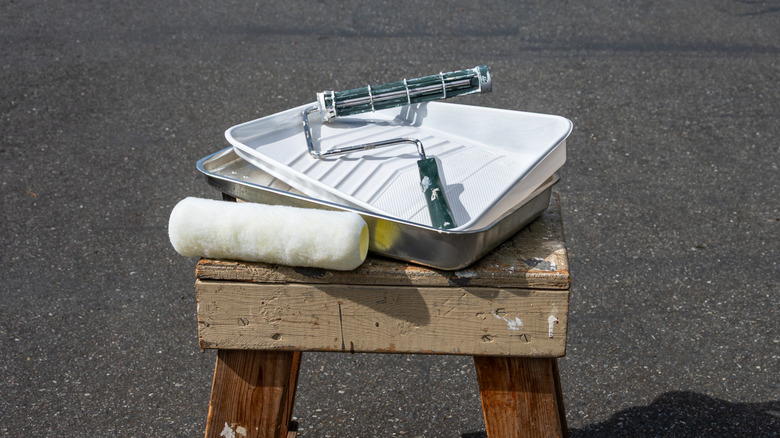
Staying with prep work, one simple method of how you prepare your paint tray can save you plenty of time at the end of the job. Once you're done painting, cleaning a paint tray is one of the least enjoyable parts of painting — and can be time-consuming if you've left the paint to dry. With a disposable paint tray liner, it's as simple as taking it off once you're done and throwing it in the bin.
It may be a simple addition to your prep, but you'll be surprised by how much time and effort you'll save. It's especially handy with multi-room projects where you may be coating different walls in different shades. For DIYers who prefer to keep things tidy as they go, it's a game-changing upgrade that's as simple as it is effective. Another benefit is that liners will reduce the chances of accidental color contamination as you move from one color to the next. With liners, you can prep a few in advance and swap them in seconds.
If you're painting on a budget, you don't only have to rely on store-bought options. If you look around your kitchen or in your garage, you'll find plenty of items that will get the job done just as well. For example, you could use heavy-duty aluminum foil as a DIY paint tray liner, an easy aluminum foil hack that makes painting so much easier. Alternatively, slip a plastic grocery bag right over the tray.
Line a paint bucket with a plastic bag and some tape
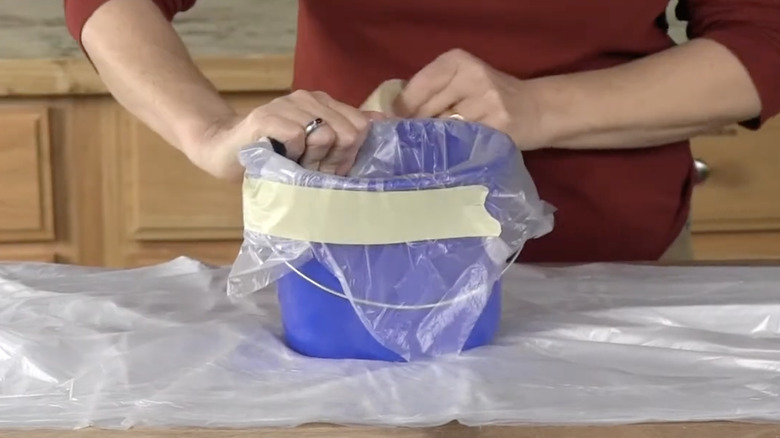
Do you prefer pouring paint into a separate bucket rather than working straight from the tin when doing brush work? You might want to use another bucket because you're working with a large one and don't want to lug it around, or you could be mixing two paints together in a separate bucket to get your ideal shade. Either way, lining the second bucket first is a great way to save both time and effort with the cleanup.
It's as simple as it sounds: Before adding paint to the other bucket, place a sturdy plastic bag inside, press it into the edges and up the sides, and secure it with a bit of tape around the rim. When you're done, there's no messy paint to wash out. If you're busy with a home painting project that involves waiting for paint coats to dry, you can simply tie the bag closed to avoid the paint drying out. It's another budget-friendly way to speed up painting your home and requires very little effort to do so.
Save time by not taping up everything
If you're one of those people that tapes up everything in your home to avoid painting mishaps, this is a tip for you. The prep work of a painting job is usually one of the most time-intensive parts of the project, especially when it comes to taping up areas of the room to protect them against spills and splashes, but it doesn't have to be. While tape is certainly important, you don't have to add it to every nook and cranny — it's all about choosing the right tools for the job.
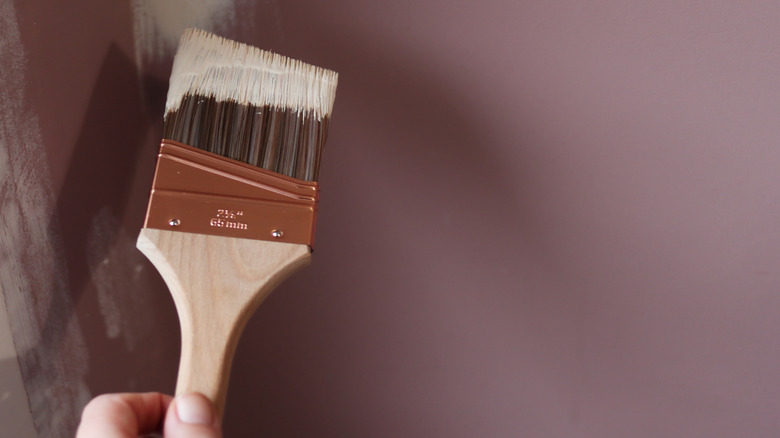
If you're looking for straight lines and to work in areas at risk of getting a lick of paint they don't need, find a high-quality angled brush. The right brush can be used to "cut in" freehand with surprising accuracy. It takes a light touch and a steady pace, but once you get the rhythm, you'll save a massive amount of prep time without sacrificing the finish. You can also try out products like liquid masking tape (such as the E-SDS Liquid Masking Film) on windows and glass panes in doors.
Use a paint and primer combo to keep paint coats to a minimum
If you're looking to limit the number of coats of paint you'll need to do on your home painting project, you can opt for a product that includes primer as well as paint. Primer is a key part of many a painting job, and if you choose not to first coat your walls with this product and go straight to your first coat, you're in for a lengthy DIY exercise.
Paint primer basically creates a smooth, adhesive base that helps paint stick better, covers imperfections, and improves the overall durability of the surface. So, when do you need a primer for painting over painted walls? If you're painting a light color over a dark surface, it's particularly effective in reducing the number of coats you'll need. The good news is that there are plenty of paint products out there that have primer built in.
Another major bonus is how forgiving these paints can be. Because the primer element improves adhesion, it reduces issues like streaking and patchiness, especially for people who don't consider themselves painting professionals. That makes the application smoother and faster, even if you're using rollers or brushes that aren't top of the range.
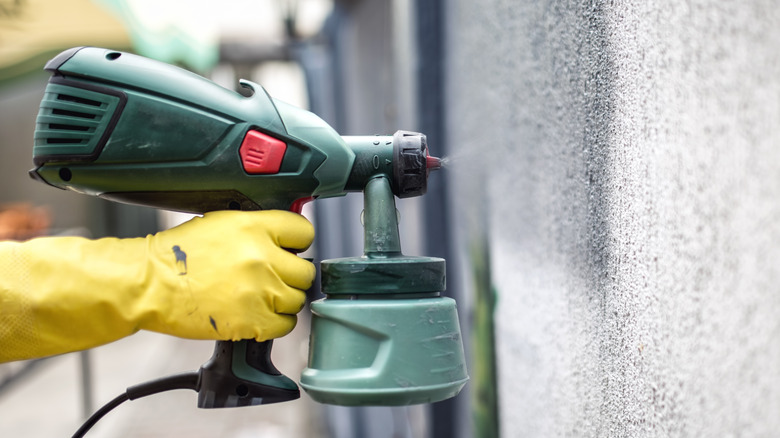
Use an airless sprayer
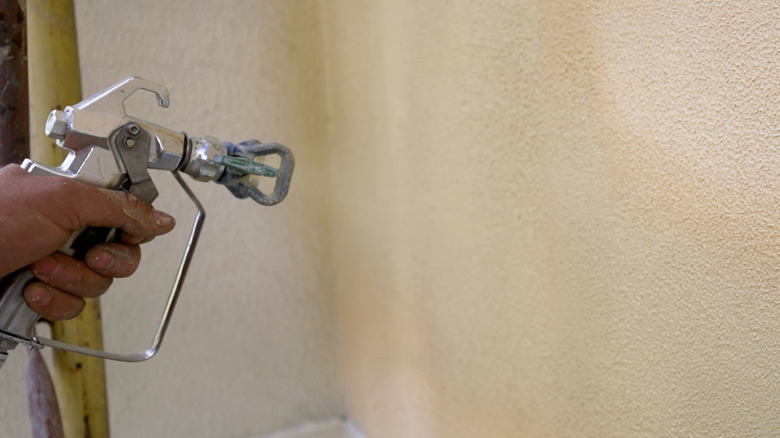
To seriously cut down on your prep time for a painting project, there is one tool that surpasses even the most efficient brushes on the market: an airless sprayer. With this handy painting tool, you'll make light work of painting projects, even if you're dealing with large, uninterrupted surfaces like exterior siding or big interior walls. With the sprayer pushing paint through a small tip at high pressure, coating the surface in a fine fan of paint, what would usually take a weekend can often be done in a day.
While there are many airless paint sprayers on the market, not everything is created equal. This is one of those times where you will get what you paid for, so it's best to invest in a tried and tested product. The Graco Magnum X5 Stand Airless Paint Sprayer is a solid pick, and has racked up glowing reviews. You don't have to empty your wallet on a new one, though — you can also rent one for the day or the weekend if painting is not a project you undertake often. Even if you are on the market for a new sprayer, you can rent one that you have your eye on to test how effective it is.
Use an 18-inch roller for twice the coverage
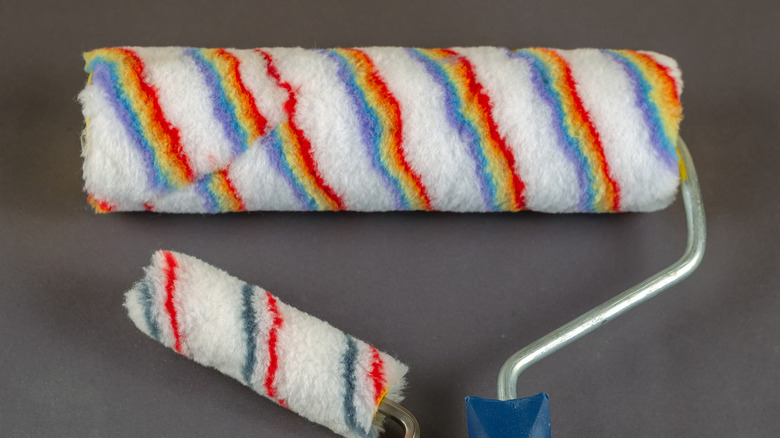
Another great way to speed up the painting process is to upgrade from a standard 9-inch roller to an 18-inch version, especially if you're dealing with large, flat walls and ceilings. The extra width means you can cover almost twice as much surface in a single pass, which can effectively cut rolling time in half on big, open surfaces. If you opt for a quality brush, you'll also find that it holds more paint than the standard size thanks to the wider sleeve, meaning less time reloading the roller as you move through the sections of the wall or roof.
Using a roller of this size does come with a bit of a learning curve if you haven't used one before. You'll find it's heavier and less nimble than a standard one, so it is best reserved for broad, unobstructed areas. Avoid using an 18-inch roller for tight corners, narrow hallways, or spaces around radiators and built-ins — it's better to go with the standard 9-inch roller or a small mini roller for these spaces. Which 18-inch paint roller should you go for, though? We recommend that you look out for a product with a heavy-duty frame, an adjustable yoke, and a sturdy extension pole.
Use ergonomic tools like extension poles
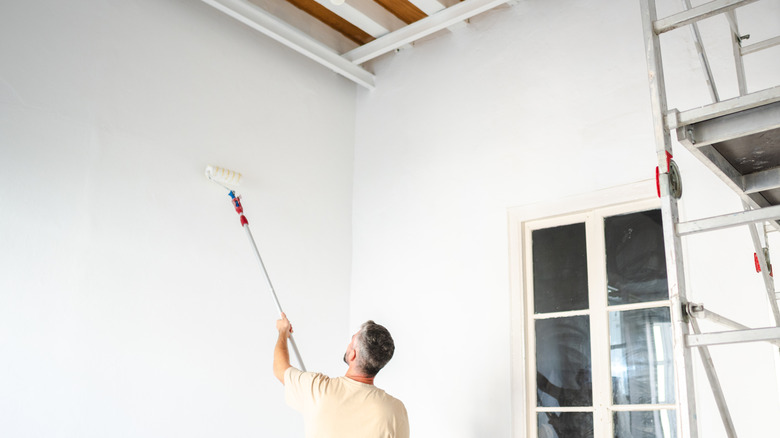
Going into a refurb project with insufficient tools is a recipe for a very long and tedious job. Using the wrong tools, or just not having the right ones, will very quickly work against you, making the entire process far longer than it needs to be. A key house painting mistake is relying on a ladder to reach the spots a short-handled roller can't or constantly swapping out short and long handles. This is where ergonomic painting tools come in handy, particularly extension poles. (Here are some must-have tools for a flawless home paint job.)
With an extension painting pole, you can stand comfortably on the floor and reach both high and low areas without the need to stand on your toes, constantly move a ladder from one area to the next, or swap out poles. This will help you with painting your home like a professional and save your back from the pain you'll get from constantly reaching or crouching. As you're able to extend or shorten the pole as needed, you'll ensure a smooth pass over the area you're painting, where you can get into a rhythm to make the job go faster.
When choosing an extension pole for painting, opt for a lightweight, telescoping product with a comfortable and non-slip grip. Beyond poles, a few other ergonomic upgrades can make a noticeable difference. Angled sash brushes with shaped handles, for example, give you better control when cutting in along ceilings and trim, so you can move more quickly without sacrificing neat lines.
Use a cut-in brush to speed up corners and trim
Cutting in, where you use a brush to paint straight, clean lines along edges, can be a time-consuming job if you don't have the right tools. While a standard brush will do the job just fine, it will be a lot more effort to get the edging and accuracy you are after than it would by using a small, angled brush that is designed for the job. This type of brush is known as a cut-in brush and is built for precision work, allowing you to move quickly while keeping a sharp line without needing to rely on masking tape or extensive cleanup.
To use the cut-in method to paint clean lines, load the brush with a moderate amount of paint and gently tap off any excess. Hold the brush at a slight angle and work in short, controlled strokes along edges, section by section. The angled bristles help with accuracy while covering more surface area in fewer strokes. For tricky corners or tight spaces, a firm, tapered tip gives you better control and prevents accidental drips onto walls or ceilings.
While this type of brush is great for tight edges, they are not foolproof. We recommend keeping a damp cloth or paper towel nearby if the brush does go over the line. When choosing a cut-in brush, it's best to go with a high-quality product. One with synthetic bristles is a good option, as they hold paint evenly, don't fray, and create smoother edges compared to cheaper brushes.
Use fans and/or airflow for faster drying time
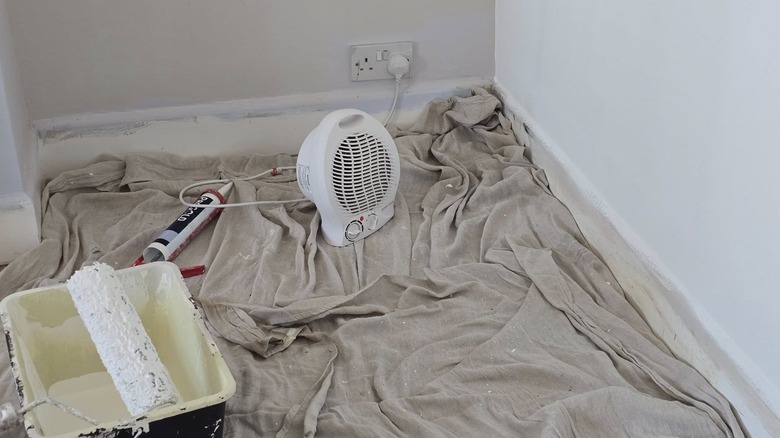
Sometimes the most time-intensive part of painting doesn't actually involve any work — it's waiting around for paint to dry. Even if you've worked with the tools and methods we've mentioned above, slow drying can add hours to the job. While the seasons do play a part, in that paint will naturally dry faster in warmer weather over the summer months and less so during the colder winter months, there is a workaround.
To speed up the paint drying process, one method doesn't involve tools of any kind. You simply need to rely on airflow by opening up all windows and doors and letting the air drift through the room to dry the paintwork. Another more effective way is to use any fans you may have in your home. Once you've finished the coat, place a standing fan in the room on the rotation setting if it has one, and the steady movement of air will help to lift moisture from the paint surface and encourage faster evaporation. If your room has a ceiling fan, that will work just as well.
The trick is to let air flow in from one side of the room and exit the other, where possible. You'll want to get a consistent flow moving through the space, rather than relying on a single cracked window. Just remember to keep your drop cloths secure and lightweight items weighed down, as a strong breeze can shift things around if you're not prepared.
Reduce paint tin cleanup time with punch holes and a rubber band
Cleaning up after painting is rarely anyone's favorite part of the job, but a couple of small, clever tweaks can make the entire process far less painful. A lot of the cleanup can come from what messes around the paint tin, especially if you're using it as the source of paint around the room and dipping the brush in and out of it. One of the simplest painting mess hacks is punching a few small holes around the inner rim of your paint tin. You can use a nail, screwdriver, or anything with a pointed end to create these holes before you start painting. Those tiny holes allow the paint to drip back inside the tin instead of pooling, which then ends up on the floor when you whack the lid back into place.
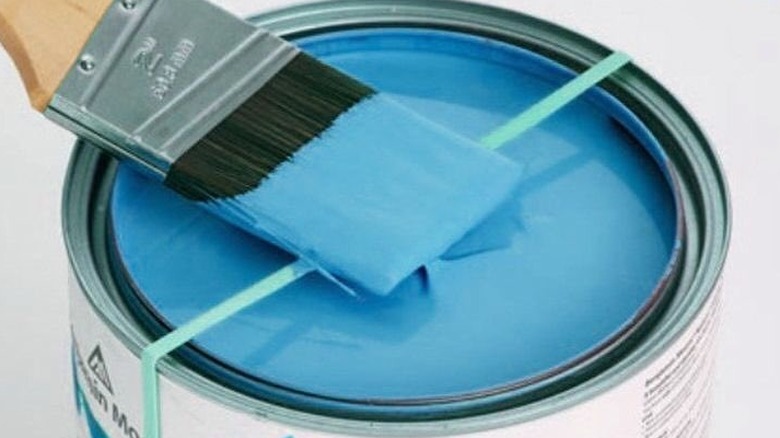
Another underrated painting trick, and one of the ways Joanna Gaines avoids a painting mess, is the rubber band method. Before dipping your brush, stretch a thick rubber band vertically around the tin so it runs across the open top. This gives you a built-in "wipe-off" point for your brush. Instead of dragging bristles along the metal rim — which usually leaves drips, splatters, and sticky edges — you can simply swipe the excess paint against the band. Both of these methods keep the tin clean, reduce waste, and stop those pesky ring marks from being left behind on your floors when you remove the tin. Both are very simple but effective home painting hacks.
Avoid washing brushes between coats with a zip-top bag
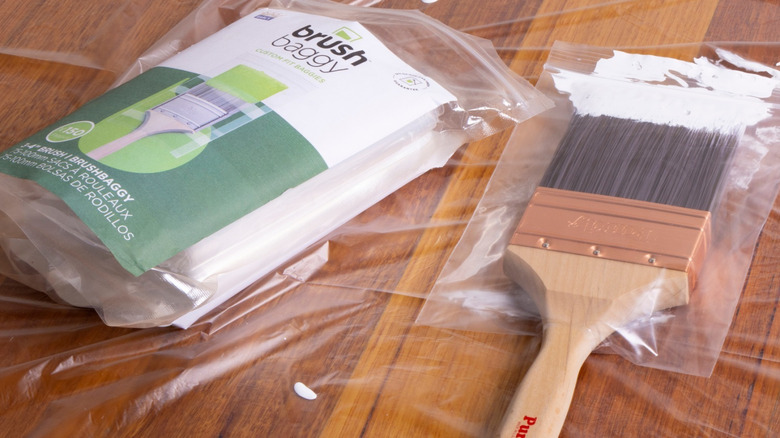
One of the most frustrating parts of painting your home is the constant stop-start between coats, especially when you're forced to wash brushes and rollers far more often than necessary. You could just leave the brushes between each coat, but the brush will start to create streaks as the paint dries and clumps the bristles together. A simple way to avoid having to wash your brushes as you wait for one coat to dry is to use a zip-top or plastic bag. Once you've finished with the coat, simply place the brush with the remaining paint on it in the bag and squeeze out as much air as you can before sealing it. When you open it again later, all the moisture in the brush and paint will still be there, meaning you'll be good to go with painting again.
There are specific bags designed to prevent paint drying out (like the aptly named Brush Baggy covers) as well that you can purchase online. If you're working with multiple colors or rooms, simply label the bags so you don't mix tools by mistake. It's cheap and will save you plenty of unnecessary cleanup time.