A DIYer Shares Their Solution For Shoe Storage On A Budget

We may receive a commission on purchases made from links.
Most shoe storage solutions involve buying and upgrading a piece of furniture or building something from scratch that requires you to have a workshop and a whole slew of tools. But if you're looking for budget-friendly shoe storage that you can make with recycled materials, then this DIY by Tik Tok user @hetalsartofficial is for you. Using some old pieces of cardboard and a little contact paper, you can create a rounded, multi-level shoe rack that will make your mudroom more organized than ever.
The biggest benefit of this shoe rack is that it can be made for next to no money if you have enough cardboard piled up in the recycle bin. You want the rack to be as sturdy as possible so aim for corrugated cardboard. In addition to the cardboard and contact paper, it will also be helpful to have a large woodworking compass to make perfect circles. You will also need scissors and a strong adhesive. With these simple supplies you can keep your footwear organized on a budget.
Assemble a cardboard shoe rack to keep your shoes organized
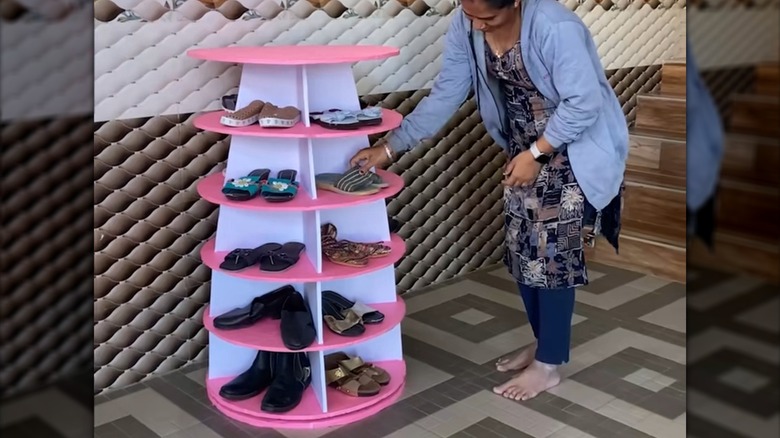
To assemble your new shoe rack, start by cutting out seven large circles of cardboard that are all the same size. The circles should have a diameter of roughly 26 inches. If you find it difficult to cut perfect circles even with the woodworking compass, there's no reason you can't do squares instead. Next, you'll need 10 smaller pieces of cardboard to go in between the circles, roughly 10 inches tall. You'll use two pieces of cardboard attached with a slot joint in between each level. In the original TikTok, @hetalsartofficial uses pieces that get smaller towards the top to create a sort of rocket-ship shape. However, you can keep it simple and use the same size all the way up.
For the base, glue a thin strip of extra cardboard around one of your eight circles, then glue a bottle cap in the middle of the cardboard, add marbles for weight, then glue another circle on top. This will give your shelf some added weight and stability. Then begin stacking and glue round pieces followed by the slot joint pieces until you reach the final circle. Finally, cover your structure in contact paper. This TANONE Wood Contact Paper or this Abyssaly Peel and Stick Black Wood Contact Paper are both great options if you want a natural wood look. Once covered, your new shelf is ready for organizing all of your shoes. Keep in mind, even with the contact paper, this cardboard shelf might not do well with moisture, so make sure your shoes are dried before you place them on the shelf.