The Smart Beadboard Hack That Makes Cutting Around Outlets So Much Easier
Paneled walls are a beloved decorative feature that upgrade the visual appeal of so many spaces. They refresh the interior with a crisp, irresistible design that typically covers the wall or part of it to provide balance and dimension. Like many wainscoting designs where you'll often find it, beadboard paneling is a classy wall option for clean lines, symmetry, and a bit of charming character. Precise measurements are a must to ensure the beadboard looks impeccable, though, which can be a challenge when adding it to a wall with multiple outlets. But the task is doable with the right planning and preparation. TikTok user @hanashappyhome, for instance, demonstrated a unique hack to properly mark the back of the beadboard with each outlet's location on the wall. This will provide ample space for the cover plates, making the cutting process easier so the outlets' function will not be obstructed or compromised.
All you'll need is a small amount of dark paint (use washable or water-based paints for easy cleanup), a roll of classic painter's tape, and a cutting tool like a jigsaw or multitool. Having a measuring tape or even a level nearby could be useful as well to make sure your proportions and positioning are correct. Remember that cutting through thick beadboard isn't as easy as cutting wallpaper to get the ideal fixture cutouts every time. Since panels are so large, imperfect measurements can be easy to notice and tricky to fix. And replacing beadboard carries an unnecessary and potentially high cost, so you won't want to let a full panel go to waste because of an oversight. While this hack helps eliminate most of the guesswork, you should still double-check your measurements and placement before cutting to confirm that they are accurate.
Outline the outlets for perfect spacing on your beadboard
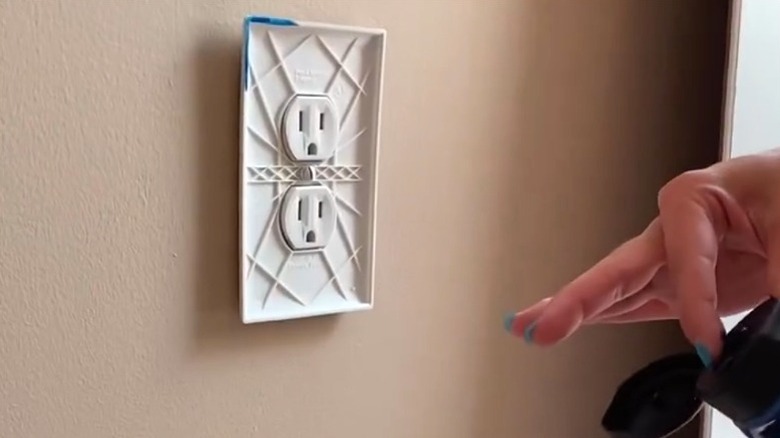
The DIY-friendly hack begins with removing the outlet covers with a small flathead screwdriver. Turn the cover plates backwards, and screw them back onto the receptacles. With the inside of the cover facing outward, apply a healthy layer of paint to the edges of the outlet cover (the paint can easily be washed off and removed later). Place the beadboard against the wall where you intend to install it, and press down firmly so the painted edges imprint onto the back of the panel. This will create an outline that perfectly illustrates where the outlets are located on the wall. But, since you want to only cut an opening to go around the outlet box (and not the cover plate that goes over it), draw a smaller rectangle about ½ inch inside the paint-marked outline (or, trace a spare electrical box if you have one handy). That way, you won't have any small gaps peaking out around the cover plate, even if your measurements are just a little off.
From there, simply cut out the shapes with your cutting tool of choice, and the beadboard will be specially retrofitted for your home. If using a jigsaw, equip it with a fine-tooth blade, and drill a starter hole (using a large bit) where you will insert the blade in the outlet box outline. Be careful with your measurements, cuts, and attachment to the wall, avoiding common beadboard installation mistakes to prevent damage or potential electrical hazards. Line the panel up with the wall so the outlets are fully and properly displayed through the cuts on the baseboard. If the entire outlet cover can be accessed through the updated beadboard without obstruction, you are ready to secure the panel to the wall.