14 Thrift Store Finds You Can Turn Into Features Birds Will Love
We may receive a commission on purchases made from links.
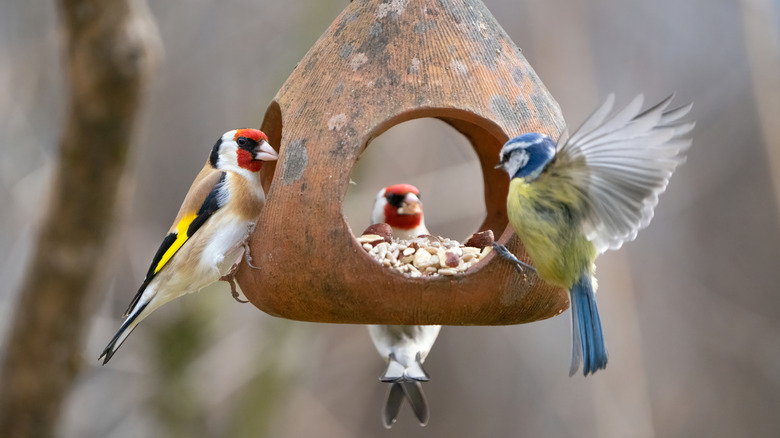
Buying everything you need to attract birds to your garden can quickly add up, especially if you're purchasing your feeders, baths, and other accessories brand new. Luckily, thrift stores are packed with affordable and often unique items that are easy to repurpose into attractive features birds will love.
While it's fun to observe feathered visitors, turning your backyard into a bird paradise serves a bigger purpose. Many species are facing habitat loss, so providing them with resources is more important than ever. Offering access to food, water, and shelter is one of the easiest (and most enjoyable) ways to support local bird populations, especially in suburban areas where birds have fewer places to feed and nest. Plus, choosing thrifted materials for DIY projects also keeps usable items out of landfills. You may be surprised at all the bird-friendly features you can create with secondhand items. The ideas below will help you get started.
Turn glassware into a beautiful pedestal-style birdbath
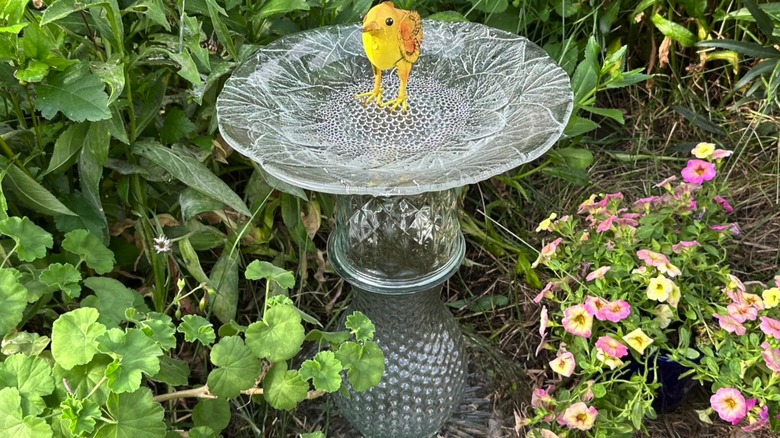
Thrift stores almost always have aisles lined with glassware in every shape, size, and color, making it easy to find pieces to DIY a decorative birdbath. Glass bowls or serving plates make perfect basins, while vases or large glass candle holders are great for adding stability and height for the base. You can mix and match different shades and patterns, or stick with a single color palette for a more intentional look. When doing it yourself, the color combinations are nearly endless.
Serving plates work especially well as a basin because their flattened edges give birds an easy place to perch. They're also shallow enough to keep the water at roughly the recommended 2-inch depth in the center. When choosing pieces for the base, aim to keep the combined height around 3 feet. Once you have your glassware, use a weatherproof glass adhesive to bond the vases together, then attach the bottom of the platter to the top vase. Add a stone or two to the center to give birds a perching spot where they can drink without submerging their bodies. Now all that's left is to fill it with water and wait for feathered friends to flock in.
Use a plant stand as the base for a DIY birdbath
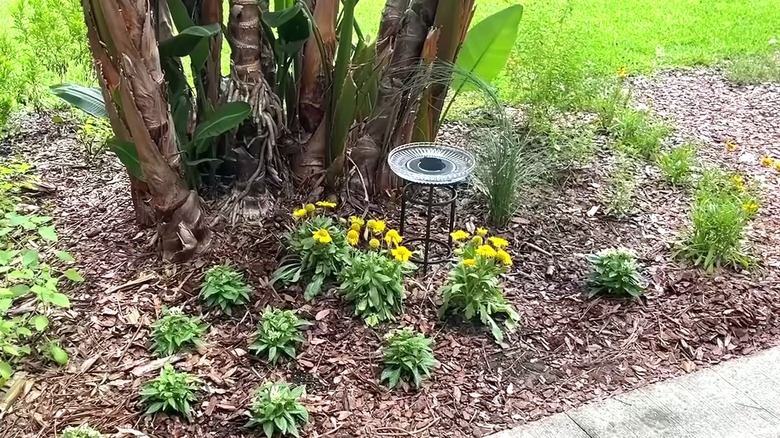
If you're struggling to find vases to piece together, plant stands make a great alternative base. They're already designed to support added weight while keeping everything steady and elevated. When thrifting for the top section, any wide, shallow, and watertight dish should do the trick. Once filled with water, it should hold about 1 inch of water near the rim and 2 inches in the middle.
Similar to the glassware DIY above, attach the plant stand to your chosen basin using a strong, weatherproof glue. Then, move it to a spot in your yard where birds will feel safe from predators. Birds are far more likely to use a bath when they can easily scan their surroundings for danger and make a quick escape if needed. Placing your birdbath near thorny shrubs works well, since cats and other animals tend to avoid climbing sharp branches. It can also be helpful to position it underneath a tree, as it provides some cover, and the shade helps the water evaporate more slowly.
Make a pretty birdfeeder using a teacup and saucer

Bring the cottagecore feel outside by thrifting a teacup and saucer to turn into a pretty bird feeder. The teacup is perfect for holding the seed, and the saucer gives the birds a spot to perch while they eat. It's not just practical, however, teacups and saucers typically come in matching sets, so you can easily create a cohesive design. If you find a teacup you like, you may need to search the dishware aisle for a bit to find the counterpart, since they can sometimes be separated at secondhand shops.
All you'll need is your chosen teacup and saucer, some string, and a strong adhesive. Clean the dust and debris off the dishes and allow them to dry completely. Then, attach the side of the teacup to the saucer using a high-quality adhesive. Choose a type that holds up well once it's cured, so birds don't accidentally pick off the glue and ingest it. Apply the adhesive to the side of the teacup where it will touch the saucer and adhere the two together. Cut eight pieces of a sturdy string and tie them together. Glue the knot to the bottom of the saucer and arrange the string so it forms four evenly spaced sections, each with two strands. Now, all you have to do is tie it to a tree branch and fill it with your favorite seed.
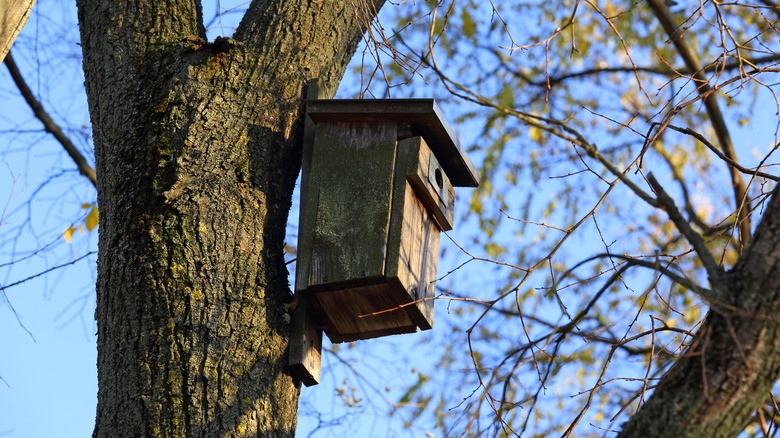
Craft a secondhand wine box into a birdhouse
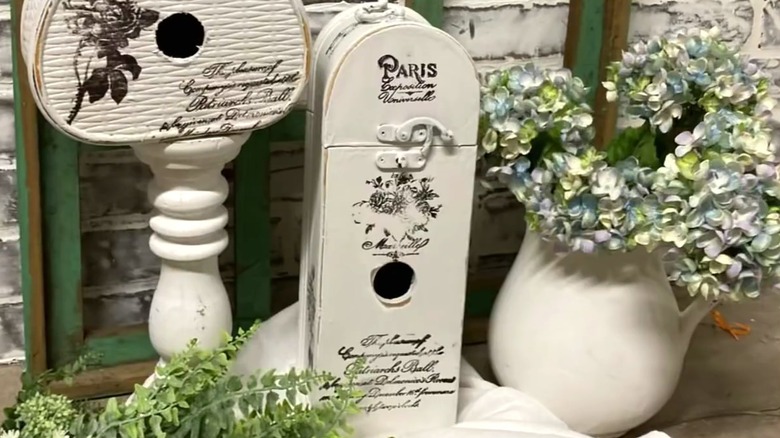
Next time you're browsing the thrift store, keep an eye out for donated wine boxes. They're already the right size and shape for a birdhouse, and they come built with a latch that makes it easy for you to open and clean them between visits from feathered friends. Look for those made of wood, as they will be breathable and safe. Metal and other materials can retain heat, making it too hot for them to safely nest.
Wrens, bluebirds, and tree swallows are a few of the cavity-nesting species that may nest in your backyard. So, make sure to choose the appropriate hole size to attract the type of bird you'd like to visit. For example, finches prefer a 2-inch nesting hole, while bluebirds prefer something slightly smaller at about 1.5 inches. While it may be tempting to paint it a bright color to match your garden, the birds will be less likely to stop by. Instead, opt for natural wood preservatives to stain it.
Repurpose vintage dishes into a gorgeous tiered birdbath
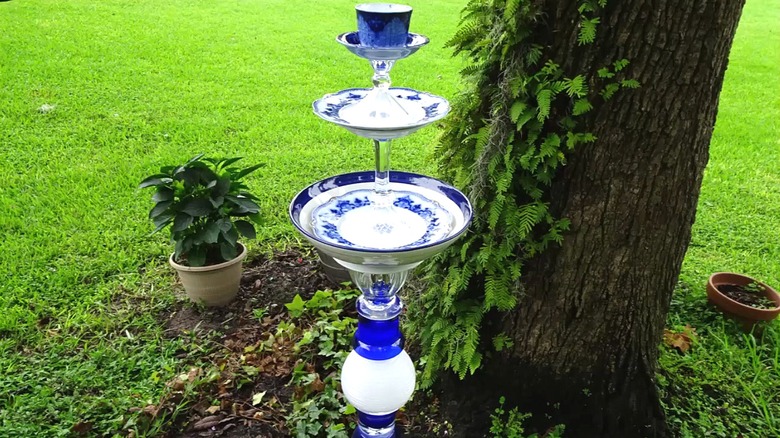
Vintage dishes are some of the most common items you'll find at the thrift store, so breathe new life into them by creating a unique and gorgeous tiered birdbath. Many types of plates, saucers, and shallow bowls are gently sloped in a way that allows birds to gradually wade in. Large candlestick holders, vases, and even smaller pieces of stacked dishware work well for adding stability and height. While it's great for feathered friends, it doubles as garden art that fits in beautifully with landscaped backyards.
To create a tiered birdbath, head to the thrift shop and search for larger plates or bowls to use as the basins. You can get a little more creative with the base, as you can attach multiple small pieces to get the exact height you want. Just make sure they're sturdy enough to support the weight of the dishes above them. While shopping, look for shapes that will proportionally match once attached. Once you have everything you need, secure the pieces together with a weather-resistant adhesive and allow it to fully cure before moving or adding water.
Use glass bottles to make an easy hummingbird feeder
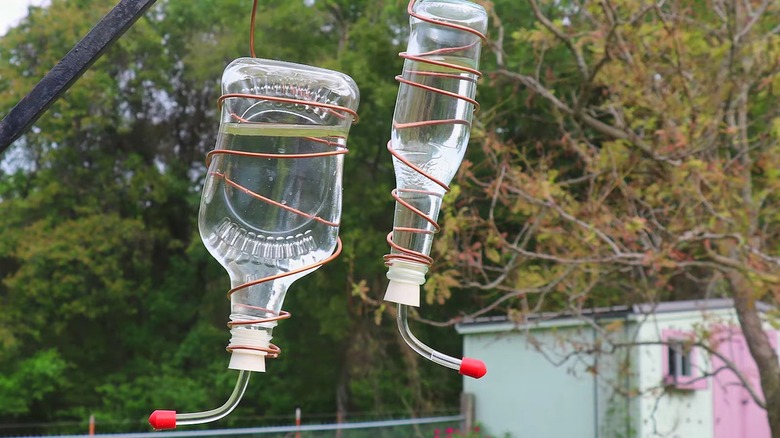
Glass bottles are some of the easiest items to find at the thrift store, many of which have interesting vintage details. Most are the right size and shape to store hummingbird nectar, so all you need is a feeding port to make an easy DIY alternative. While you may be able to find bottles in other materials, glass is going to work best. Not only are they typically easier to clean, but you won't risk accidentally choosing a material that warps, overheats, or leaches toxins into the sugar water.
Before you head to your local thrift shop, you'll first need to purchase a feeder insert so they can actually drink from the bottle. Options like Baderke's Hummingbird Feeder Tubes are often inexpensive and are made with cone-shaped rubber stoppers that fit snugly into most bottle shapes. Bring them with you to the store, so you can test the fit before buying a bottle that won't work. You'll also need some sturdy wire to hang up your new feeders. Wrap the wire tightly around the bottle from the bottom (near where the feeding port will be) to the top, leaving some excess length for hanging. If the bottles aren't red, it can help to plant some red flowers or tie red ribbon nearby to grab their attention. However, you should never add food coloring or other dyes to your homemade hummingbird nectar.
Create a charming birdbath fountain using a thrifted lamp
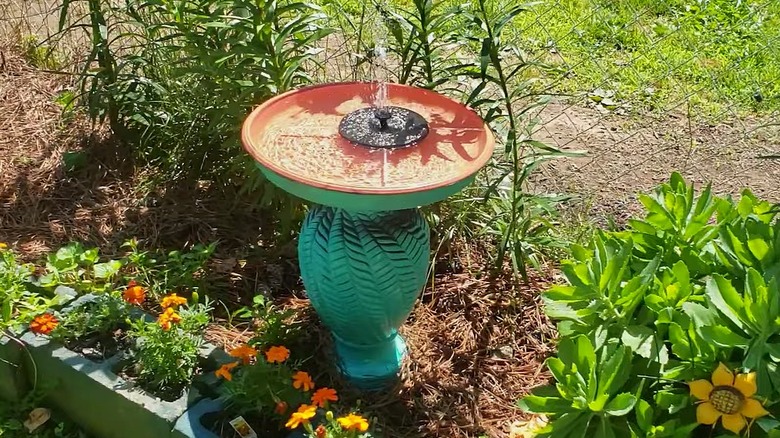
You've likely walked past the aisle of nearly endless lamps, not realizing the bases are exactly what you need to create a gorgeous birdbath. Many secondhand lamp bases already have interesting shapes, textures, and carved details, so it doesn't take much work on your end to create a birdbath that feels decorative rather than homemade. You'll also need something for the basin, but luckily, thrift stores are overflowing with dishes and other containers that are perfect for the actual bath piece.
Not every lamp works well for this project, so keep an eye out for one that stands between 1 and 3 feet tall with a wide, stable base. First, remove all the wiring and seal any openings to prevent water from seeping in. If you plan on spray painting your lamp, it's easiest to do so before attaching the top and bottom pieces. Once everything is attached, the birdbath is ready to use. However, to take it a step further, add a small solar pump, such as Mademax's Solar Fountain, to create some water movement that will grab the birds' attention.
Turn a waterproof placemat into a stylish hummingbird feeder cover
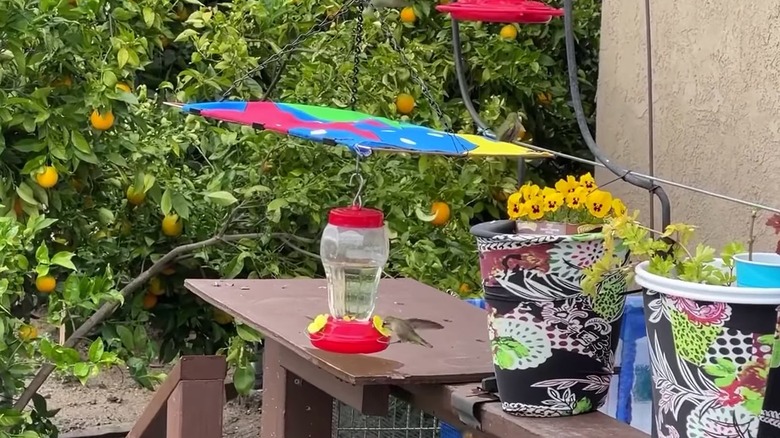
With a secondhand placemat and a couple of items from Dollar Tree, this easy DIY offers a stylish way to stop the heat from spoiling your hummingbird feeder. Shading the nectar can slow the fermentation process, especially if you keep your feeders in a sunny area of the yard. If you don't want to splurge on a fancy cover, then make sure to grab a stylish, waterproof placemat next time you hit the thrift shop.
Placemats can be a little flimsy on their own, so you'll want to attach them to something with a bit more stability. A square-shaped wire net works beautifully, and they're typically available at Dollar Tree. You'll also need a wire plant hanger, binder clips, and some zip ties, which can also be found at dollar stores. Adjust the plant hanger to your liking and attach the chains evenly around the wire net. Loosely fasten a zip tie around the middle square to give you a loop to hang your feeder. Then, adjust the size of your placemat and use binder clips to secure it in place.
Transform a thrifted whisk into a nesting material holder
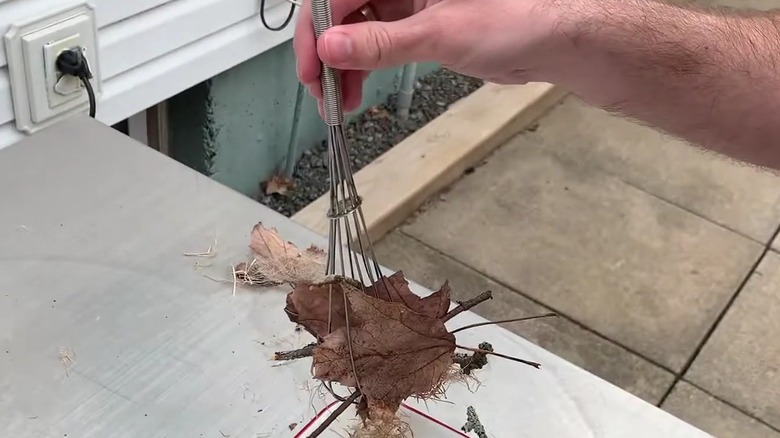
Providing nesting material is a great way to encourage birds to nest in your yard. Keeping all of their supplies organized within a whisk makes it easy for them to snag what they need in one place. As they use their beaks to pluck what they want, the wire loops will prevent the rest of the materials from dumping on the ground. Plus, most whisks have a handy loop at the end, making it easy to hang from a tree or shepherd's hook.
Gather materials like dried grass clippings, twigs, fallen leaves, feathers, plant fluff, bark, pine needles, or moss. Just make sure anything you use hasn't been treated with pesticides. It's generally advised to avoid adding anything from around the house. Pet hair may contain flea treatment chemicals, human hair is often too long and can pose a risk of tangling around birds' feet, and dryer lint often contains microplastics or chemicals from detergents. After you've gathered the nesting materials, simply insert them inside the whisk and hang it where birds can easily find it.
Make a DIY hummingbird fountain using a secondhand trash can
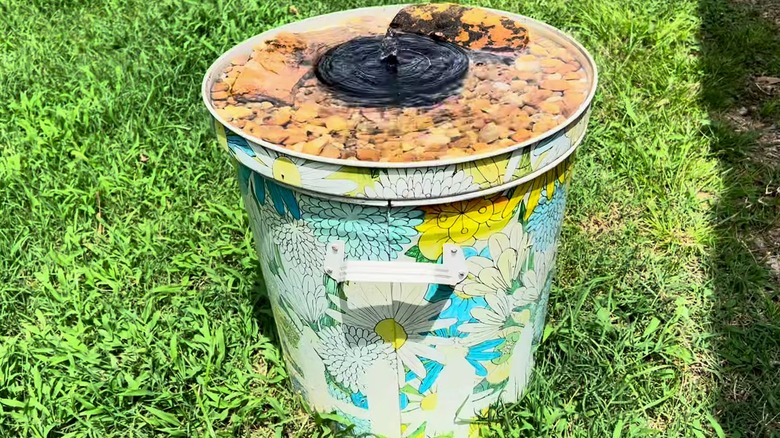
Hummingbirds bathe frequently, but they prefer to zip in and out of moving water, like sprinklers or fountains. They can't walk or hop on their feet as most birds can, so most standard baths aren't very practical for the tiny birds. This is what makes trash cans great for designing a special bath just for hummers. By flipping the lid upside down, you have a shallow basin that's just deep enough to add a fountain. Plus, many smaller cans come in attractive designs, so this is a super-easy project that nearly anyone can tackle.
Make sure to choose a garbage can with a shallow lid that's only a few inches tall. Flip the lid over and fill it with water, and you're already halfway done with this DIY. Then, install a solar fountain that has a sprinkler effect — the more movement, the better. For example, Solatec's Solar Powered Bird Bath Fountain has four nozzle options that create a range of fountain patterns at different heights, so you can test to see which one the hummingbirds prefer. Then, fill the remaining space with rocks to reduce the depth.
Convert an old dresser drawer into an adorable upcycled birdhouse
An old, wooden end table or dresser has just about everything you need to create several birdhouses. Each of the drawers will have all but one side attached, so there's less construction compared to using random pieces of scrap wood. Because you'll attach the front panel yourself, you can hinge it for easy clean-out, and you can customize the entrance hole to attract your favorite species.
Remove the dresser drawers, unscrew the handles, and disassemble the rest of the dresser, saving the wood to use as scrap for the front panels. Cut the boards to size, then drill an entrance hole based on the species you want to attract. Sand away any paint or rough edges and apply a wood-preserving stain to all pieces, allowing them to dry fully. Once finished, attach the front panels to each drawer using hinges on one side and a latch on the other. Leftover wood can be used to create a roof or mounting board.
Grab a used saucer to make a fruit fly attractor for hummingbirds
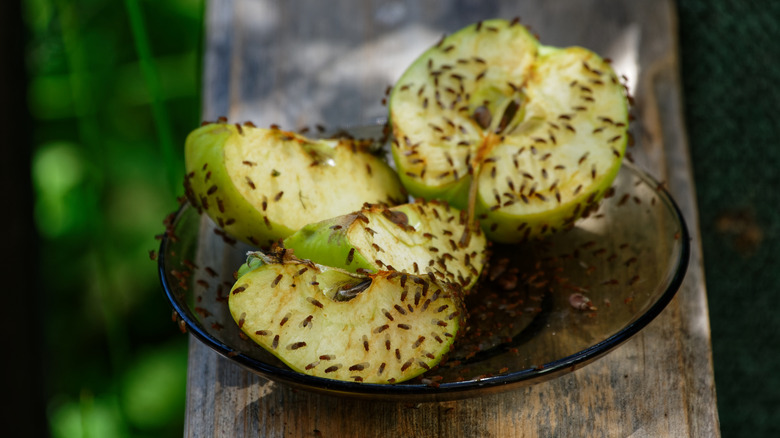
Understanding the hummingbird diet is the key to supporting them in your backyard. While you may already have nectar-rich flowers and a yard full of feeders, you're likely missing one of their main food groups: insects. Bugs aren't just a snack for these tiny creatures; according to the University of California, insects and spiders make up roughly 80 percent of a hummingbird's diet. Setting out small pieces of fruit is a surefire way to attract fruit flies, a hummingbird-favorite treat. If you don't want to use your own dishes, you can grab a secondhand saucer to use instead.
You don't need to find anything fancy to attract the insects, though the color red can be more eye-catching to hummingbirds. Place your thrifted plates or saucers near your feeders where hummers can spot the bugs, but out of reach of other scavenging animals. Instead of throwing away fruit scraps, fill the plate with overripe bananas, cantaloupe, or other leftover fruits taking up kitchen space. As it rots, fruit flies and other insects will feed on the fruit, and hummingbirds will swoop in to pluck them from the air.
Make a squirrel baffle using a thrifted plastic pot
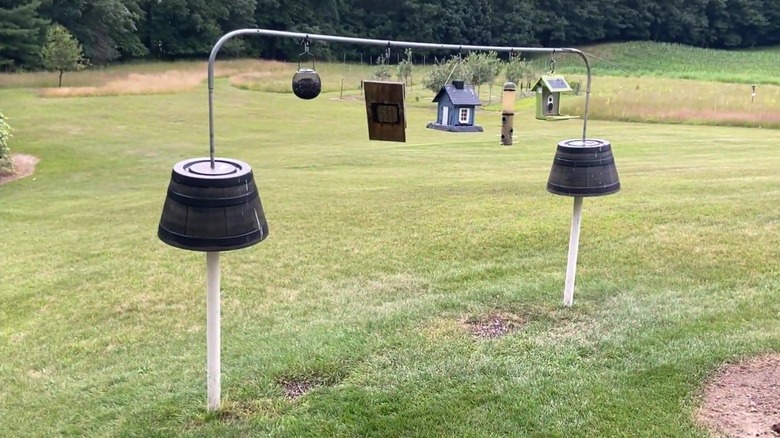
If you want to keep squirrels out of your bird feeder, you'll need to find a way to outsmart them. Aptly named, a squirrel baffle does just that. Although there are plenty of commercial deterrents available, you can just as easily DIY them with items easily found at the thrift store. Plastic buckets, planters, bowls, or similar items can be repurposed to keep squirrels from climbing their way to your bird feeders.
The installation method will depend on how your feeders are set up. If squirrels are climbing up from the ground, you'll want to hang the bowl upside down beneath the feeder. However, if they're dropping down from a nearby tree branch, position the container above the feeder to block access. Start by drilling a hole in the center of the plastic container. To prevent the baffle from sliding all the way down, the section beneath it needs to be slightly wider than the chain or post above it. To add some width, you can encase the hanger or pole with a PVC pipe. Alternatively, you can create a stopper by securing a zip tie at the spot you'd like to install your baffle. Just make sure the hole in the container is wide enough for the feeder mount to pass through, but small enough that it can't slip over the zip tie.
Turn a thrifted serving tray into a fruit feeder for birds
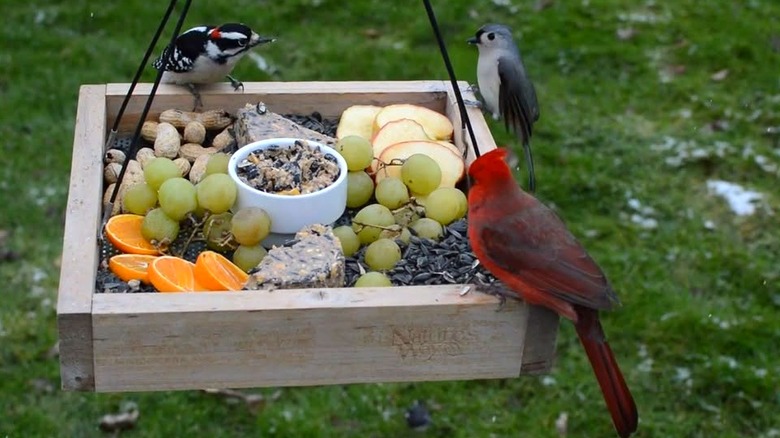
If you have fruit and berry trees that birds love, then you already know that ripe fruit doesn't last long once birds discover it. Serving trays aren't just great for hosting guests; they can also be repurposed as feeding stations to offer your feathered visitors berries, grapes, oranges, plums, and other sweet treats. To make your bird-style charcuterie board even more appealing, you can thrift a ramekin or other small dish to place in the center for seed, mealworms, and other types of bird food.
A wooden tray works best, since it's easier to attach hooks or hardware for hanging. To hang the tray, start by marking the center point on each side of the tray. Drill shallow pilot holes to prevent the wood from splitting, then screw an eye hook into each marked spot. Attach a short length of chain or wire to each eye hook, connecting them to a central ring or hook for hanging. Now, all you have to do is hang it in a safe, open area where fruit-eating species like catbirds, robins, thrushes, waxwings, and catbirds will spot it.