Create Style And Useful Shoe Storage With This DIY Spinning Rack Idea
We may receive a commission on purchases made from links.
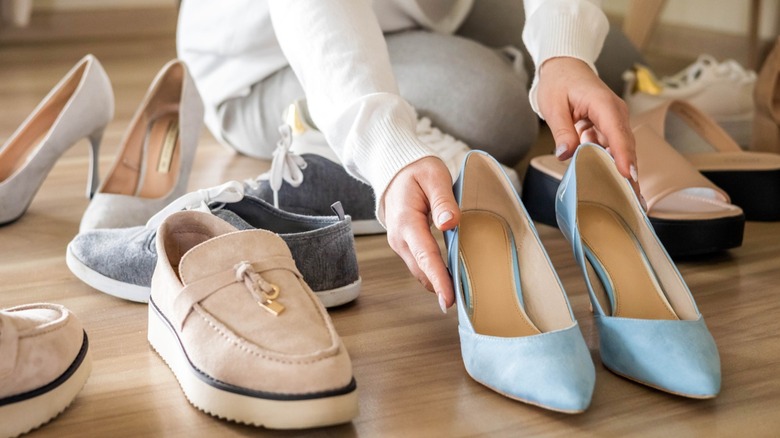
Shoes, shoes, and still more shoes. Footwear fans know sneakers, sandals, and slippers create a constant organization problem, especially when you're dealing with limited places to put a growing collection. As storage gets tighter, a rotating shoe rack becomes a huge relief. Rather than filling walls with shoes and stealing valuable usable space, you could put a spinning column in the corner to keep more pairs in one spot. It's easy to find spinners online, but this is a great project to work out your DIY muscles. TikTok creator @keenannicole shows us how to get started, building a stylish and functional rotating rack with pine boards, wood dowel rods, and a turntable. With a few measurements, cuts, and attachments, you can construct a solid-wood spinning shoe holder for a fraction of the cost of a store-bought (and likely inferior) product.
For this DIY, you'll find most (if not all) of the needed materials at local home improvement stores like Home Depot. Pick up some round wood boards, like these 18-Inch Round Pine Boards ($13.97 a piece) — you'll need two for the bottom (one for the bottom shelf and one for the base connecting to it via the turntable), one for each additional shelf, and one for the top. Get 1-inch dowel rods, grabbing enough to cut down into supports for the shelves. Following @keenannicole's design, you'll use three 9-inch dowels to hold up each additional shelf. Do the math for your desired height, and buy accordingly. Otherwise, you'll need a turntable, like the Everbilt 6-Inch Lazy-Susan Turntable, but you may also be able to save some time and money by repurposing a lazy Susan, if it's the right size.
Assembling your shoe rack shelving
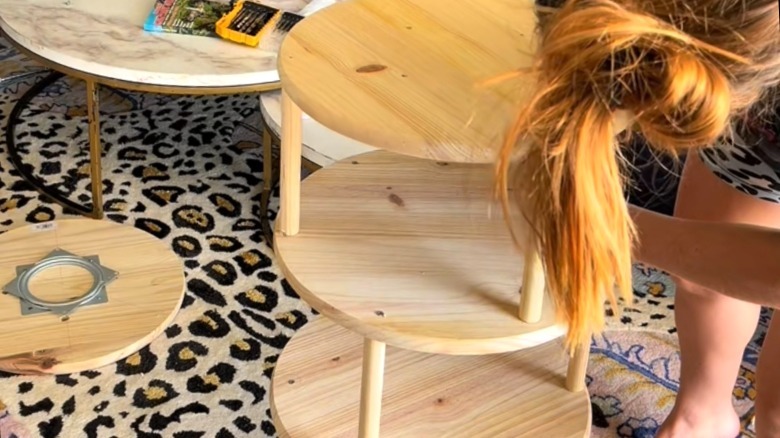
Cut the dowel rods into 9-inch segments (a miter box or chop saw helps for 90-degree cuts). Then, drill pilot holes in the center of each end of the segments for screws that will secure them to the shelves. Measure and mark equally spaced placement points for three upright support rods around the edge of the bottom shelf. Mark the points an inch in from the edge, and drill pilot holes through them. Repeat this for each shelf.
If you're off-setting the supports between the shoe rack shelves, simply screw them onto the boards with 2 ½-inch wood screws through the pre-drilled holes. Do this for every shelf (except the top board), so each has three supports sticking up. Place the second shelf on the bottom shelf's supports. Position the second shelf's supports so they're centered halfway between the supports underneath, creating a staggered look. Mark the support placement underneath on the second shelf, and drill pilot holes through the board. Screw the supports to the shelf. Continue this process to build the rack, screwing the top board to the final three supports.
If you want the supports between the shelves to sit directly in line over one another, use dowel screws, like Everbilt 3-Inch Dowel Screws. Install three supports into the bottom shelf with regular screws. Then, use pliers to screw a dowel screw about an inch into the hole at the top end of the supports. Push the dowel screws through the pre-drilled holes in the second shelf (drill wider holes for the screws to fit snugly through them). Twist the next set of supports onto the other end of the screws. Repeat this with the other shelves, and use screws to attach the top to the final supports.
Attaching the turntable and finishing your DIY shoe rack
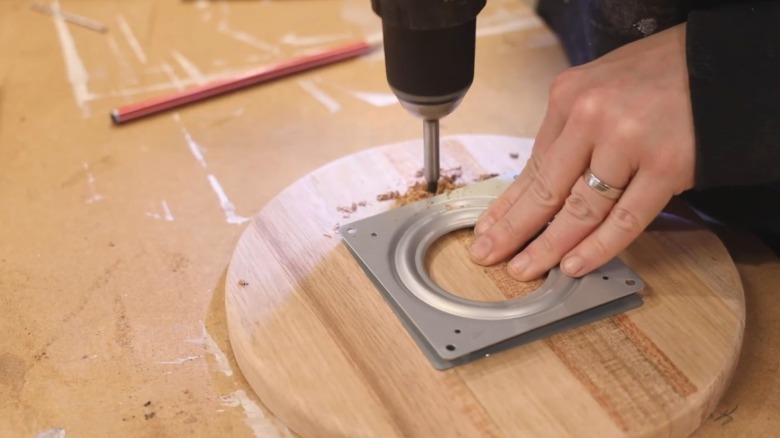
Attaching the rack's turntable between the base and bottom shelf is the trickiest part of this DIY. The basic process is to find the center of the bottom shelf's underside, mark the mounting points for the turntable's top plate on it, and drill pilot holes (ensuring you don't drill through the top side). Then, mount the turntable's bottom plate to the center of the base piece. Rotate the top plate 45 degrees offset from the bottom plate (the mounting holes for the top plate should be over bare wood). Mark the position of one of the top plate's holes on the base, and drill a wide hole (about ½ inch wide) all the way through it.
With the base and rack flipped upside down, align the base over the bottom shelf. Use the large hole you drilled in the base to line up the top plate's mounting holes with the pre-drilled holes in the shelf. Put a short screw (e.g., ¾ inch) through the large hole, and screw one of the top plate's mounting holes to a pre-drilled hole. Rotate the base 90 degrees to the next hole, line up the plate hole with it, and screw it in place through the large hole again. Do this for the last two holes, and you're done! You can finally start filling your brand-new spinning storage rack with shoes, bags, and accessories.
Since you're using wood, it's easy to customize the shelf to fit your home's aesthetic or complement your shoe collection. You could consider picking the perfect shade of paint or applying stain, making sure to use some pre-stain wood conditioner first. Get creative, and you'll have a stylish, functional, and space-saving shoe rack to enjoy for years to come!