Tile Spacers: How To Determine The Amount Needed For Your Project
Tackling a tiling project is a major milestone for any home DIY enthusiast, but success so often hinges on the smallest details. You've picked the perfect tile; now you just need to grab some tile spacers. But how many do you actually need? Well, fortunately, there's an easy formula for that: just take the total number of tiles in your project, multiply it by four, and voila! This easy formula is the gold standard for calculating spacers because it works for most common layouts, from a classic stacked grid to an offset subway pattern. While it might seem like you're overbuying, this times-four rule covers the perimeter of your project, where tiles meet cabinets and similar areas. And not buying enough spacers is just one of many mistakes to avoid when tiling.
Beyond the basic math, this calculation also acts as an insurance policy against the biggest project killer: the mid-job supply run. Tiling is a race against time once your thinset is mixed and applied to the substrate. Professional results require a steady, uninterrupted workflow, and having a few extra spacers on hand lets you stay focused on edge alignment rather than the dwindling contents of your spacer pile. And sure, there are tile spacer alternatives, but they can cause crooked grout lines. By committing to the four-spacers-per-tile rule from the start, you protect both your tile project and your sanity during such a critical moment.
How to master the math to find the perfect number of spacers
While the times-four formula covers your layout, there's another tip that can help: grab a few extra, too (maybe like ten-percent of your initial calculation). Why? Tile spaces are notoriously easy to lose in the inevitable chaos of a construction site, whether they vanish into debris piles or get accidentally buried in wet mortar. Plus, plastic spacers occasionally have factory defects that could compromise the precision of your entire project. Having some extra on hand ensures that a few dropped or quirky pieces won't force you to compromise your project. This little investment is a small price to pay for the peace of mind.
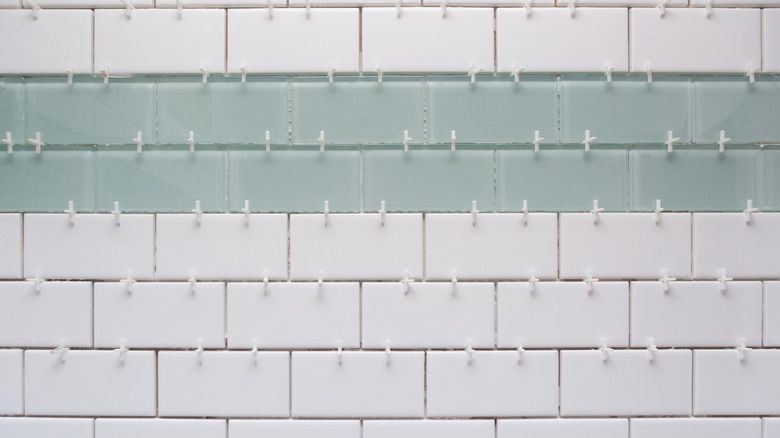
The type of spacer you choose (whether it's a T-spacer, the traditional cross shape, wedges, or a horseshoe shim) doesn't change the math of this formula, but it does impact your final cleanup. A common rookie mistake is leaving spacers in the joints for too long, which can cause them to become permanently trapped under your grout. You should always plan to remove your spacers once the thinset has reached a firm set, but before it fully hardens into that rock-like bond. This timing ensures your grout channels stay deep and clear, allowing for a smooth, even application of color across the entire surface. Managing your supplies with this level of foresight practically makes you a pro, turning a daunting task into a manageable weekend win. With a healthy number of spacers at the ready, and an essential tool for laying tiles evenly, you can finish your tiling project with confidence and precision.