15 Reasons Your Paint Is Peeling, And Best Methods To Prevent It
Is there anything more annoying than watching the paint around your house start to crack, blister, and peel? Not only is it messy, but it can also make you want to cry when you recall the amount of money that you spent on paint and the hours you put into applying it. Even more frustrating is realizing that there are various reasons it could be happening.
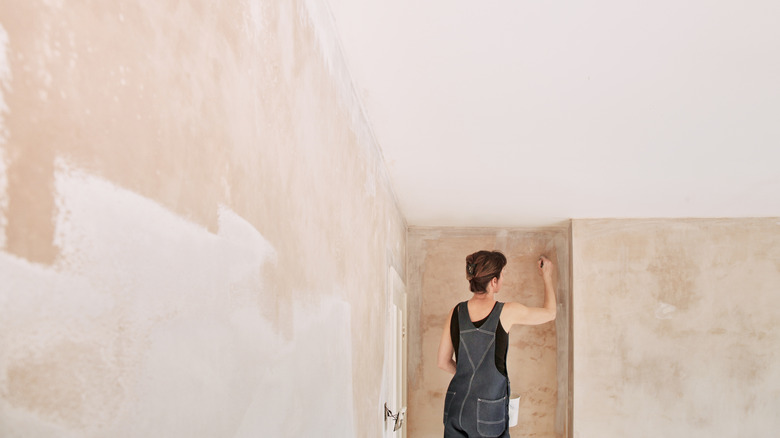
It could be that you failed to properly clean and dry the surface before painting, or that you neglected to address a mold issue before covering it with Farrow & Ball. Condensation around your house could easily have soaked into your paintwork if allowed to settle on your walls, and if you failed to use the right type of paint for the surface in question, your handiwork was always doomed to fail. Whatever the problem is, this guide is here to help. We're covering 15 common reasons your paint could be peeling, plus ideas on how to fix the problem moving forward. If you're ready to address your errors and learn to paint your house like a pro, you're sure to find what you need in the sections below.
High humidity causes paint to bubble and blister
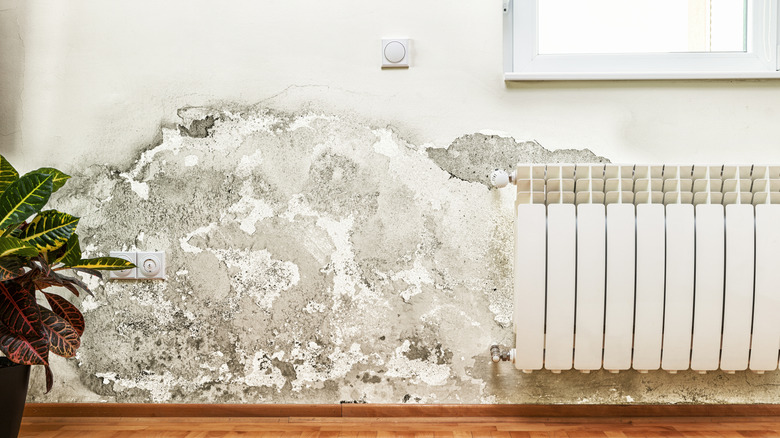
If you struggle to keep on top of humidity levels, extreme condensation can easily build up in your house. This constant build-up (and drying out) of water on the paint around your house can eventually lead to bubbling, blistering, and peeling. Not only is it frustrating, but it can also lead to damage, depending on the surfaces beneath your paint. When the paint starts to peel, any wooden surfaces beneath won't be as well protected, and if left damp for long enough, could start to rot.
The best way to prevent all of this is to ensure your home is properly ventilated. Air-drying clothing indoors can increase humidity, as can cooking without decent extraction. Use a dehumidifier to soak up any excess moisture in your laundry room, and ensure you choose an appropriate extractor hood for your stovetop. It can also pay to make a habit of opening your windows.
Water is often the reason for peeling paint in the bathroom
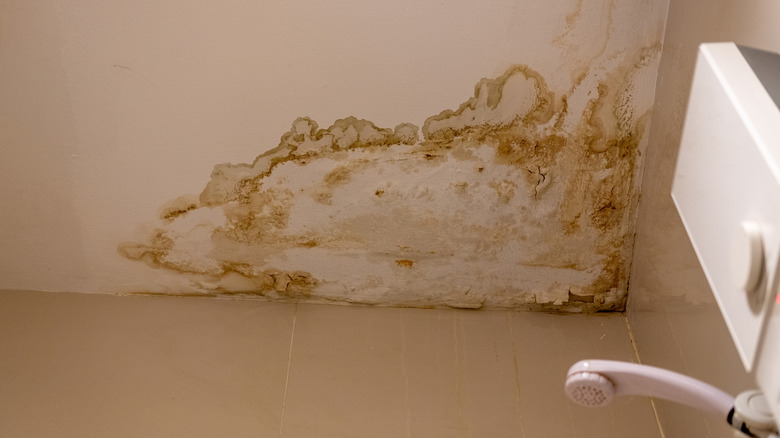
If you're noticing paint peeling in the bathroom, then one of the most common reasons is water. It's not necessarily that the kids are getting fast and loose with the showerhead. Like in other parts of the house, including the kitchen, steam can cause condensation to build up very quickly. When it's not properly ventilated away, it settles on the walls, and over time, can saturate the layers of paint, eventually causing them to detach from the surface.
This is why it's so important to have a decent exhaust fan in your bathroom. You could also open the window when you shower, though if you can't bear the cold on your skin afterward, then there's much to be said for using a dehumidifier. The key is to try to address the build-up of steam before it has a chance to settle on your walls, and ventilation is almost always the best solution.
Condensation build-up during the winter can cause paint to peel
Do you ever wonder what causes your windows to fog up in the winter? It's condensation, and it forms when the outside air is colder than the inside air. Where the cool air meets the warm interior surface of your glass, the air condensates, and while it's highly visible on your windows, you mustn't forget that it's also happening on the walls around your house. If allowed to go unchecked, that condensation can seep into your paintwork, and when it does, it's bound to start peeling.
To prevent this, try to keep your home at a steady temperature in the winter and avoid wild fluctuations that could lead to sudden bouts of condensation. Avoid air-drying clothes indoors, and weather permitting, consider opening your windows in the daytime to keep fresh air flowing through the house. You could also consider running a dehumidifier in poor weather, or, if your home is particularly prone to condensation and mold in the winter, a positive input ventilation (PIV) system could help keep fresh, dry air continuously flowing throughout your house.
Painting damp surfaces is a surefire recipe for peeling paint
One of the mistakes people often make when painting their home is failing to wait until the surface is dry. Whether your house is damp and you're waiting for the dehumidifier to kick in, or you've just given the wall a clean pre-paint (which is also recommended), you should hold off until you're certain it's dry. If it's not, and you start painting, all you'll do is trap moisture between the wall and the new layer of paint, thus preventing the two from creating a proper bond.
To prevent this from becoming an issue, ensure that your walls are thoroughly dry. If it's a bathroom or a kitchen, avoid using steam-producing appliances like showers, kettles, and your stove for a day or two. So long as you can manage without them, this is a worthwhile step, especially when you consider the peeling wall you'll have to contend with sooner or later if you fail to keep things dry.
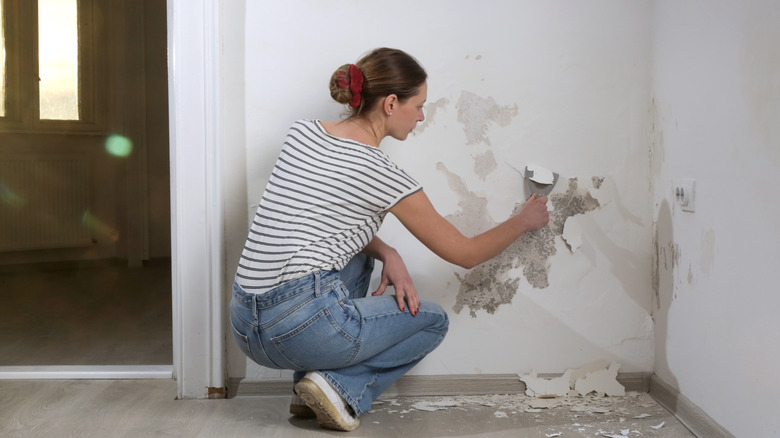
Painting over dust and dirt prevents the paint from bonding properly
Knowing how disastrous painting a damp wall can be, you might be tempted to forgo wiping your walls down before adding a fresh layer of paint. Unfortunately, we would urge you to employ the same amount of caution here. Just as painting over moisture can lead to peeling, so, too, can painting over dust, grease, and grime — all of which are common on painted surfaces around the home.
If you fail to clean away that grime (and then let the wall dry), it will prevent the paint from bonding to the surface properly, which will inevitably lead to peeling. Unfortunately, there are no shortcuts here. Most decorators recommend wiping your walls down with sugar soap, a powerful degreaser specially formulated to cut through the typical dirt that builds up on our walls. With that done, wash your wall down with warm water to remove any traces of soap before allowing the wall to fully dry.
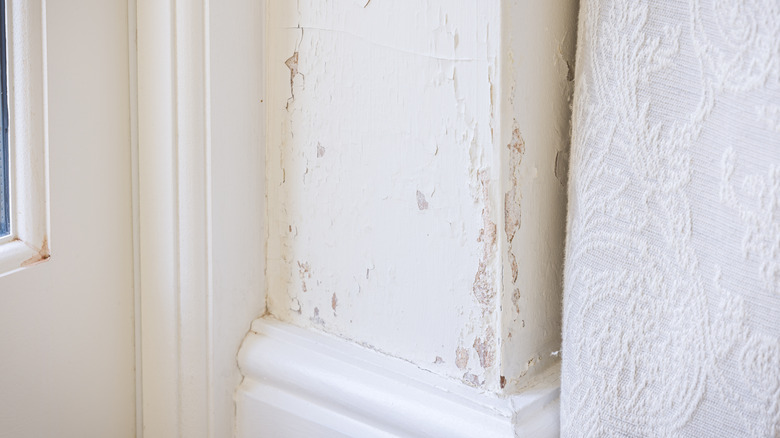
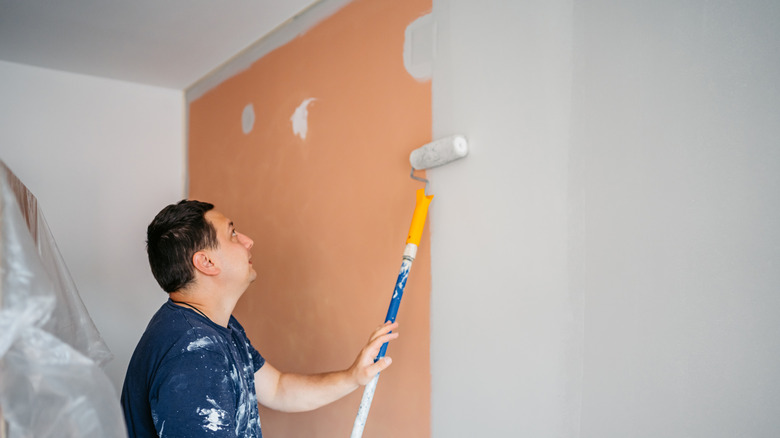
Not priming certain surfaces is a recipe for a poor, short-lived finish
One of the biggest painting tips we can give you is to prepare your surfaces first. If you don't, and you paint directly over the old finish, then depending on what that old finish is (and the condition it's in), you could end up with all kinds of issues, including peeling. This is especially true with smooth surfaces (like laminate, plastic, and metal), but it's also true of any old finishes that are chalky, powdery, stained, or that you suspect are highly alkaline.
If any of these descriptions match the surface you're thinking of painting, then we urge you: Use a primer. These products create a surface between the old finish and the new one — a surface that'll gladly grip the old finish and to which the new paint will happily adhere. You'll still want to prepare the surface by sanding and cleaning it, and if any rotten wood is present, make sure you cut as much of it away as possible.
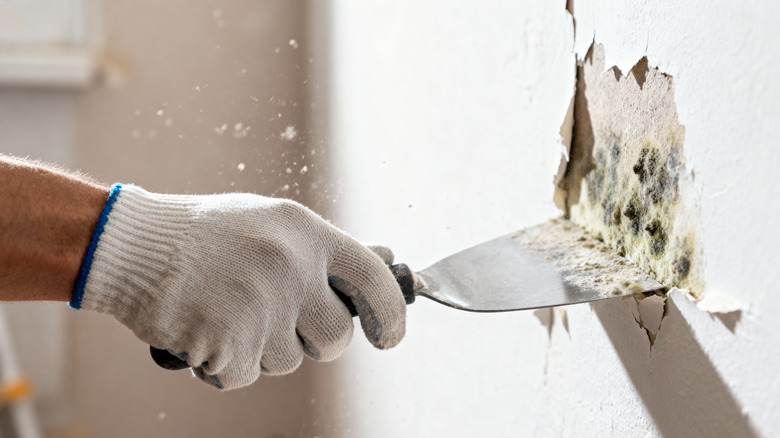
Painting over mold will only hide the problem for so long
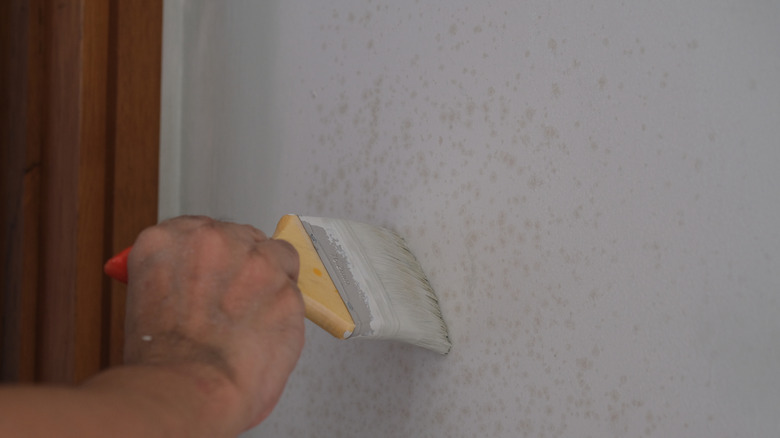
Another reason that paint can start to peel is that whoever painted the surface neglected to deal with a mold problem. Unfortunately, as much as it can make the problem feel "out of sight, out of mind," it's unlikely to do so for long. The reason you should never paint over mold is that it'll only continue to get worse, unseen, until it's ready to force its way back through the paint.
To fix this issue, first clean the surface and remove all traces of mold and mildew. With that done, before you attempt to repaint, the Centers for Disease Control recommends that you address the underlying issues causing the mold. This could mean fixing a leak in your plumbing, installing an exhaust vent in the bathroom (or a range hood in your kitchen), installing a dehumidifier, or even a combination of various strategies.
Thick coats (and numerous coats) of paint are bound to peel eventually
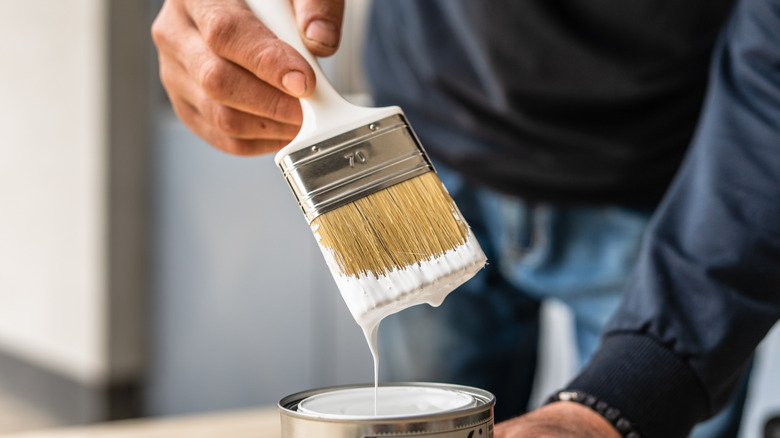
Slathering paint onto your walls is tempting, especially when you have imperfections to hide or lots of walls to paint, and you want to get it done with as few coats as possible. Unfortunately, this is usually a falsely economical use of time and paint. If applied in layers that are too heavy, your paint may not cure properly, leading to a weakened finish and increased likelihood of peeling.
Instead, you should apply thin, even coats of paint, and allow each coat to dry properly before applying the next. Now, if you're painting over older surfaces that have already received multiple decorative updates over the years, then you should consider stripping them back. Just as putting too much paint on at once can lead to issues, so, too, can applying too many coats over a longer period of time. Those older layers are bound to start degrading eventually (most quality paints last up to a decade before they start to wear). Even if you follow best practices and just apply thin coats over the top, the failing paint underneath could cause your new paint to peel well before its time.
Not allowing paint to dry between coats can create weak bonds
If you paint over condensation, it's liable to peel. The same goes if you paint over a wall or other surface that's not been properly cleaned. Unfortunately, even if you go to the painstaking effort of cleaning and fastidiously drying your surface, if you fail to let each coat dry properly before applying the next, then all you'll be doing is setting yourself up for failure.
Precisely how long it takes for paint to dry varies depending on the type of paint and the specific formula used to make it. The weather and ambient temperature have a big role to play in dry times, as do the levels of humidity in the room you're decorating. The best bet is always to follow the paint manufacturer's instructions to the letter and ensure your room is well ventilated. And don't forget, just because your last coat of paint feels "touch dry," that doesn't mean it's "recoat ready."
Painting in extreme heat can cause problems with curing
If watching paint dry feels a little too much like watching, well, you know, it might be tempting to crank up the heating and speed things along. Don't do it. Paint is meant to cure slowly and steadily, and while some are designed to be recoat-ready faster than others, few are able to cure properly if applied during periods of extreme heat (or in rooms with the heating cranked up). If forced to dry too quickly, paint doesn't usually bond as well to the wall as it should, which means it's highly likely to fail and start peeling way before it should.
With this in mind, keep your fingers away from the thermostat. If you're decorating in the middle of a heatwave — and you absolutely must paint — then aim to do it either in the evening or early in the morning, thus giving the paint a few hours of tolerable temperature in which to cure. Alternatively, you could use a dedicated drying retarder. Mixed into the paint before application, drying retarders alter the chemical composition of paint slightly in order to slow the drying process, without diluting the color of the paint.
Choosing the wrong type of paint is a common mistake that causes peeling
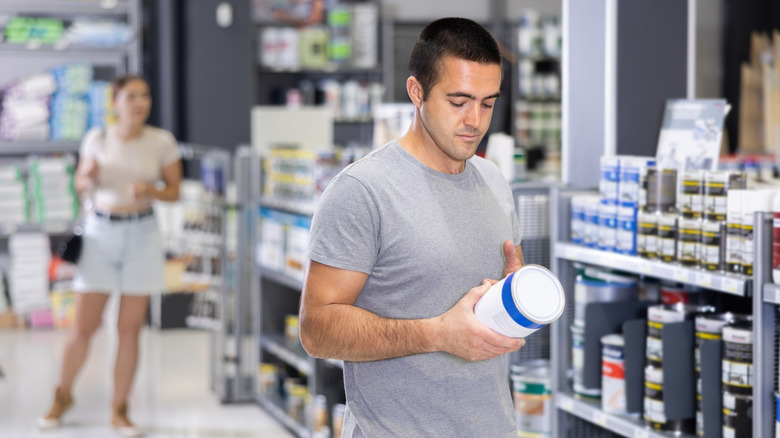
If you're struggling to choose the right paint finish for your house, it's no wonder. Not only is it possible to buy every color imaginable in paint form, but there are also seemingly countless different types of paint to choose from, each designed for specific surfaces and each with its own unique preparation requirements. Some are best for woods, others for plastics. Some are formulated to go directly onto metal, while others wouldn't stand a snowball's chance on the stove if applied to your home's metalware. Get it wrong, and you could find yourself facing a whole raft of paint adhesion problems.
It sounds obvious, but one of the best ways to avoid peeling paint is to ensure that you match the type of paint to the surface you're painting. Don't be tempted to try to make your can of wood paint stretch to cover the metal fixtures in your room just to ensure a color match — this is likely to turn into a peeling mess before your housewarming guests even have a chance to RSVP. At the very least, you may need to use a primer or an undercoat to make the surface properly receptive to the paint that you're using.
Neglecting to mist-coat new plaster can have drastic consequences
If you've ever painted fresh plaster before, you'll know how thirsty it is. Don't forget, when it's first applied, it's chock-full of moisture and needs days — sometimes weeks — to fully dry out. This means that the first few coats of paint that you apply need to "quench" its subsequent thirst and seal it. If you go straight in with regular, unaltered paint, your work can lead to improper bonds between the paint and plaster, which in turn can lead to peeling later down the line.
Instead (and once your plaster has had time to fully dry), it's best to mix up a "mist coat" by diluting paint with water and applying a coat of that to the plaster first. The plaster will absorb this coat like desert sand, eventually forming an excellent base for your first proper, undiluted coat. To mix your mist coat, shoot for a ratio of 70:30 paint to water. One coat should be enough, but if you feel that it's soaked up particularly voraciously by your plaster, don't be afraid to apply a second.
Failing to cure your plaster before painting is sure to cause paint problems
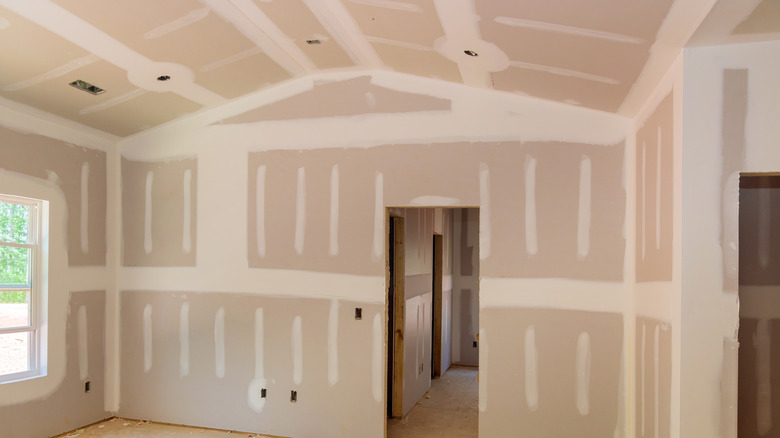
Whether your home's plasterwork has seen better days, or you've had about enough of open-plan living and have decided to throw up some partition walls, it's important to paint fresh plaster properly. Fresh plaster contains a lot of moisture, and often needs a surprising amount of time to fully cure. One of the biggest mistakes you can make with fresh plaster is painting it before it's dry, and if you do, you can easily end up with bubbly, flaky paint as that moisture tries to escape.
The workaround? Unfortunately, there isn't one. All you can really do is wait for the plaster to dry. To know when it's ready, look out for a uniform peachy-pink or beige color around your plaster. You should see this color start to form in blotches and eventually spread over the entire surface as it dries. Even if there is just one or two tiny pockets of darker plaster, wait — these still need time to dry, and if painted over prematurely are almost guaranteed to spoil your hard work.
Painting over oil-based paint with water or latex paint requires proper and thorough prep
We've already touched on the importance of preparing your surfaces before painting. But if you have oil-based paint anywhere in your house and intend to paint over it with latex or water-based paint, taking some time to prep those surfaces is the only way to ensure success. Oil paint doesn't play nice with these types of paint, and if you fail to prepare the surface, then, as the old adage goes, you're merely preparing to fail.
If you're unsure whether your surface is painted with oil paint, there are several ways to know for sure. One way is to apply a small amount of latex paint to the surface, let it dry, and then attempt to scratch it off with your fingernail. If it scratches off easily without digging in, then the base is oil paint. The second test — an acetone test — involves rubbing part of the surface with an acetone-soaked rag. If the paint on the surface comes away, then it's latex. But if it stays put and appears unfazed, then it's oil. If it's oil, then the best way to prepare it is to sand the surface with coarse sandpaper to remove the oily "sheen." With that done, smooth the surface with some finer-grit sandpaper before cleaning it, allowing it to dry, and applying a suitable primer.
Paint can peel as the wood beneath expands and contracts
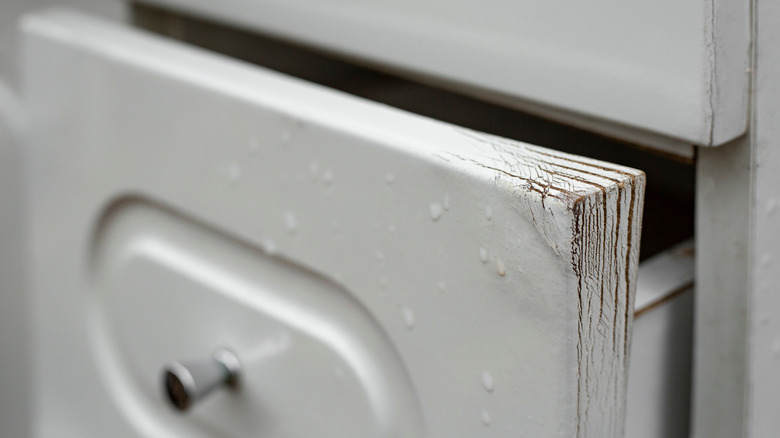
This is more likely to occur outdoors, but it's worth knowing in any rooms around your house where severe fluctuations in temperature or humidity are likely to occur. When they do, any wooden surfaces are more likely to expand and contract, and when that happens, it can cause your painted wood finishes to crack and peel. Of course, most wood paints are designed to flex with these natural movements; however, over time, they can become brittle, and when the paint loses its original flexibility, it needs to be removed and reapplied.
This sounds annoying, and it is. But it's relatively easy to avoid with indoor furniture and surfaces. The key is to maintain a steady temperature and avoid wild fluctuations, and to keep on top of humidity levels. The latter is especially important. Not only will it help to extend the lifetime of your wood paint finishes, but it'll also help to prevent other non-wood surfaces from soaking up excess condensation and eventually peeling.