How To Restore An Old, Worn-Down Shoe Rack Like New

We may receive a commission on purchases made from links.
If you are an avid thrifter, you know lady luck has smiled on you when you come across a sweet treasure. Imagine finding a wooden shoe rack bench that clearly has good bones, even though it appears old, stained, and worn down. Bench-style shoe racks are especially useful for keeping a mudroom organized while also providing a place to sit. They combine looks, seating, and storage and are often made from high-quality hardwood, pine, or bamboo. So what do you do to restore this precious piece of furniture to its former glory? It's a low-stress, high-impact DIY project that involves cleaning, sanding, priming, and painting to make the rack look like new.
Thankfully, wood is one of the easiest furniture materials to restore because it can be sanded and refinished multiple times without compromising structural integrity. If the piece still has a solid structure, the restoration process mainly involves improving its surface appearance. The most important supplies you'll need include sandpaper, primer, paint, and a little bit of patience.
How to restore an old wooden shoe rack bench
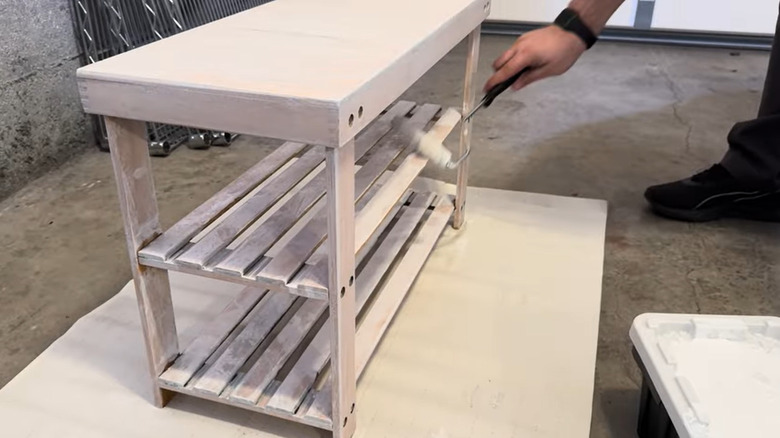
Before you begin, protect the floor and wall next to your workspace using a plastic or canvas drop cloth. Start by cleaning the shoe rack using warm soapy water and a cloth. Pay close attention to any buildup between the wooden slats, legs, and corners. Then leave it to dry. Once dry, it's time to sand it down. Begin with medium-grit sandpaper and finish with a fine-grit. This removes old paint, varnish, and worn areas. Now use your roller to apply a paint primer, like this Bulls Eye Primer Sealer from Amazon. Start from the top, then the sides, and lastly the bottom. Paint primer ensures a smooth, even surface so your subsequent paint work adheres well and looks great.
Finally, it's time to give your shoe rack its new and improved color. You can go for a bold dark color, like black, for an elegant modern look. Black paint can help hide dirt, dust, and scuff marks from shoes. For this step, you can put the roller aside and use a paint sprayer. Besides speeding up the work, a paint sprayer will help coat hard-to-reach areas such as narrow slats evenly. Unlike a brush, it also avoids leaving visible brush marks. Then, spray the base and frame evenly and ensure that the color settles into grooves, edges, and slat gaps, then leave it to dry. Your thrifted shoe rack should now look refreshed and restored.
Customize your shoe rack according to your taste

You now have a refreshed piece of furniture that keeps shoes organized and accessible. Since you're already in DIY mode, this is also a good time to customize the rack. Consider adding caster wheels to the feet for ease of movement. Go for one with brakes like these ASHGOOB Heavy Duty Casters so your shoe rack can not only move around with ease, but also stay stationary once you've positioned it on the spot you want.
Alternatively, one of the smart ways to repurpose this shoe rack around the house is to use it for other functions (apart from holding shoes) without changing the structure. For example, you can turn it into a bathroom bench with storage by arranging storage bins on the lower tiers. You can often find these for cheap at Dollar Tree. This same arrangement will also work as a storage/organizer in your garage, bedroom, or even the kitchen.