Say Goodbye To Jewelry Clutter With These 11 Adorable DIY Storage Boxes
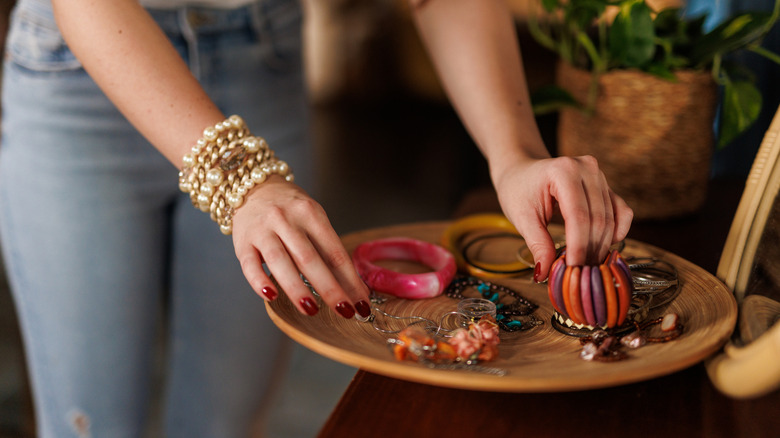
Even if you cherish your jewelry, you may not have invested in a jewelry box yet. This means rings pile up in little dishes by the sink, and necklaces and bracelets get tangled or lost wherever they're strewn. Not only is this adding to your home's clutter, but it's not great for your jewelry!
If you have even half an hour, you can take care of that with a DIY jewelry box. This list includes ideas that run the gamut: From glue-together-and-you're-done, to weaving tiny pieces of recycled paper into something remarkable. Many of them are eco-friendly, making use of supplies you already have around the house. Others are super cost-effective, requiring just a handful of items from a discount or craft store. Choose which works best for you, and remember that the DIYs here are just a jumping-off point. You can always customize them to reflect you (and your home's) unique style.
Head to the dollar store for this DIY
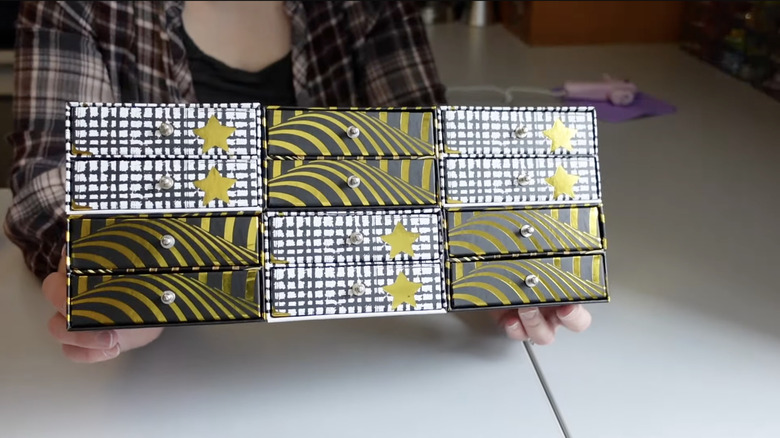
The dollar store can be a great place to start your DIY jewelry storage project. If you can find miniature paper trinket boxes, all you need is hot glue to create a chest of drawers for your collection. Mix and match patterns for an eclectic look, or choose one design that matches your home's color palette. You control the dimensions of this box by stacking and connecting the drawers as you please, then hot gluing them together. Because the mini-drawers are so affordable, you could stockpile a few different colorways to create a jewelry box for each holiday or season.
Transform a cardboard box into something luxe

This DIY jewelry box uses cardboard as the base. But, the key is to choose an indulgent-looking floral graphic (or something similar) in luxe color schemes that will make your home look more high-end. Then all you have to do is decoupage it on the box. Baroque details make this box look complicated, but all they really require are a mold, some air-dry clay, and spray paint. To simplify the project, you could also hand paint on details instead — or buy some premade appliqués.
Use a package of air-dry clay
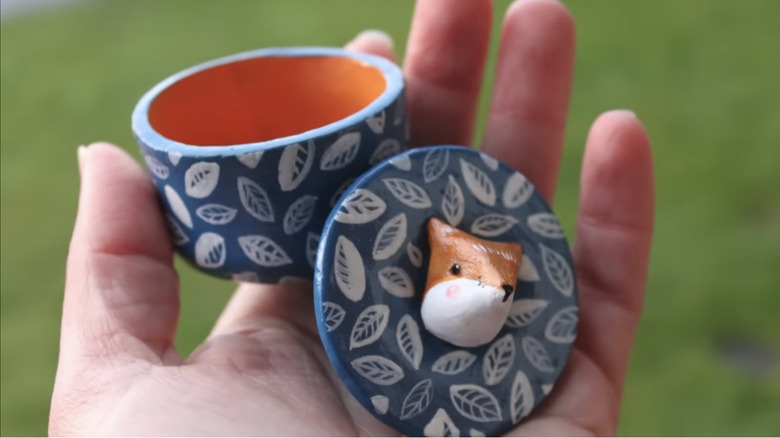
If you want to make a jewelry box that looks like something you would find at a trendy boutique, an air-dry clay trinket pot could be your answer. It's a beginner-friendly project that can look surprisingly sophisticated when it's finished: Fashion an animal head for a knob, or, simplify the design by opting for a round ball of clay. Or, swap out the shape on top for a simple heart or star. It's a beautiful way to add a whimsical accent to your home. Once you understand the basic form, you can use this tutorial to make all kinds of jewelry boxes to suit your home's decor.
Decoupage a craft store treasure box
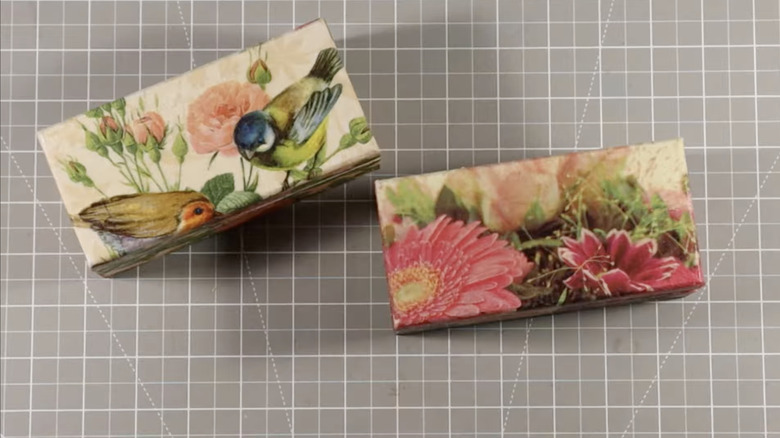
Sometimes the best DIYs are quick, simple, and rely on premade items from the craft store. Case in point: A decoupage jewelry box. Just source a small wooden box from the craft store, some napkins with a pattern you love, and Mod Podge. Paint a layer of Mod Podge on the wooden box, layer on the napkin, and top with more Mod Podge to seal it in. A paintbrush helps make this project seamless. You could even replicate this on a larger scale with a bigger box and holiday-themed napkins. Perfect for storing ornaments or seasonal costume jewelry.
Recycle paper into a stunning jewelry holder

If you have a balloon, paper, and glue, you've got just about everything you need to make an elegant and bohemian-looking jewelry box using coiled paper like this one from Dream_Fairy_DIY. While the final outcome might look complex, the method isn't: This YouTube Tutorial shows how one can glue paper roll twists around a balloon to create a bowl shape. To keep this DIY eco-friendly, use recycled junk mail or newspapers. Or, make it more elaborate by investing in handmade paper, sheet music, paper maps, or metallic paper, and skip the painting step.
Fold colorful paper — no glue needed!
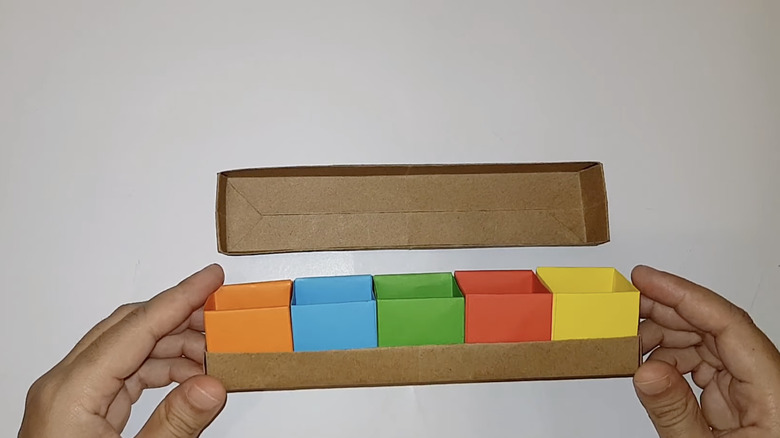
This beginner origami project creates a sleek and functional jewelry box with all folding and no glue. It even features different compartments to keep items, like earrings and pins, separate. Use good-quality origami paper to help this box stand the test of time. You can even coat it with a thin layer of Mod Podge if you would like. To make this jewelry box read more chic than playful, you can switch out the rainbow compartments for a monochromatic palette. Make a few of these at a time and tuck them into drawers throughout your home for easy storage.
Make a beaded masterpiece
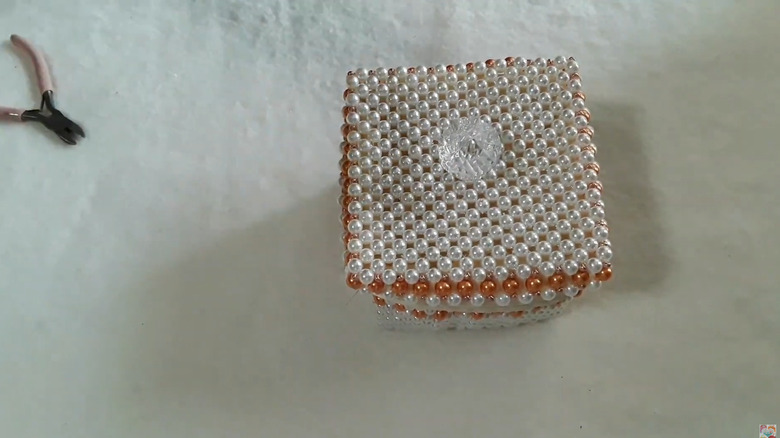
If you're ready to settle in with a DIY project that takes a little longer (but has gorgeous results), consider making your jewelry box by stringing beads in a 3-dimensional pattern. It sounds complicated, but once you get the hang of it, just about anyone can make this impressive-looking project. Use the pearl-style beads pictured above, or swap in glass, wood, or even rainbow beads to match your home's motif. You could even make a smaller version to use as a ring box. If you have leftover beads, you can give a boring lamp a stunning upgrade.
Use popsicle sticks for a whimsical jewelry box
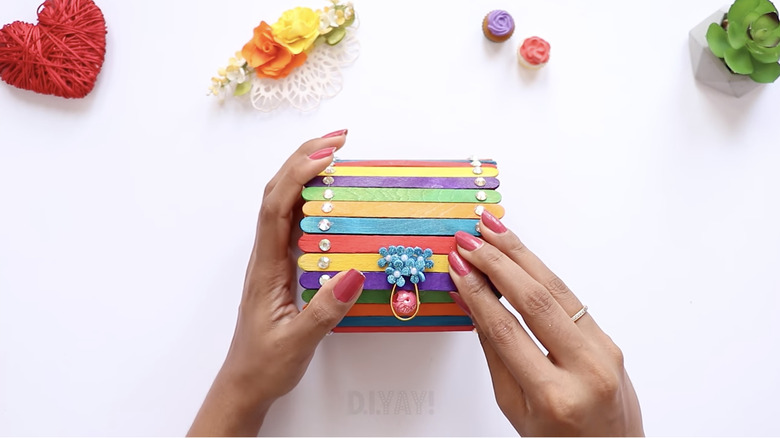
Want a chic way to display your children's artwork? Invite them to create something functional, like this cheerful jewelry box. It uses multicolored popsicle sticks, cardboard, and glitter foam to make a cylindrical container perfect for storing a small amount of favorite jewelry (or throwing it in your suitcase for a quick trip). To make it a little more sophisticated (or adult-friendly), you can tint plain brown popsicle sticks with wood stain and use mosaic tiles or pressed flowers instead of stick-on gems.
Use scraps from around your house to make a convenient jewelry box
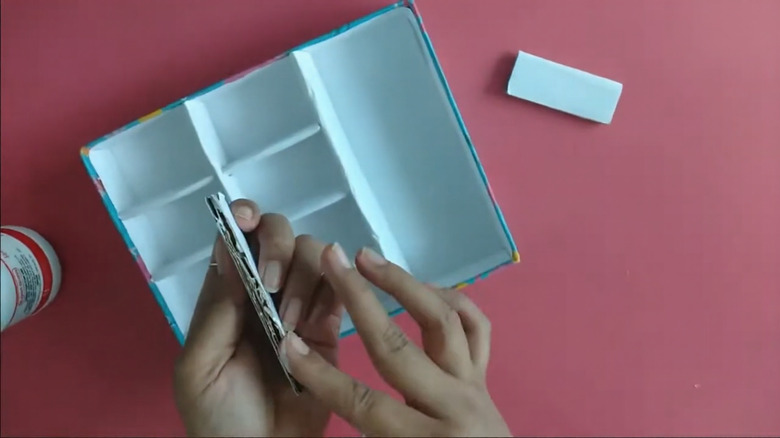
This would be a perfect jewelry box to make during the holidays, when you have lots of scrap paper and cardboard hanging around. It's an eco-friendly way to get jewelry storage quickly, without much fuss or the use of expensive craft tools. Plus, there are endless ways to customize it for each member of your household using paint, fabric, decoupage, and stickers, for example. Following the basic ideas of this DIY, you could make a larger or smaller box, with compartments personalized to the needs of your exact jewelry collection.
Upcycle a thrifted jewelry box
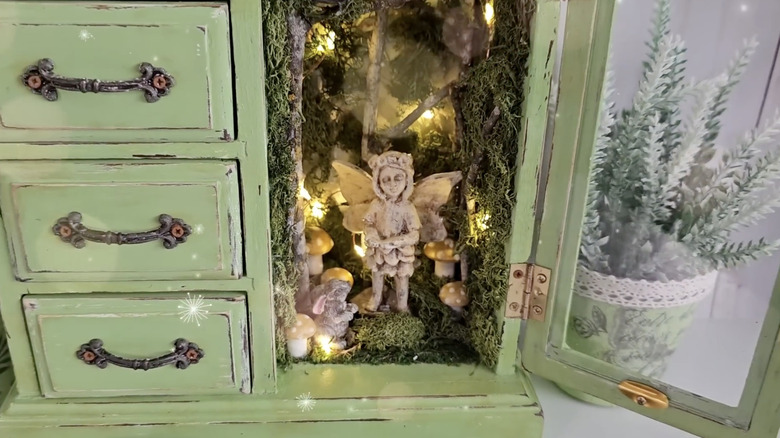
If you'd prefer to upcycle an existing jewelry box rather than create one from scratch, this whimsical DIY from CreArtive By Nature is the way to go. For a trendy new take on cottagecore decor, you'll need to source an old jewelry box from the thrift store similar to the one pictured above, with a small "door" for necklaces. With a few craft accessories, paint, and fairy lights, you'll turn this jewelry box into a whimsical fairy garden (while still leaving room to store your rings, of course).
Use recycled newspaper and cardboard
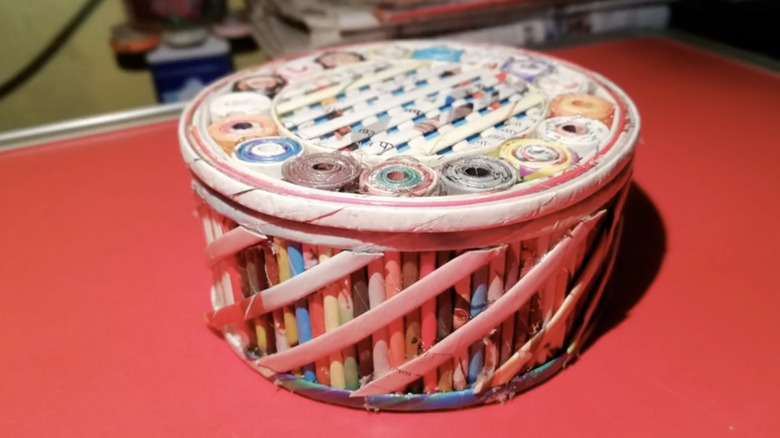
For fans of the bohemian look, this rustic jewelry box is a great DIY. It's a clever way to repurpose old newspaper by winding it into tight coils, gluing these together, and combining with twisted cardboard strips to create a surprisingly sturdy little box. You might experiment with building on the rustic look of this piece by weaving in dried florals or raffia. Or, take it in a different direction with glossy magazine pages and vibrant paint. Just be sure to set aside enough time to roll all of that paper (perhaps while you watch your favorite show?).