Turn An Old Basketball Into A Sporty Shoe Storage Solution
We may receive a commission on purchases made from links.
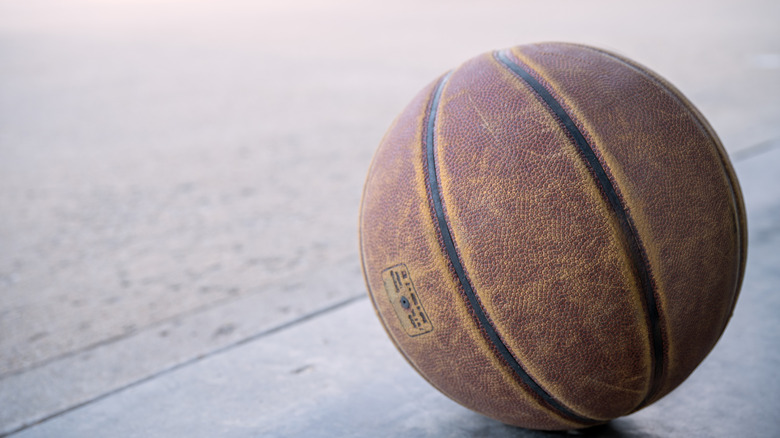
Sports equipment can last a long time with proper care; however, for serious athletes or sports fans, its lifespan can be drastically reduced. When it is finally time to retire your old basketball from the court, you may not need to discard it completely, though. It's no secret that sports fans love to show off their enthusiasm for the game at home, so it's worth exploring ways to repurpose old sports equipment. What better way to upcycle a basketball than to use it as shelving? To make this DIY even better, you can use these sporty, floating basketball shelves as the perfect platform for your basketball shoe collection.
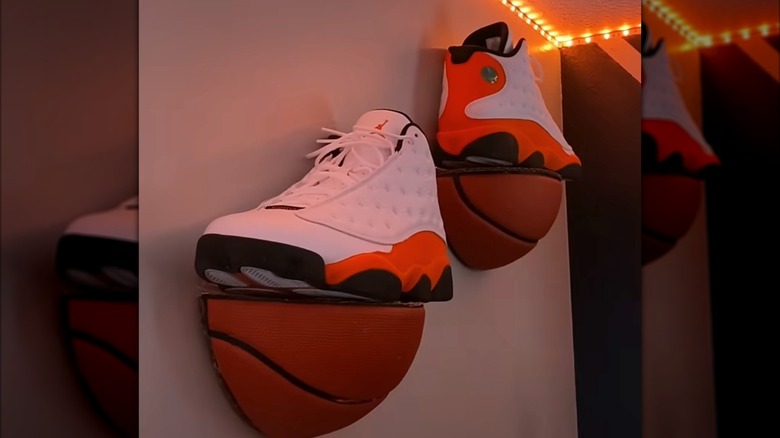
You can make your own basketball-themed floating shelves with a deflated basketball and some scrap wood. Essentially, you will cut the basketball into a slice that is one-quarter of the basketball. The wood will fill in the shelf portion, leaving a basketball protruding from the wall with a flat shelf on top for your shoes. Theoretically, you could end up with four shelves for each basketball.
This DIY is just one of the many subtle ways you can incorporate a sports theme into your home. If you only have one old ball on hand, you can use these shelves as space to display the best of your shoe collection. On the other hand, if you have several old basketballs, you could make enough shelves to display the entire collection. Whatever your decor plans are, be sure to use the proper tools and safety equipment when assembling and mounting your shelves.
How to convert an old basketball into a floating shoe shelf
Social media has a lot to offer sports fans and DIYers alike. For example, TikTok shows us how to convert an old basketball into an incredible plant stand. That said, some social media DIYs are so simple that they may look nice on the first day but won't hold up over time. You can make small changes to improve durability with this basketball floating shoe shelf DIY, though. Content creator @MotivatedByMylan shared this DIY, making floating shoe shelves from a deflated basketball and cardboard. This method is relatively easy, but if you want the shelves to support some weight, layer the cardboard or use wood.
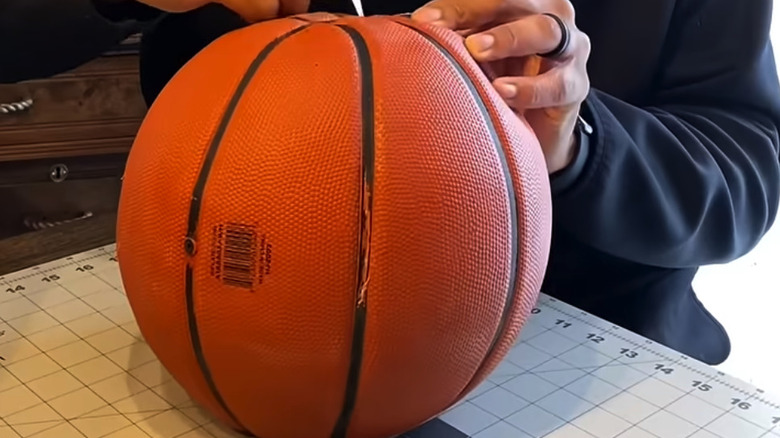
For either method, use a sharp crafting knife to cut along the black lines of the basketball horizontally until you are left with four equal pieces. Then trace the basketball's curves to create a template for the shelves. You will need one piece for the top, and another for the backing. Use the template to cut quarter-circle pieces from cardboard or wood.
If you choose the cardboard route, use a thin layer of diluted wood glue (one part wood glue to one part water) to glue two pieces of cardboard together, creating a stronger shelf. Allow to dry completely. For wood, use a saw to cut two quarter-circle shapes. Attach the two straight edges of the shelves together using glue or screws to form a 90-degree angle. Glue or staple the raw edges of the basketball to the curved part of the shelves. You can attach hanging hardware if desired for easy wall hanging.
Tools and tips to make your upcycled basketball shelf DIY easier
Even though this floating basketball shelf DIY is relatively simple, there are still some tools and tips you can use to make it even easier. You can purchase a DIYSELF Exacto knife 12-piece set on Amazon for about $6, which includes blades that work for both basketballs and cardboard. Just make sure you have a cut-proof surface to work on. A craft mat for exacto knives costs about $8 on Amazon. Using a craft knife makes it easy to create a paper template for your shelf pieces and test how they fit together before you make your first shelf cuts.
If you are making a wood shelf, you will want to have an easily maneuverable saw for curved cuts. Jigsaws are commonly used for these types of curved cuts, and they don't have to be an expensive investment. You can purchase a DEKOPRO Electric Jigsaw on Amazon for under $30. You may want to consider getting sandpaper to smooth off the edges after cutting. The edge will be covered by the basketball, but it can be a quick way to resolve any awkward cuts without extra sawing.
Adhesives are another important thing to consider. Make sure you choose an adhesive that works for both wood and leather. Most super glue or contact adhesives, like wood glue or bonding cement, should do the trick. If you are building wood shelves, you may want to pair adhesives with screws and staples, so it may be a good idea to have a drill and a staple gun on hand. If you use staples to attach the basketball to the shelves, you can hide them with a bit of black or orange paint.