Turn Oven Cooling Racks Into A Convenient Makeup Organizer
When bringing order to your vanity or bathroom, your mind probably goes to baskets, bins, and other ways to organize makeup. If anything, you've probably walked through the bathroom aisles of stores looking for plastic containers and drawer dividers. But what if we told you that the solution to a perfectly organized makeup collection might be in your kitchen drawer? That's right, there's a way to turn oven or cooling racks into a convenient makeup organizer.
This DIY, which comes from TikTok creator redeux_style, is beyond clever. She emptied out her makeup drawer and placed an oven or cooling rack at the bottom using four binder clips as stabilizing legs to elevate it a couple of inches off the bottom of the drawer. She then placed her makeup collection into the rack, using the wire grid to help separate individual products and laying them out standing upright or angled on the side. You didn't expect those racks you use to cool baked goods to be a trusty makeup organizer, did you?
If you'd like to recreate this DIY, well, you just need an oven cooling rack. If you already have one that you no longer use for baking, this DIY is a great way to repurpose a cooling rack to organize your home. Or, find affordable racks at the dollar store, or thrift store. The main thing to consider is size. Measure your drawer and make sure that the cooling rack fits within it. If not, you can use wire cutters to fit it to size. In addition, if the rack doesn't have 1- to 2-inch legs built-in, you'll need four binder clips, too.
Bring order to your makeup drawer with a cooling rack
Start by removing the contents of your makeup drawer (or dedicate a drawer for this purpose) and cleaning the drawer. You can leave it as is, or add a piece of fabric, drawer liner, or contact paper to the bottom to protect it from any makeup residue that might fall from pans and brushes, and add a decorative background.
@redeux_style 4 HACKS to UPCYCLE oven/cooling racks! #upcycle #upclycling #hacks #organizing #organizinghacks #rework #ovenrack #coolingrack #homehacks #diyhome
Then, place the oven rack into the drawer. You need an inch or so of space between the rack and the bottom of the drawer, so if the built-in legs aren't right, snap binder clips on all four corners. Make sure the prongs face downwards so that the binder clips act as short little legs for the rack, adding the space you need to organize your beauty room.
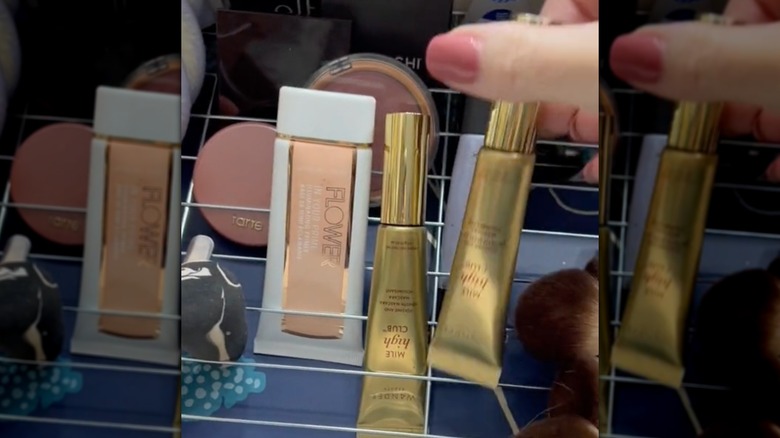
Once the rack is in place, organize your makeup! Pans of makeup like eyeshadow palettes, blushes, powders, and bronzers can fit vertically in the slots, resting at an angle. With this technique, those palettes take much less space than if laid out flat, while still being visible and accessible (which isn't the case when you pile them on top of each other). In another section, place lipsticks, nail polish bottles, and small makeup tubes vertically into one of the slot of the rack for easy access. In fact, TikToker organizedandsimplified4u found just the right chest of drawers and just the right Dollar Tree rack, so she could dedicate an entire drawer to vertically organized lipstick and other tubes.
Finally, lay brushes and longer products flat horizontally on their side for easy access. Alternatively cut the rack to fit only half the drawer, adding plastic bins for longer products, jewelry boxes, or other containers.