13 Tips And Tricks That Will Make Your DIY Kitchen Renovation So Much Easier
We may receive a commission on purchases made from links.
If you're embarking on a DIY kitchen remodeling project, then power to you! It's a superb way to keep costs down, potentially saving you thousands of dollars versus paying for the time of a contractor. In turn, those dollars can be redirected into your most desired custom kitchen features. Really, for those who have the tools and the skills with which to do it, a DIY kitchen makeover is a no-brainer. But that's not to say that it's easy. In fact, if you don't have a solid plan of action in place — plus a contingency for when that plan inevitably goes awry — you could be left without a kitchen for much longer than you initially thought.
To help you bring all of those ideas for your kitchen remodel together as seamlessly as possible, we've pulled together this guide. In it, we'll cover things like organizing your hardware and managing your budget. We'll explore ways to keep your household fed and watered when the kitchen is out of action, tools to make your life easier, and even some ways to help keep your home dust-free. In other words, if you're embarking on a kitchen renovation and are taking it on yourself, the below tips and tricks are most certainly for you.
Set up a temporary kitchen before work begins
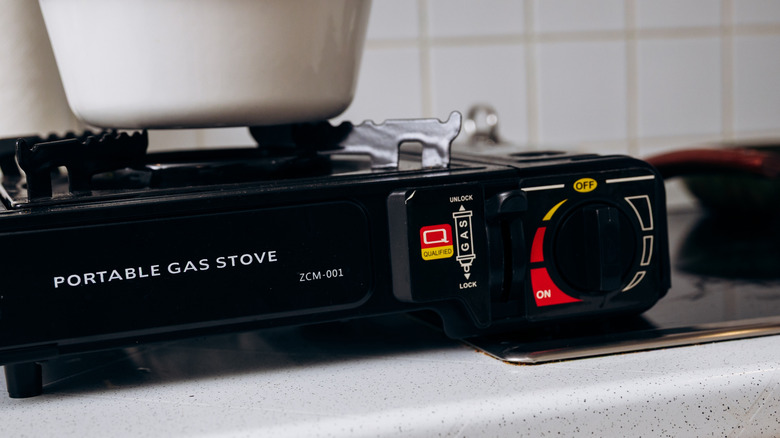
The kitchen is by far the best room to start with if you hope to survive a full-scale, live-in renovation. It ensures that, for the bulk of the project, you at least have a way to keep your family fed and watered. But what about when you're renovating the kitchen? How do you keep everybody fueled when the oven's disconnected and there's no tap to fill the kettle? The best bet is to set up an area elsewhere in your home ahead of demolition to ensure you have somewhere to cook.
Of course, this entirely depends on the space you have elsewhere. But you only need a few basics. A microwave and a portable stove can help to keep you cooking, thus preventing your family's takeaway bill from pushing your project over-budget. As for water, you could either buy bottled water from the store, or keep a large bottle on-hand that you can fill from the garden tap. Oh, and don't forget about the kettle. Especially if you're renovating your kitchen after work and into the evening, you may well need the caffeine.
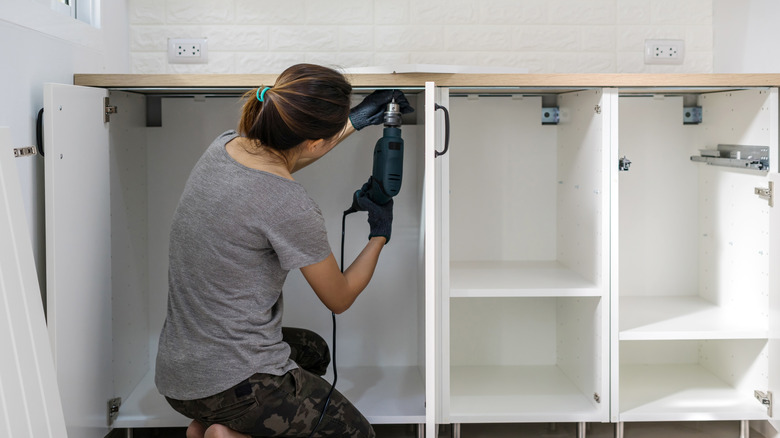
Photograph everything before you take it apart or remove it from the mains

There are various tools that you'll need for a kitchen remodel. Many of them you'll need to buy or hire, however, there's one that's probably already in your pocket and which is guaranteed to make your life easier. We're talking about your smartphone, and more specifically, the camera with which it's fitted. By taking regular snapshots of your work, you'll be able to look back at your progress in those inevitable moments of crisis when it all starts to feel too much. More importantly, if you're dismantling parts of your kitchen that you intend to put back together again, then those pictures are sure to help inform your reassembly.
As well as taking periodic "progress" pictures, make sure to snap anything that's being taken apart. Photograph appliance connections before disconnecting them, and do the same with any light fixtures. Any cabinets that you're dismantling should also be photographed for future reference, especially those with more-complex fittings, like drawers and blind-corner pullouts. If you've ever embarked on a project like this before, you'll know that it's almost always easier to take things apart than it is to remember how they go back together.
Label everything!

Labeling is a great way to bolster your smartphone photography. Yes, you'll be able to see how certain cabinets go back together by referring to those pictures. But if you have lots of identical cabinets that you're re-painting, then labeling it all so that you know what goes where will help keep the right parts together. Even with multiple matching units, cabinets can warp slightly in the humid kitchen environment. This, in turn, can lead to differences in hinge alignments. With that in mind, it's always best to keep each individual cabinet (and all of its components) together, instead of mixing and matching.
You don't have to use actual labels, although, it's as good a chance as any to give that label maker you insisted on buying a run for its money. You can just as easily use painter's tape. Either way, simply label your components with corresponding numbers. For example, if you have a run of cabinets, label the end unit with a "1," the second with a "2," and so on. Finally, ensure that the corresponding door, shelves, hardware components, plus any drawers are all labelled the same way.
Keep a notebook handy

It's amazing how much you need to jot down when you're taking on a project as big as a new kitchen. Measurements that you take, for example, need noting for future reference. Shopping lists for the hardware store are constantly being updated, and if you're relying on takeaways to feed the family, you may need to take your kids' orders before they embark for school in the morning. Add to that the various things you "think of" that you need to run by your partner when they return from the hardware store, and you'll probably make good use of a simple notebook.
You can also use your pad to record things like product codes, and keep it handy when you're shopping to note down any potential paint colors for your cabinets. It's fantastic to have on hand during the dustier stages of your reno project, too, like when you're sanding. A notebook is far less prone to dust-damage than, say, your smartphone. Plus, a notepad doesn't run out of battery.
Use a paint sprayer to re-finish cabinet doors
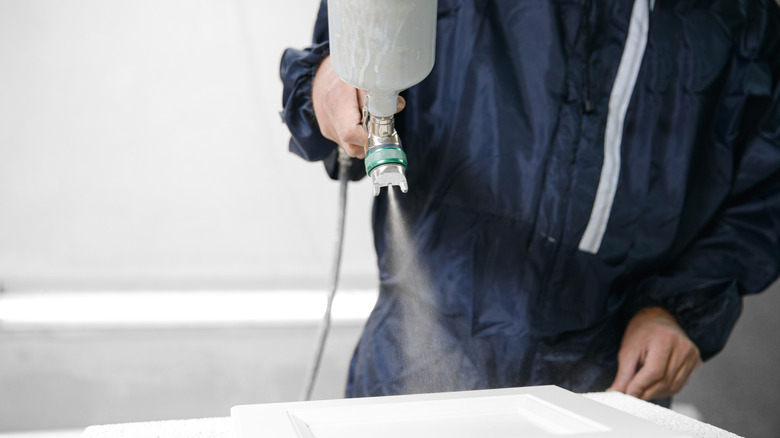
By refinishing your existing kitchen cabinets, you stand to save a small fortune versus buying a brand new set. However, if you're shooting for a professional finish, then it pays to think about how you'll do the refinishing. You could do it the old-fashioned way, however, if you don't have the appropriate types of paint brushes, then you may come to regret it. Not only that, hand-painting your cabinets can be time consuming. It's for these two reasons that a paint sprayer could be worth the investment.
These specialized tools are designed to apply thin and even coats of paint, with zero brush marks — precisely what you need for a professional finish. They're also designed to cover large surfaces quickly. They'll make light work of your cabinets versus trying to paint them by hand, and if you have lots of walls to paint, then they could potentially save you hours there, too. Especially if you're painting a large, vacant space — where you don't have to worry too much about protecting lots of appliances and counters — a spray gun is unmatched in terms of efficiency.
Create a hardware storage system to prevent annoying losses
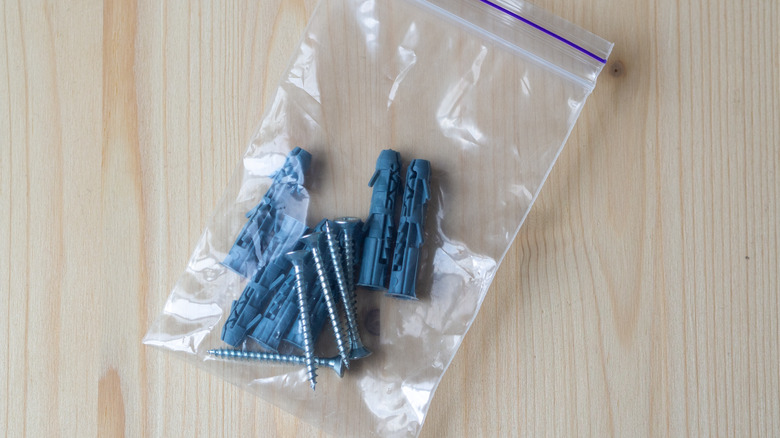
There are various ways to keep your DIY supplies neat and tidy. However, once the kitchen is ripped out and the reno is in full swing, even the most organized home improver can find themselves in disarray. Without a storage system in place, screws can get lost and hinges misplaced, leaving you needing to run to the hardware store at the most inconvenient times. With that in mind, it pays to think of a system you can use to keep your hardware safely stored when things begin to get messy. And it doesn't have to be fancy. All it has to do is keep your hardware safe and in a place where it's easy to retrieve.
For example, you could use an old see-through tackle box, or an old pill dispenser. Either of these will keep screws from rolling beneath the rubble and thus becoming lost forever. Alternatively, if you'd rather keep your hardware and cabinets together as "sets," then use a good old-fashioned Ziploc bag. Take the screws, hinges, and any other hardware from a given cabinet, bag it all up, and then tape the lot to the cupboard door.
Invest in laser-assisted levels and measuring tools
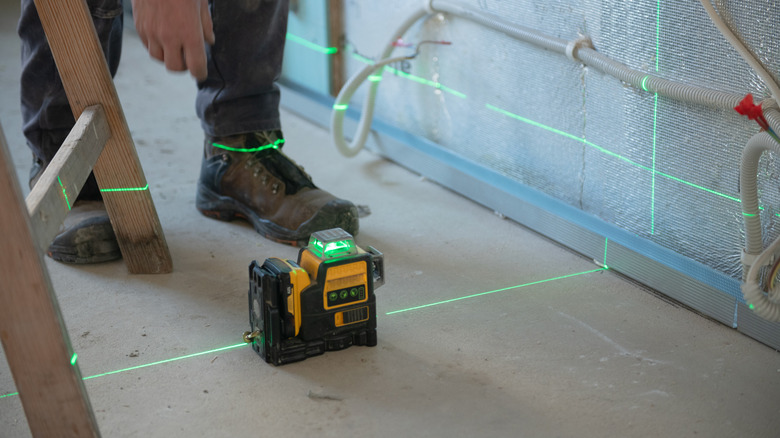
When you're mounting a set of shelves, or measuring the width of a doorway, spirit levels and measuring tapes are invaluable. But on a project as large as a kitchen renovation, where precision is the aim of the game, you may find they make your life harder, not easier. For example, when leveling a shelf, a minuscule inaccuracy may be negligible. But across a longer surface, which you'd have to measure in sections, those small errors will add up. Poorly leveled installations risk looking wonky and unprofessional, and if you get your space measurements wrong, you risk either over- or under-spending on materials.
For this reason, the benefits of laser-guided levels and measurers are hard to ignore. They're usually simple to operate, requiring you to simply "point and shoot" the laser. They eliminate the risk of compounding errors, and by doing their job in one "take," they can also help you save time. Laser-guided measuring tools will give you precise readings for things like your flooring and ensuring that your appliances will properly fit. Laser levels, meanwhile, will lend visible design choices like backsplashes a straight, professional finish.
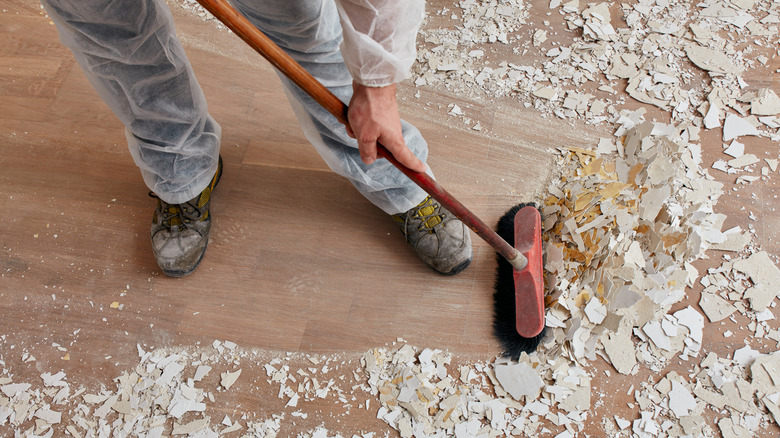
Protect your entire home from dust

Anybody that's undertaken a large-scale home renovation project, complete with demolition work and sanding, will tell you how dusty things can get. It's inevitable. And the thing is, dust spreads. Not only around the space you're renovating, but around the rest of the house. When it does, it's really annoying, and it can be seriously uncomfortable to live with — especially if it gets into your clothes and bedding.
With that in mind, pay some thought to how you'll keep the mess contained. Generally speaking, it's a good idea to keep the doors around the rest of your house shut. You could also consider using draft excluders, to prevent dust from creeping underneath. Try to stick to a single entry/exit point for the kitchen — perhaps an outside door. And if you can't, consider sealing the room that you're renovating. You can use plastic sheets and tape to do this, or you can buy dedicated zip-around door sealers, like this Dust Barrier kit from Pick for Life. And don't forget about your HVAC system. Those vents around the house can easily ingest dust and become damaged. Sealing them with something, even simple plastic wrap and some tape, can help to protect them, thus saving on unexpected — and costly — repairs.
Do a dry run before finalizing your kitchen installation
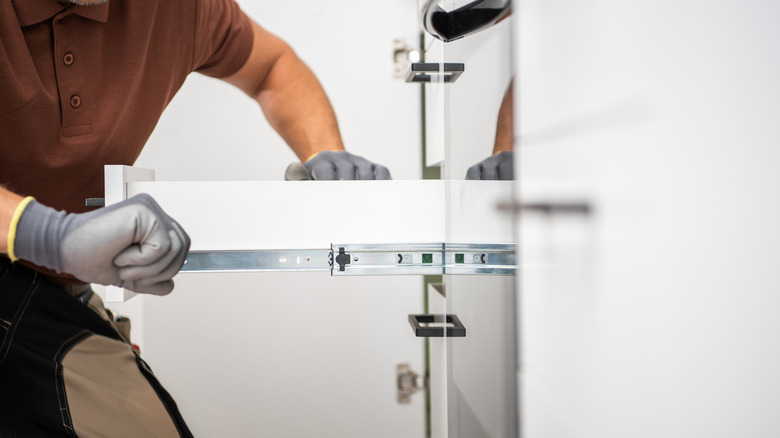
We probably don't need to tell you what a dry run is. But in the context of a kitchen renovation, it's hard to overstate its importance. Once you reach the final stages of your project, it's tempting to assume that everything's "sweet" and start screwing it all into place. But if you rush into the final assembly, only to find that something doesn't quite fit properly, you may have to take everything back out.
Instead, it's best to dry-fit your cabinets and appliances. This means putting everything in place — cabinets, appliances, and all — without hooking up any utilities or screwing things into the wall. The goal is to check that all your measurements are right, and to ensure that everything fits as you intended. Give your laser level another run-out to ensure those counters are nice and straight, then stand back and assess your work. Only once you're completely happy with how everything looks and fits should you start making your assembly permanent.
Give yourself plenty of lighting for late-night reno work
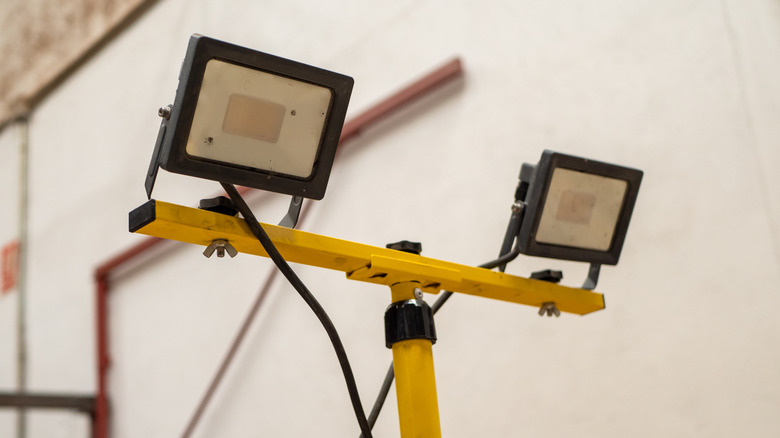
This one boils down to pure practicality. If you're DIY-ing your kitchen renovation, especially if you're doing it around your regular job, then working into the night is almost inevitable. And while you might have big ideas for lighting in your new kitchen, they're not much use until you've actually had a chance to install them. Instead, you need to think about how you'll illuminate your project once you've ripped the old lighting fixtures out. And it's important for several reasons. Firstly, if you're working with power tools or blades, insufficient task lighting can lead to accidents. What's more, if the rest of the room is dark, it's all too easy to trip over errant tools and materials.
Starting with the room as a whole, it's worth either hiring or buying general-purpose site lighting, which will help you navigate around the room and avoid tripping. As for task lighting, there are various options. A standard flashlight could be useful, but only until you need both hands for the job. You can also buy magnetic lights, which can easily be mounted on nearby metal surfaces. Alternatively, you could buy a head torch, which is guaranteed to help you see whatever you're working on clearly.
Adopt clean, clutter-free habits
We can't help but think about the phrase "tidy desk, tidy mind" as we flesh out this particular reno tip. Sure, the space you're working with is probably larger and more complex than your average desk. But the principle remains the same. If your renovation space is cluttered with materials and tools from several different parts of the project, then you may find it hard to focus on a single task. Instead, it can pay to "batch" your tasks by type. For example, if you have lots of sanding work to get done, then can you do it all in one sitting? If so, you'll only have to clean up the mess once, plus you'll be able to put the tools away instead of having them clutter up the floor (and your mind).
It's also worth adopting a daily cleaning ritual. Clean up any mess or dust at the end of the day, put your tools away, and toss any material cut-offs in the pile or the skip. Even if you don't manage to finish a particular task before you break for the night, taking the time to clean up your workstation and re-organize your tools will make life easier in the morning. There's nothing more annoying when you're in the mood to "crack on" than having to tidy up last night's mess.
Schedule deliveries before demolition starts

When you hand your kitchen renovation off to a professional, it's usually down to them to arrange the various deliveries. But if you're handling it yourself, it's down to you. And if you want to get the job done as quickly and seamlessly as possible, it pays to be organized. By scheduling all of your deliveries ahead of time, you can ensure that you have everything you need, exactly when you need it.
So, start a spreadsheet! List everything that you need to have delivered, including any appliances, cabinets, hardware, furniture, and lighting. Confirm your delivery times with your chosen suppliers, record them, and use them to build your renovation game plan. Assuming everything goes roughly to plan, your various deliveries should arrive around when you need them. What's more, if you know you have a delivery deadline for certain aspects of your project, it can help to keep your mind focused on the task at hand — instead of falling foul of procrastination.
Be meticulous and militant about your budget

If your goal with your DIY kitchen renovation is to keep costs down, then we cannot stress how important it is to stick to your budget. Whereas a contractor will "price up" the job, leaving you with a definitive idea of costs, a DIY renovation requires you to, well, do it yourself. And if there's one mistake you should avoid when redoing your kitchen, it's underestimating the costs. So, be meticulous. Go through everything that you need to renovate your space, down to every screw, and price it. Make sure to factor in any tools that you'll need to buy or hire, plus the cost of spare bits and blades. And if there are parts of your home improvement that are best left to a professional, then shop around until you have a quote and a contractor that you're happy with.
The goal is to ensure you don't inadvertently run out of money before everything in your kitchen is accounted for. With that in mind, it's also worth giving yourself some wiggle room — to account for any unexpected expenses that crop up throughout the project. It could be a broken-down drill that needs replacing, or hidden structural damage that needs repairing on-the-fly. Just don't confuse your desire for that shiny copper tap with an "unexpected expense." Instead, keep it in reserve for anything that goes awry. You never know; you may not need it. And in that case, you could always put it towards a bottle of bubbles to toast your new kitchen.