Use A Boot Tray To Create Budget-Friendly Pavers With A Savvy DIY
We may receive a commission on purchases made from links.
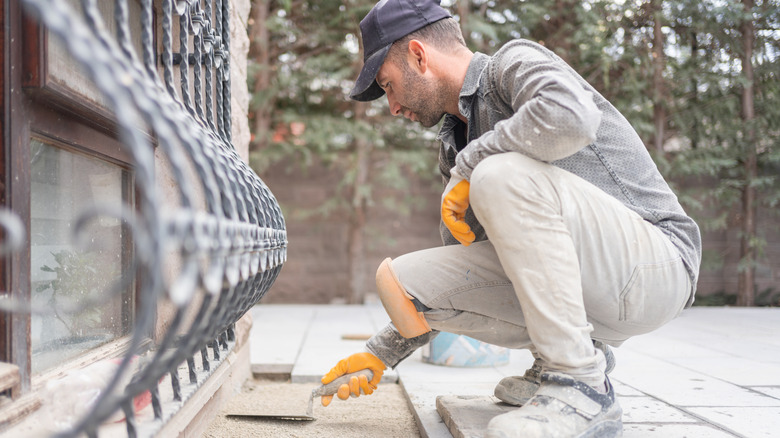
When it comes to budget-friendly paver DIYs, the internet is filled with interesting suggestions. You can even use old milk jugs to create budget-friendly pavers, but the problem is, you'll still end up with a basic, flat surface. Sure, you might be able to create some fun and interesting shapes, but that style doesn't work in more sophisticated landscapes. If you're looking for something a bit more decorative, TikToker @basicboringmarie decided to use a boot tray, which costs between $10 and $20 depending on the design, to DIY large, decorative pavers, and the results are stunning. Altogether, you can expect the supplies to cost you under $50, depending on how creative you are with your budget and how ambitious you get with the project.
This DIY is designed to create pavers with intricate designs by using a boot tray as a mold for your mortar or concrete. Of course, that means you will need to take precautions to safely complete this savvy DIY by taking the time to understand the difference between concrete and cement — the original DIYer recommends not using cement, as it can crumble easily. Concrete generally has visible rocks when it dries, which may not work in narrow crevices. Many DIYers who have shared this project on social media opt for mortar mix, which costs less than $10 for a 60-pound bag. Mortar mix is more closely related to concrete than cement, but without coarse fillings that end up being visible in the pavers.
Getting your mixture right for your boot tray paver DIY
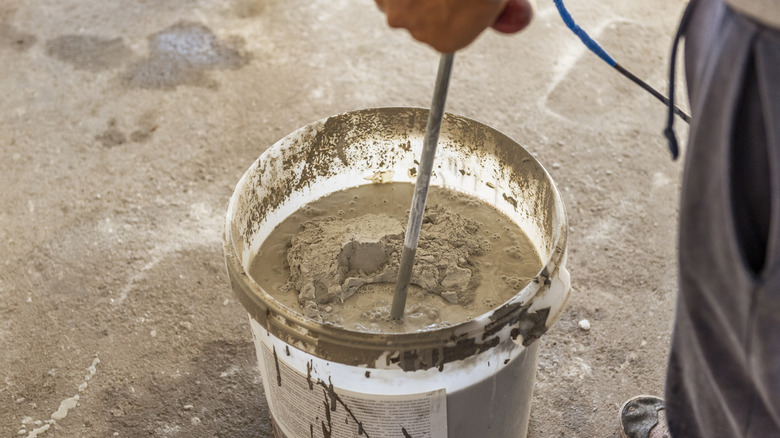
Because boot trays often have interesting designs imprinted into them, it makes them ideal for this decorative DIY, but it requires some knowledge and skill to execute perfectly, as @basicboringmarie demonstrates in her TikTok. Many viewers suggest that in this case, the poster made the original mix too thick or released it from the mold before it was fully cured. It is generally recommended to have a mixture that is the consistency of thick pancake batter. In addition, many people suggest shaking the mold or using a device to vibrate it immediately after pouring it to reduce air bubbles and fill in the details.
@basicboringmarie Making our homestead prettier one project at a time #homestead #cementmold #diy #diyproject
Ultimately, the exact method for mixing and curing will depend on what type of mix you choose. It is always best to follow the directions on the package. If you choose to use a mortar mix or something similar, adding a wire mesh to the paver when you pour it can help create a stronger bond and ensure the paver doesn't crack or break when it is released. Commenters suggest using chicken wire if it is on sale at local hardware stores.
Putting it all together: from boot tray to garden path
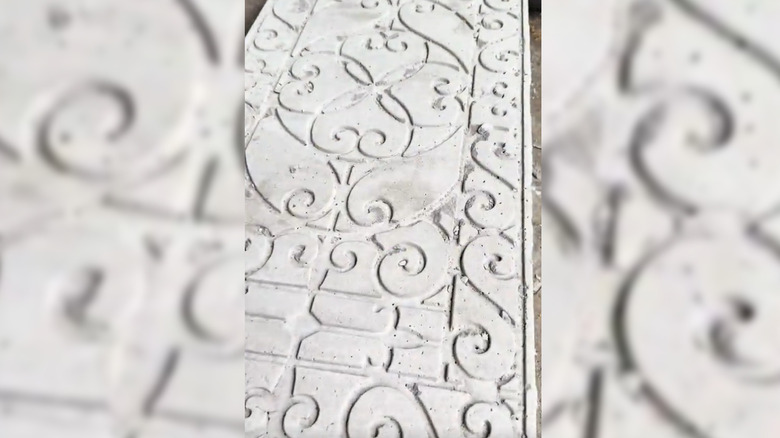
The good news is, once you get your mixture and curing methods right, these DIY boot tray pavers work wonderfully to upgrade your yard's style on a budget. First and foremost, you'll want to prep the boot tray to perform as a mold. Start by cleaning it thoroughly so it is completely free of dust and debris. Then, add a non-stick coating to make sure your pavers will release easily when they have finished curing. Without a coating, they can get locked in the mold, making it nearly impossible to get them out without damage to the paver of the mold. Some DIYers suggest a coating like cooking oil, while others use an industrial lubricant like WD-40 or a silicon mold release, each of which costs between $5 and $10 at most retailers.
After the pavers have cured and they have been released from the mold, you can finally see it all come together. Most boot trays are rectangular, which is a great style to create innovative walkway designs that will spice up your backyard. You can lay them side-by-side or fill in the space around them with gravel. Whatever you choose, be sure to install the pavers on a level surface to prevent cracking during or after installation. First, lay landscaping fabric like Vigoro's garden fabric, which costs about $10 for 40 feet. Add a layer of packed gravel and then level sand to create your base. Gravel and sand are generally sold by the ton, but if you don't need that much, you can often get these materials for free from work sites or other local sources. Finally, finish off your design with optional extras like Sherwin-Williams concrete stains for a bit of color and waterproofing.