Turn Old Egg Cartons Into Unique Decoupage Vases

With eggs being a staple breakfast item in most homes, extra egg cartons are a common occurrence in kitchens. And after using up all the eggs, it's easy to view that empty cardboard box like trash. But wait, don't throw out those old egg cartons without trying a few genius DIYs. One of our latest discoveries is turning them into home decor pieces. DIY enthusiast Merry Craft on YouTube does a great job of pulling this off, using cartons and a plastic bottle to make a stunning decoupage vase.
Decoupage is an art form that involves gluing pieces of material, such as paper or fabric, onto the surface of an object to make it look decorative. Revamping a tired-looking kitchen tray, fashioning wood cutouts into striking wall art, or giving an old dresser a new look are some of the creative ways to use decoupage in your home. So in this project, we'll use this decoupage technique, with the egg carton serving as the decoupage paper and a plastic bottle as the object for decorating.
You'll end up with a unique vase that totally looks high-end. Gather the necessary supplies: an egg carton, a used plastic bottle, acrylic paint, such as this FolkArt Acrylic Paint available on Amazon, and decoupage glue, such as the popular Mod Podge or white glue like Elmer's Liquid White Glue. Toolwise, you'll need a paintbrush, a sharp pair of scissors, and/or a utility knife, a pot of water, and a pair of tongs.
How to repurpose your old egg carton into a chic decoupage vase
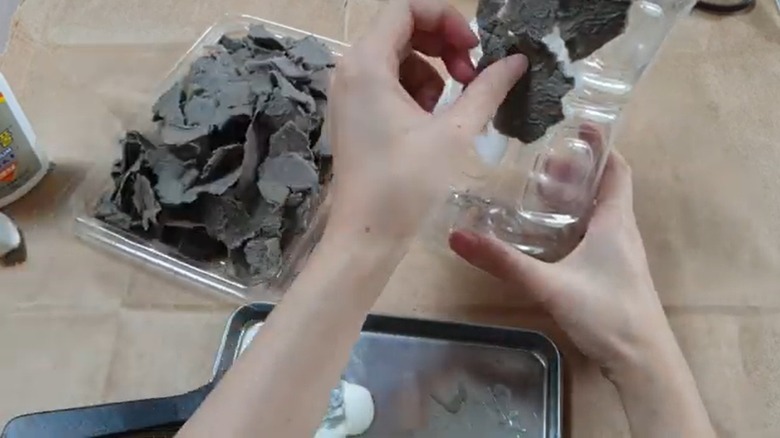
To create your beautiful vase, you'll start by tearing the egg carton into tiny pieces. You can make this process easier and faster if you first cut the carton into two halves with scissors, then pinch off small bits of the cardboard from one corner. After shredding the egg carton, gather up all the little pieces and place them in a pot of boiling water (ensure they are completely submerged) for a couple of minutes. Once all the carton pieces have absorbed water and shrunk, remove them from the water with tongs and set them aside to cool.
While the wet cardboard cutouts cool, grab your plastic bottle, clean it, remove any labels, and cut off the upper section, which is usually slanted, using your scissors or a utility knife. You want the bottom cylinder-shaped part. The next step is to cover the cylindrical bottle with the wet carton pieces. First, apply your Mod Podge on the bottle, one small section at a time. If you're using white glue, dilute it first in a ratio of 3 parts white glue to 1 part water before applying it to the bottle. Working systematically, carefully separate the damp shreds of paper and attach them one by one to the glued part of the bottle. Do this until the entire exterior of the bottle is completely covered, then leave it to dry.
Customizing your DIY decoupage vase to your taste
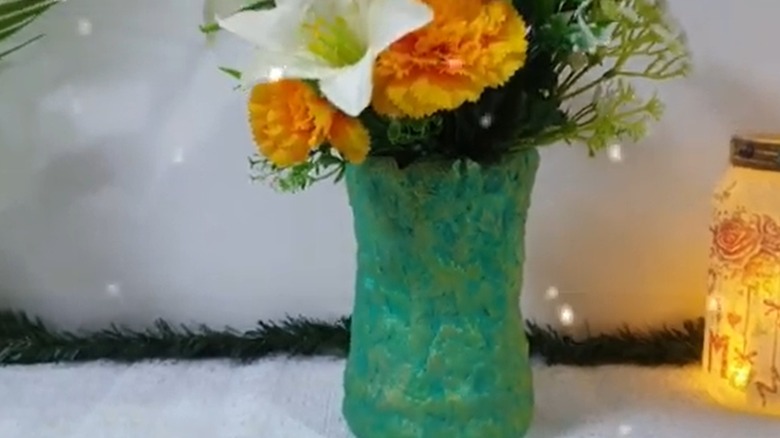
The final step is where you decorate the vase, and one of the ways to add personality to your decorating scheme is by adding a touch of color. Just like the YouTube creator, you can use acrylic paint to do this. Using small brushstrokes, apply a coat of white paint, making sure to cover all the dips and crevices. Give the paint time to dry, then apply a second coat, this time using a color paint of your choice mixed with a little white. If you're using green, like the YouTube creator, wrap up with light touches of yellow paint followed by gold paint for a textured effect.
Alternatively, paint different shapes on the vase, such as horizontal or diagonal lines or polka dots. And if you're more artistic, this is an opportunity to go all out and draw actual images using the paint, like flowers, ladybugs, or fun cartoon characters. Another easy way to add pizzazz to your DIY vase is to glue on dry or faux flowers on the outer surface of the vase. This will make the vase a complete decorative piece on its own, even without actual flowers inside.