Not Paint, Not Stain: The More Stylish Way To Update Golden Oak Cabinets
We may receive a commission on purchases made from links.
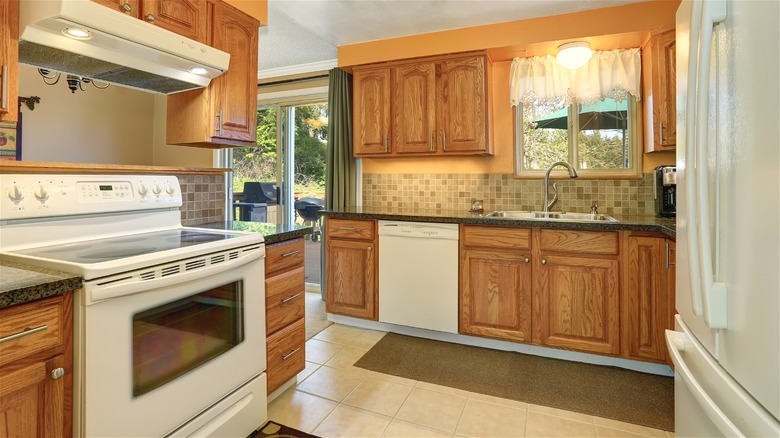
Golden oak is one of the outdated wood tones to avoid on kitchen cabinets, and if you already have it, you might feel like you're out of luck. The good news is that you can give your cabinets a refresh without spending a fortune or completely painting them over. For those who still enjoy a natural woodgrain look, cerusing is a brilliant technique that can bring out the grain pattern of your cabinets while also mellowing out the bright golden-orange tones.
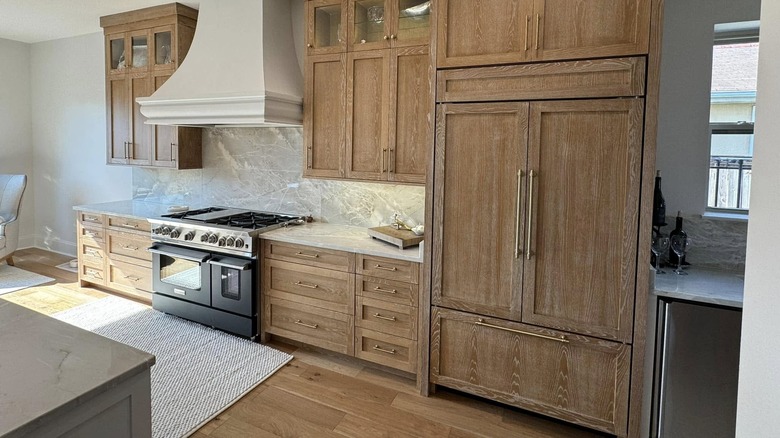
Also known as a liming finish, cerused wood finish cabinetry has a deeply textured, soft-washed appearance that plays well in natural, organic interior design styles. By applying a cerused finish to your outdated golden oak cabinets, you can transform them to fit into a modern shabby chic, weathered seaside, or earthy boho kitchen that nails the eclectic aesthetic. Previously used as a technique to preserve wood furniture, ceruse looks similar to whitewashed wood or chalk paint, but much more subtle. In most applications, a lighter shade of ceruse will be used to bring out the lines and pores of the wood grain, which can have a softening and brightening effect overall.
This technique can be done with watered-down paint, liming wax, or a wood stain and finish, and it works brilliantly on both red oak and white oak cabinetry. From staining or painting the wood to leaving it bare and choosing a unique ceruse shade, there are endless ways you can adjust this project with a wide variety of results. It's wise to test the whole process on a sample piece of oak before committing to it on all of your cabinets.
Preparing your golden oak cabinets for a cerused finish
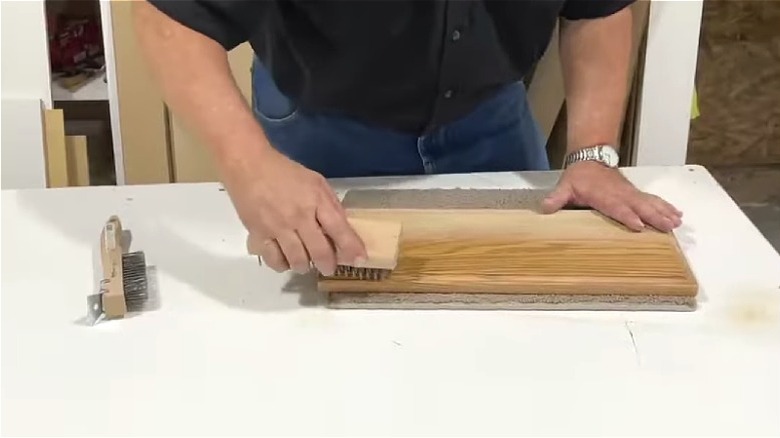
Preparation is key for good results, so start by removing your cabinet doors, cleaning out the cabinets, and stripping everything back to the bare wood. This means you'll need to remove any existing sealants, paints, or stains with a chemical paint stripper and sander. Next, use a wire-bristled brush to enhance the grain pattern, if you'd like. Start at the outside edges of each wood panel, then push in the same direction as the woodgrain to compact or scratch out lines of softer wood. This deepens grooves and lays the groundwork for a more impactful ceruse pattern. You must start with a completely clean surface and open wood pores, so after sanding and brushing, thoroughly vacuum and dust the wood with a microfiber cloth.
Unless you want to leave the natural oak color alone, applying a stain or paint will be your next step. You can choose any color, but remember that this color will lie underneath the final ceruse layer, so it will be slightly softer and lighter than it looks on the label. Allow the stain to soak into the wood for a few minutes, then wipe off any excess with a microfiber cloth. Let this layer rest overnight to ensure it's dry when you apply the ceruse. If you're concerned about the color bleeding into your white or light cerusing formula, you can apply one coat of thin, water-based polyurethane to seal it in first.
Finishing and maintaining cerused wood cabinets
The next step will be to highlight or "glaze" the woodgrain with either a diluted paint, liming wax, or stain. Most people create contrast with a light or white ceruse, but it can also be done with dark colors like gray, black, and brown, or even bold colors like blue. For his cerused projects, custom cabinetry expert and business owner K-C Bonney reaches for Rubio Monocoat Oil Plus 2C in the shade Super White. "The beautiful thing about Rubio is it only bonds to the wood, so you're not going to get overlap lines," he explains on YouTube. "It doesn't bond to itself. Once it sticks to the wood, that's it."
Generously spread the glaze with a plastic scraping tool or staining sponge, working it into the grain. "Within 15 minutes of application, you need to go back with a microfiber cloth or any kind of lint-free rag, and you're going to buff off any excess," Bonney advises. As you wipe it away, some glaze will remain sunken into the grooves — that's exactly what you want! If you find that your glaze layer is covering too much wood, follow up with a ball of steel wool or fine sandpaper. After letting this dry, consider protecting your cabinets with a topcoat.
Once they're up, cerused oak cabinets are relatively easy to maintain; just keep them dusted and avoid using any harsh cleaners or polishes. Over-polishing your wood furniture can do more harm than good and ruin the rustic, natural-looking appeal of cerused oak. Wipe up spills quickly to prevent them from staining the light woodgrain. If you ever decide to change your cabinets again in the future, you will need to strip and sand them again to remove the cerused finish.