

Man Transforms An Old Wood Crib Into A Beautiful Garden Bench With An Impressive DIY
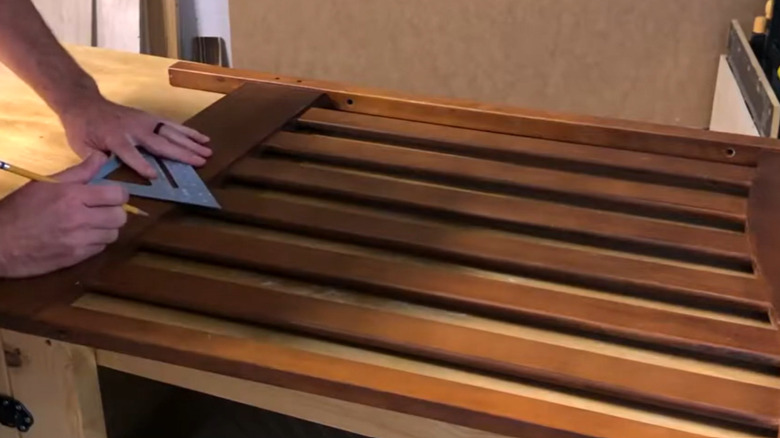
When you're welcoming a new baby to the family, designing a chic nursery is an exciting part of the process. Buying new toys, decor, and furniture can prepare you for this major step in your life and ensure your baby has a comfortable, safe space ready when you bring them home. Your child won't be an infant forever, though. Within a couple of years, it's likely that you'll need to swap out your crib for a more appropriate sleep space. It can feel like a waste to toss an expensive piece of furniture after such a brief period, and for many parents, the item's nostalgic value makes them hesitant to sell or donate it. Instead, give that sentimental piece a useful second life by partially disassembling and rebuilding it into a simple, stylish bench with a built-in seat.
In a video on YouTube, a clever DIYer going by Mill Cove Woodworks shared just how simple this process can be. Thanks to the simple shape of most wood cribs, it's easy to transform them into comfortable, stylish, and sturdy seating with a few basic woodworking tools and some extra materials. Before getting started, make sure it's structurally sound, with no cracked wood, loose joints, or other damage that could compromise the finished bench. To complete this project, you'll need your wood crib, a jigsaw or miter saw, a pocket hole jig, a drill/driver, a square, a tape measure, and some clamps. You should also pick up some wood screws, a couple of 2-by-4s, some 1-by-6s, and paint in your color of choice.
Assembling the basic structure of the bench

Before you get started on the actual building, you'll need to somewhat disassemble your crib. This won't require you to break everything down completely, but you should disconnect the sides from the base. You'll need both short sides and one long side for this project — the remaining pieces can be used for another DIY that provides a clever way to repurpose old cribs or as scrap wood. Keep the hardware handy as you work, and label pieces as needed so you know which parts belong together.
To begin, you'll want to cut down the short sides of the crib until you reach your desired bench depth using your saw of choice. If you want an extra-deep seat, you can leave them as-is, but the average measurement is between 15 and 18 inches for a garden bench. Measure both sides carefully before cutting so the seat will be even and level. From there, drill some pocket holes with your jig — you'll use them to attach the bench sides to the back panel, which was previously the long side of the crib. Before attaching these three pieces together, make sure the legs are all the same distance from the ground; even a little bit of a difference will land you with an annoying wobble. The final result should be a simple C-shaped frame that will function as the decorative sides and back of your bench.
Creating the seat and adding your finishing touches
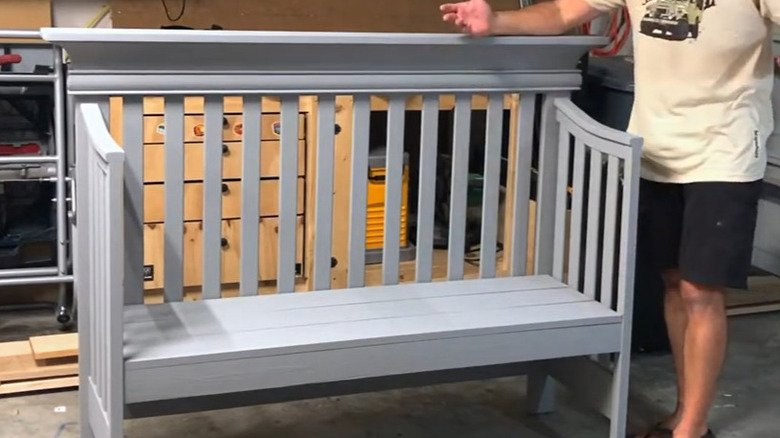
Now that you have your basic structure down, it's time to get to the actual building. To create a seat, you'll want to build a frame out of your 2-by-4s — you'll need two pieces that fit the bench's width and four pieces that make up its depth, making sure to subtract a couple of extra inches from the longer 2-by-4 pieces. Your square and clamps will come in handy here. Because the sides will be painted and concealed by the exterior frame, you don't have to worry about creating pockets. The 1-by-6 boards will form the seating surface on top of this frame, so cut a few to the proper width and depth. At this point, you can test-fit the boards to make sure everything lines up, but don't screw them down just yet.
Before you complete the final assembly, now's a good time to paint. An all-over paint job will ensure a cohesive look, but you could also always leave the crib pieces as-is and attempt to match (or contrast) the paint or stain job on the seat. This is up to your preference. Either way, make sure to use a weather-safe paint if you plan to style your bench in the garden. A weather-resistant finish is especially important for outdoor use, and exposed wood ends should get extra attention.
Finally, it's time to assemble. Slide the seat frame into the crib structure at the desired height, attach it securely, and finish off with the cut 1-by-6s. After driving in your final screws, you'll have a stylish bench that both honors your happy memories and helps you make the most of something you already own.