

DIY A Show-Stopping Lantern For Your Patio With This Dollar Tree Board Game
Accent décor can lend a designer touch and tie together the feel of a room or outdoor space, by adding a stylish focal point to a corner, shelf, or tabletop. It can also get pretty expensive if you're browsing standard shops and websites. For outdoor entertaining, budget-friendly patio lighting ideas can make a real difference, to a space and your wallet. One way is to DIY your own customized piece. For example, YouTube creator Crafting with JC had an idea to build a lantern from board game pieces.
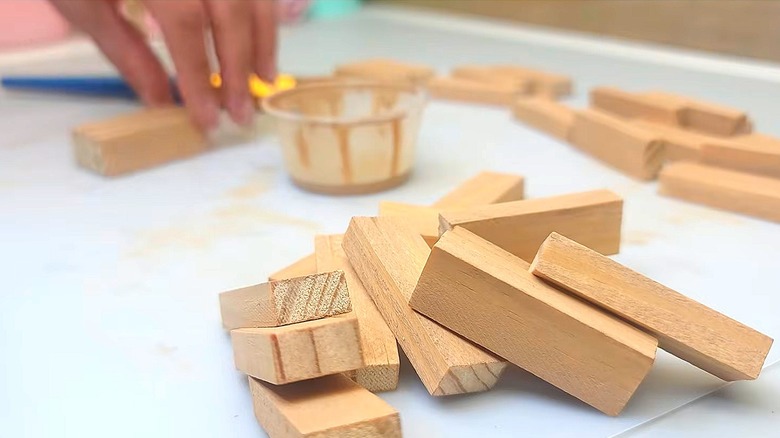
It all starts with the game Tumbling Tower from Dollar Tree, which costs $1.75 and comes with 72 wood pieces. For this lantern, you'll need 36, so you can create two lanterns for less than $2 if you have some craft supplies on hand. In addition to the board game pieces, you'll need some paint to create a stain. This DIY calls for Apple Barrel's Khaki and Territorial Beige paint in a matte finish — both 58 cents at Walmart. You'll also need wood glue and a carpenter's square to keep everything straight.
Putting together this Dollar Tree patio lantern
Rather than paint the wood pieces, Crafting with JC turns the paint into a thin stain. When you brush it on, the diluted color allows a bit of the wood grain to show through. Brush the stain on all surfaces and sides except the ends. Wipe excess paint with a clean cloth as you go. Alternatively, you could use the acrylic craft paint as is, or pick different colors that maybe better complement your patio color scheme. Once the paint is dried, it's time to assemble your lantern.
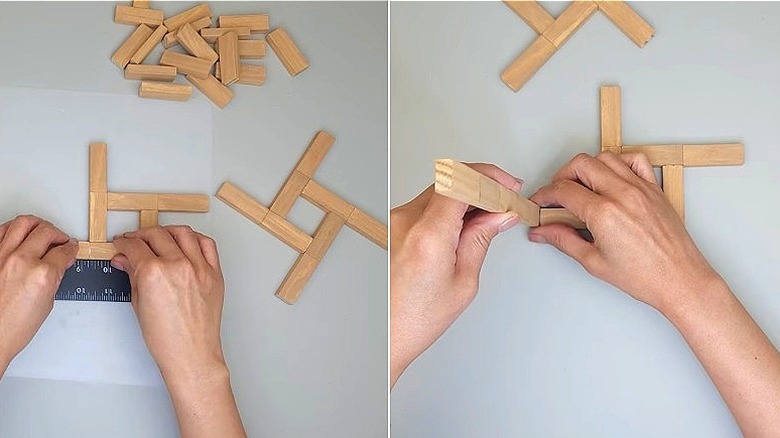
For the top and base of this DIY Dollar Tree lantern, you'll use a total of 16 blocks, evenly divided. Form two flat squares of four blocks each –– affixing them with waterproof wood glue at 90-degree angles so that one end of each block is exposed. A carpenter square can help to make your angles precise. Glue the ends of four more blocks to the exposed edge of each side of the squares (above left image), using a plastic straw to remove any excess wood glue or scraping it off with a sharp edge. Set these pieces aside to dry.
Next, glue five blocks together, end to end, to make the sides of the lantern; you'll make four sides total. Allow the glue time to dry, then it's time to build the lantern. Using one square as a base, glue each five-block strip vertically to the end of each "arm" (above right image). Once fully dry, flip the piece upside down and apply glue to the unpainted ends of your other end piece; then match the supports up in similar fashion. Note there's a difference between wood glue drying and curing times, so allowing the glue to fully cure for 24 hours before use will help stabilize the piece long term.
Building different lanterns with the blocks
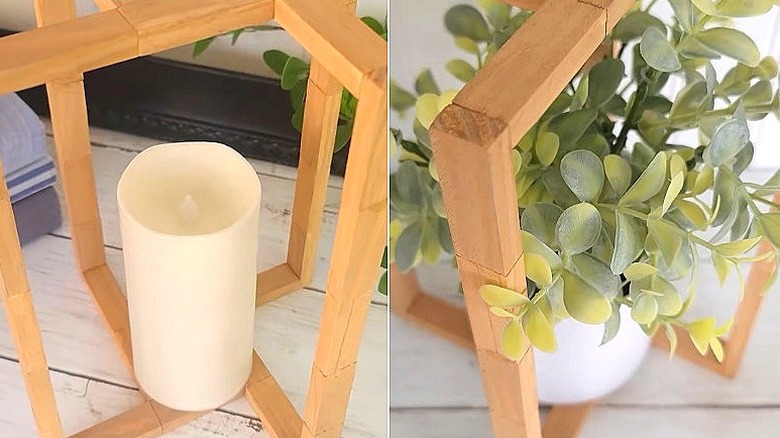
To your newly crafted open-sided lantern, you could add a battery-powered candle (10 inches or smaller) on a glass plate candleholder. Or, as Crafting with JC explains, you can use this DIY lantern made from wood game pieces to display other items on your patio, such as a small potted plant — faux or real.
Further, you could take the building blocks of this idea, and experiment with other lantern designs. For example, you could glue together three pieces to form a "U," and then stack these 24 blocks high. Each block measures 2 inches wide, and 24 blocks stacked flat would measure 8.63 inches. If you turn the wood blocks on their side, it can be even higher. You could also build a small box from the blocks, two blocks for each side for a 4-by-4 container to hold your flameless candle or plant pot.
At Dollar Tree prices, you could pick up a few Tumbling Towers to try out even more designs and shapes. And while this DIY called for a paint stain, keeping the blocks as they are would work, too, especially with certain outdoor/indoor rustic lighting ideas.