

Transform Empty Pet Food Bags Into A Durable Gardening Apron With A Simple DIY (No Sewing Required)
We may receive a commission on purchases made from links.
You may remember the heady days of the duct tape craze. Everything from wallets to prom dresses was designed and constructed with it. People still use it in creative ways, and its sturdy, sticky staying power makes it a solid choice for upcycling crafts, like turning a pet food bag into a durable garden apron. This idea comes from YouTube creator Chickens in My Garden, who used chicken feed bags with a photo she liked to make a quick, no-sew apron that can be easily sprayed off for cleaning.
These bags are usually made from woven polypropylene (WPP) and are stronger than most plastic bags. Unfortunately, they take 20 to 30 years to break down in a landfill, so transforming them is a smart way to repurpose your pet food bags around your home and garden. To make something similar to the YouTuber, you'll need one or a few large, empty woven polypropylene pet food bags, scissors, duct tape, and garden twine like the MAQIHAN Plant Ties from Amazon. You can also use a plastic tarp across your workspace to ease sticky mishaps with the tape. A tip to consider: Use warm water and grease-cutting dish soap to clean and disinfect the plastic bags so you can reuse them. Let them dry thoroughly — bright sunshine does a great job! When your materials are set, you're ready to make your apron.
Creating the front of the apron
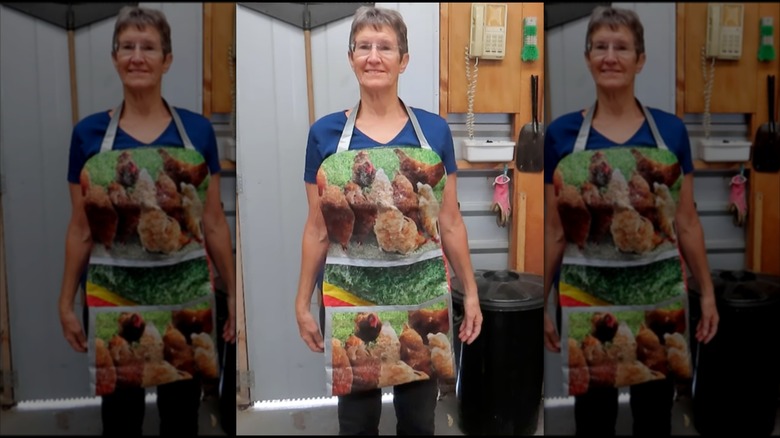
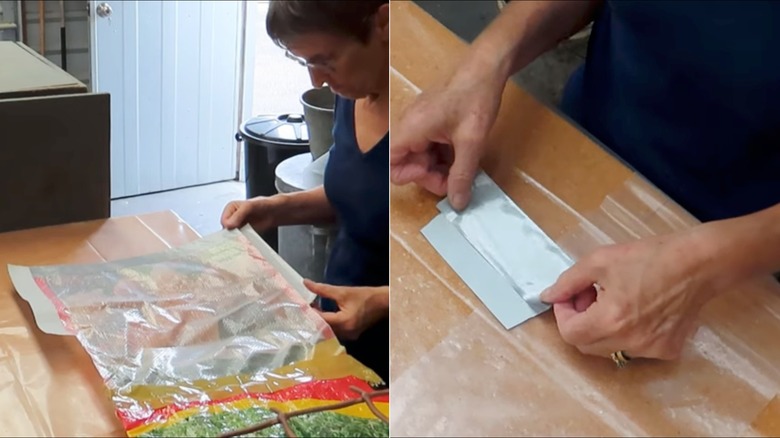
If your bag has a photo or design you'd really like to feature, use two bags for this project so you can show it off twice, once on the chest and again on the pocket. Otherwise, you can make the entire apron from one bag; just adjust the following instructions accordingly. Start by cutting off the top and bottom seams of both bags, then cut a clean rectangle around the photo (you'll fold it for a deep pocket later). For the second bag, cut a longer rectangle the same width as the first. This will be the top front of your apron. Use scissors to round the upper corners for a more polished look. Who says you can't be chic in the garden?
Lay them down end to end, one face up and the other face down. The photo you want to display should face the ground so that when you fold it, it will be right-side up. Then, use thin strips of tape to "sew" the bases together on both sides, creating one long sheet. Now, it's time to check the fit. Hold the sheet against your body to see where you'd like the base of the pocket to land, then lay it back down and press to crease. For a smooth top pocket edge, fit a length of tape along the base of the bag and fold it over to cover the raw edge. Next, turn the piece over –– wrong side of the pocket face-up –– and line both sides with the duct tape on the offset. Carefully fold the pocket up, then fold the tape over the pocket backing at the base of the apron to seal. Now, you've got a big pocket to hold supplies!
Tying the apron together and customizing it
To craft the neck loop, snip two long, matching strips of tape. Lay one directly over the other, offset by about ½ inch. Fold one exposed sticky side over the other, then flip and secure the opposite side. It's time for another quick fit check: loop the tape around your neck, positioning it against the top of your apron. Leave enough slack for it to easily slide on and off over your head. Once you've decided on the ideal length, position the ends against the apron's top backside, trim excess, and fasten securely with a couple of short pieces of duct tape.
To finish up, make the waist ties. Flexible garden twine adds a nice splash of color and has some helpful stretch to it. Loop the apron over your head once more and figure out where your waist falls, then cut two generous lengths of twine (you can always trim them down later) and attach one on each side along the back waistline with more duct tape. Your handy, upcycled apron is complete! You're ready to clean your pet's crate or tackle that weekend backyard checklist. Just hose off your apron when you're finished!
Personalize your apron by using brightly colored duct tape or fun, printed designs to mix and match for extra pizazz! No duct tape? Heavy-duty packing tape works in a pinch, and you can use excess strips cut from the bag for the neck strap and waist ties; they'll just have less stretch. Whichever route you take, you'll have a super unique DIY apron, which is the must-have product that makes cleaning the house a breeze.