

She DIYs A Garden Walkway With Pavers Made From Quikrete And Rubber Edging
Adding unique elements to your property is what makes it feel personal, but you also want any additions to be functional. If you've grown bored of basic garden walkways, there is an easy DIY that utilizes just a few affordable supplies to create a one-of-a-kind feature. With rubber edging, Quikrete, and a few simple finishing touches, you can handcraft some gorgeous, oversized, round pavers for a whimsical walkway.
The inspiration for this DIY comes from Instagram creator Kingy_Kottage, who shows how she transforms a dirt-filled courtyard into a dreamy secret garden. The video showcases a simple but brilliant method for designing pavers right in her garden, without having to haul heavy stones into the yard. With a few affordable tools — a mallet or hammer, a concrete smoother, a paint roller, and some outdoor-suitable paint — the rubber edging and Quikrete become some not-so-typical concrete pavers. The large, bright, circular stepping stones are easily something that could be found in a hotel courtyard but are a surprisingly beginner-friendly project that anyone can pull off without too much time, money, or effort.
How to make large round walkway pavers
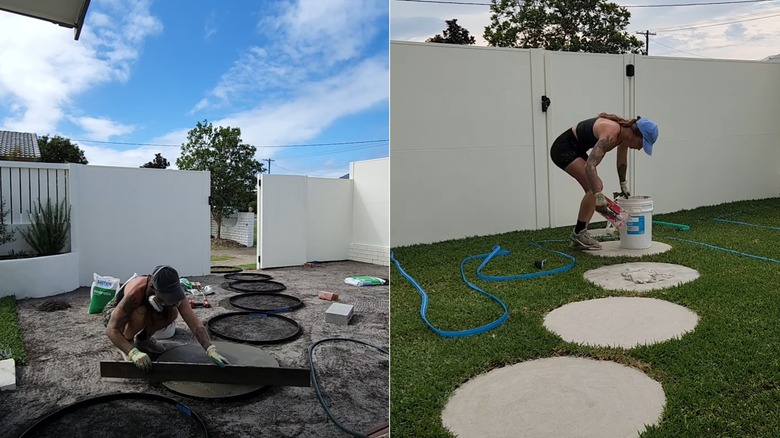
If you love this DIY and want your own version, you can copy the same steps for a similar end product. Begin by taking lengths of flexible rubber edging and forming them into circles for the concrete mixture to go into. Use strips of painters tape to hold the ends together. Be thoughtful about the sizes of the circles as you won't be able to go back and change them once the Quikrete is poured. Once in circular form, use your mallet or hammer to drive the edging into the ground so that the mold doesn't leak and the finished pavers are at your desired height.
For the next step, mix your Quikrete by following the safety and usage instructions on the product's packaging, and pour it into the circular molds. Carefully level the top of the mixture with a concrete smoother for a uniform appearance and the best performance as a stepping stone. Remember to plan out your project when the weather will allow for proper curing conditions — otherwise you might be left with pavers that don't perform as well as expected. After leaving the concrete to dry overnight (or for as long as the instructions denote), you should be able to easily peel off the rubber edging from the stones to reveal your pavers.
As a final step, you can paint the pavers for a uniform appearance that is more appealing than the gray concrete. While some DIY projects involving concrete can be tricky, this one is straightforward and beginner friendly, making it an ideal option to increase your home's curb appeal.
Personalizing your DIY paver walkway
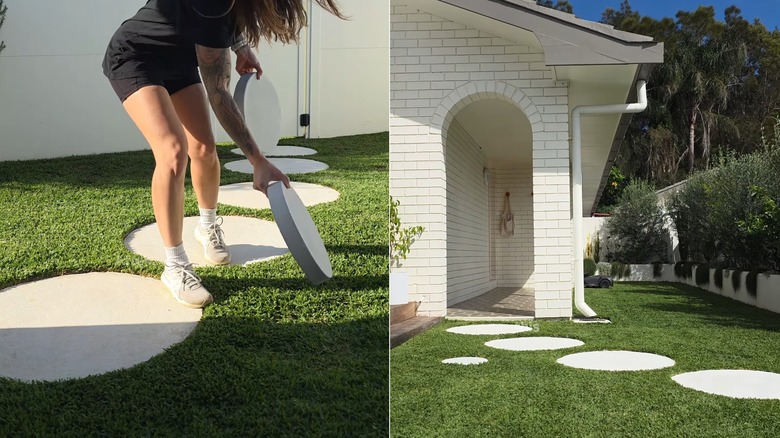
The simplicity of this DIY makes it the perfect candidate for personalizing it to varying tastes. While the round pavers are undoubtedly lovely, modern, and chic, you could use the rubber edging to create oval stepping stones for a more unique look. Another option is to utilize landscape stakes to secure the edging in a wavy form in order to create more whimsically shaped pavers.
Keep the creativity flowing and give your concrete garden path a hand-painted upgrade. You can glean inspiration from Mediterranean tiles, which feature bold, bright colors and patterns, or you can use a stencil to add intricate designs to them. Another fun way to personalize the stones is to get your hands on some mosaic tile pieces and press them into the Quikrete while it is still wet. Once the concrete has set, you'll be left with truly special pavers for your walkway. Remember to grout and seal your mosaic masterpiece to protect it for the future — this is especially important for areas that experience freeze-thaw cycles in the colder months. Want to take your walkway a step further? Brighten your garden path with glow-in-the-dark stones, which will keep it looking magical both day and night.