How To Install Central Air With No Existing Ductwork
If you don't have ductwork in your home, don't fret! It's not the end of the world when you have a variety of ductless air units to choose from. Some ductless air units work with just a click of a button, and others require some easy hours of installation. Regardless of the variety, they are super easy to install and are an excellent replacement for central air ductwork systems. It might even be better than ductwork air units, and Hiller Plumbing, Heating, Cooling, and Electrical offers many reasons, including its effectiveness.
The major convenience of ductless air units is flexibility. You can decide to install different units in various rooms to choose which room you want, warm and cold. Central air conditioning using ductwork sets one temperature for the entire house. Fire & Ice Heating and Air Conditioning also emphasizes the energy efficiency and advanced technology of the ductless system. You don't have to adjust the settings like central air conditioning manually. Plus, it means fewer bills to pay.
Choose the mini-split ductless cooling system
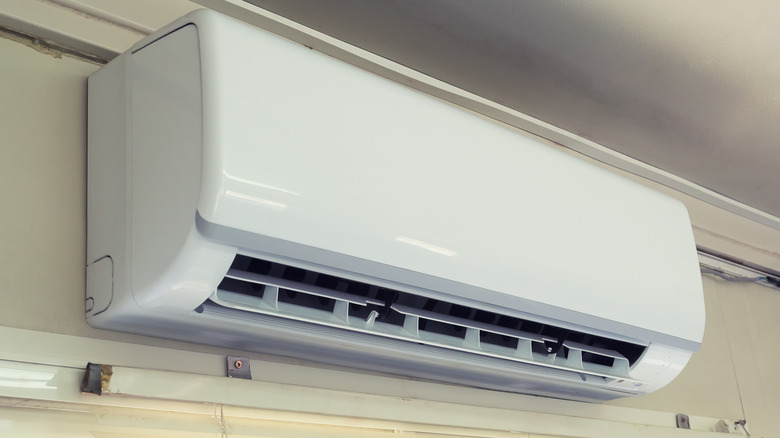
We rank the ductless mini-split air conditioning system as the best. Even though you would have to create a hole through your wall, it's better than putting your entire house under construction for ductwork installation. It comprises two parts: an outdoor condenser and an indoor unit. These two units are connected by electrical refrigerant and condensate lines, per Hiller Plumbing, Heating, Cooling, and Electrical. The number of indoor units is up to you. The mini-split air conditioning system is famous for its versatility, simple installation, and high energy efficiency.
You could go for a Variable Refrigerant Flow unit (VRF) for commercial settings instead. The VRF system is exactly like the mini-split system, just that each indoor unit has its own controls, i.e., it is not dependent on a single outdoor unit. This gives you the ability to choose the temperature of each room. You could also try a temporary solution like portable air conditioners or window air units, according to Ambient Edge.
Mark out the mini-split placement
To install a mini-split yourself, you would need a few tools. They include a marker, mini-split indoor backplate (this should be provided in the package), adjustable wrench, torque wrench, drill, drill bits, hole saw, level, utility knife, wire cutter, wire stripper, head screwdriver, flat lay screwdriver, safety glasses, work gloves, and a ladder, per Cielo WiGle Inc. You should also get a concrete or plastic pad for the outdoor condenser unit.
Before purchasing your mini-split, consider the size of the room and where it will be placed. According to wikiHow, your mini-split must have 6 to 12 inches of space on both sides, and the ceiling must be high enough to set it 7 feet above the ground. This will allow equal airflow throughout the room. It would be best to avoid electrical noise from radios, televisions, telecoms, telephones, etc., as it can cause your air units' operations to fumble. Gas leaks, oil mist, and sulfur aren't good friends of mini-splits either. When you've allocated the installation areas, it's time to install your outdoor and indoor unit rests.
Install rests for the outdoor and indoor units
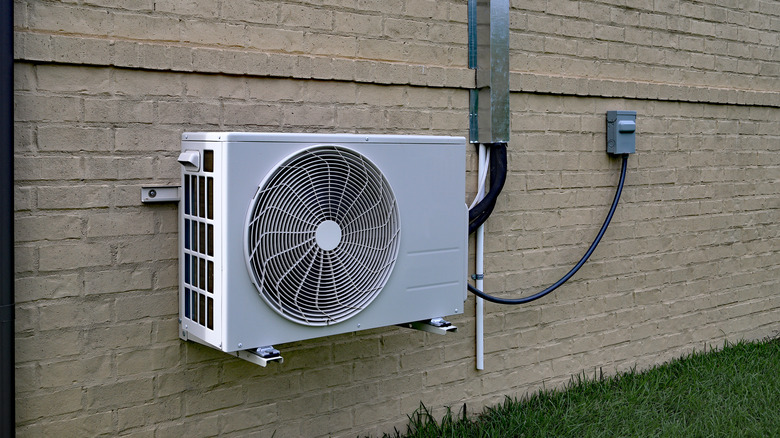
Your outdoor unit needs to be suspended from the ground to be stabilized and leveled, per Cielo WiGle Inc. Simply fill in a wooden frame with concrete or screw a wooden board on top to create a condenser rest. If you don't want your outdoor unit getting snow-filled during the winter, invest in condenser wall brackets instead.
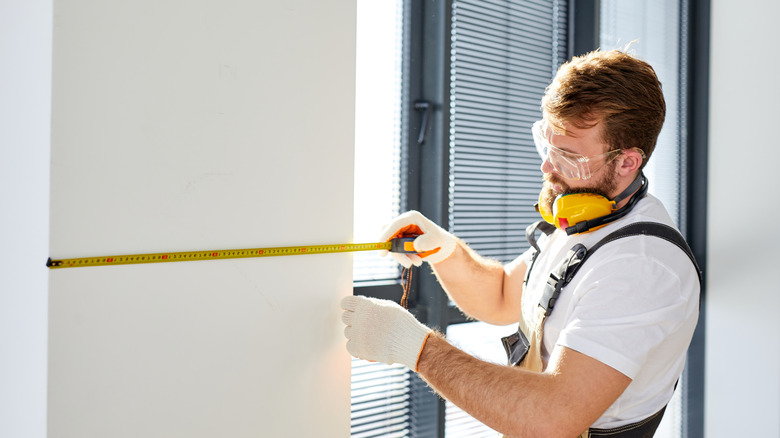
To secure your indoor AC backplate, you need to locate a wall stud. This is essential because screwing your brackets directly onto drywall is not enough to hold up the weight of the AC. According to Bungalow, wall studs are 2 by 4-inch wooden or metal beams fixed inside your wall to aid the framework of your house. To locate the stud, knock on different parts of the wall until you hear a hollow sound. If the sound becomes muffled as you hit sideways, you have found the sweet spot.
To be sure, identify the end of the stud and measure 16 inches away from that point, and that should be another wall stud. Turn off the electricity running through that room to prevent drilling through charged wires, and screw your brackets securely onto the wall studs. Use a level before screwing the other side to ensure it is placed at 180 degrees, via Cielo WiGle Inc.
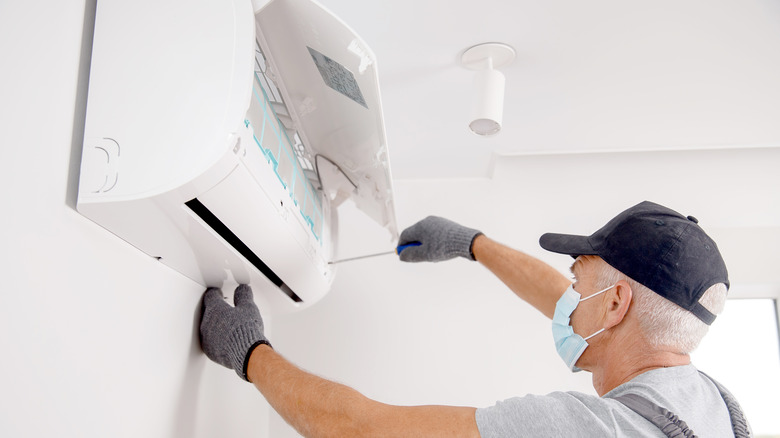
Mount the indoor unit and the connect AC pipes
Use a hole cutting drill to create a 3.5-inch hole through the wall where your AC pipes will slope down the outside wall to the ground for proper drainage. The AC unit has a drain pipe and refrigerant pipe, according to Trial N' ERROR. You can use tape to bound them together alongside the electrical wire. Create a seal around the pipes with neoprene, bend them at a 90 degrees angle and feed the pipes through the hole. Mount your AC onto the backplate till you hear a click.
Head outside and connect the drain pipe to the condensate hose. Some DIY mini-splits like Mr.Cool come with line sets already charged with refrigerant, but seek professional help to charge it if yours isn't. The substance can be hazardous if not careful. Uncoil the line set, unscrew the color-coded caps, and use two wrenches to attach it to the AC refrigerant pipe firmly. Do the same for the condenser, per DavidPoz.
Test for refrigerant leaks
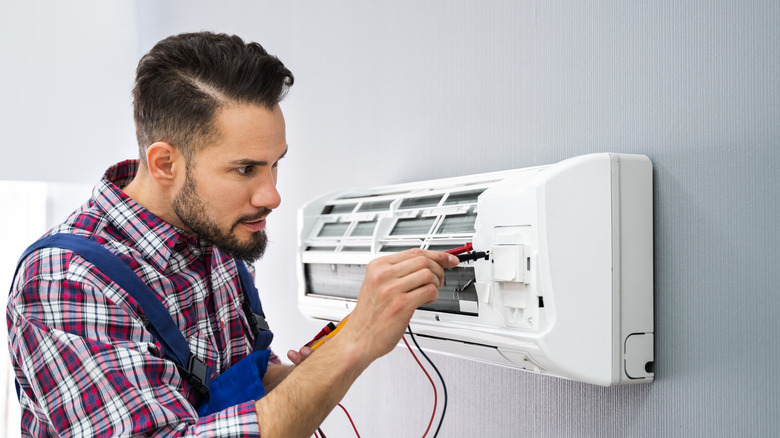
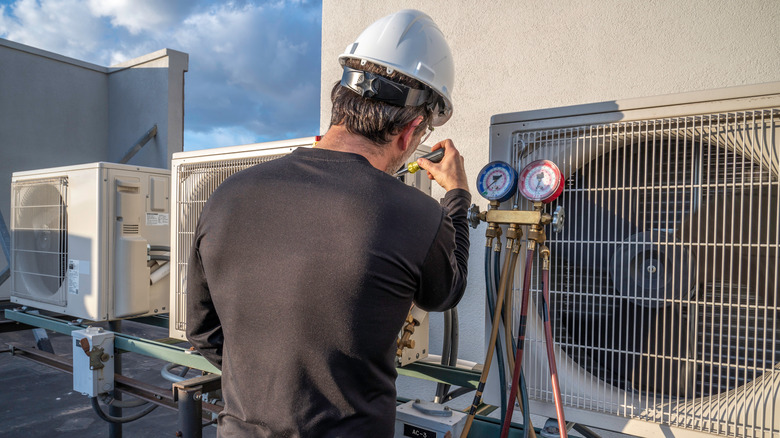
Now that your mini-split is halfway done, let's check if the refrigerant pipe was correctly installed by determining leaks. Unscrew the valve caps on top of the condenser and go anti-clockwise with an Allen wrench to open the valve, making sure you open it fully. After, spray soapy water on the joints. If you see large bubbles, you have a leak somewhere, or the refrigerant connections were not secured tightly. If the leak persists after tightening the joints, call the attention of a professional to check for any damage on the pipe during installation, via Cielo WiGle Inc.
Mr.Cool DIY Mini-split provides sound-dampening pads to wrap the refrigerant connections. These pads have high sound absorption and thermal insulation properties. After wrapping the droning sound away, finish it up with vinyl tape, per DavidPoz. You can give it a cleaner finish by investing in a line set cover. The final step is installing the electrical connection. It's best to leave this for an electrician who can safely secure the connection between your air unit and the electricity supply, especially if this is your first time. And there you have it, a ductless cooling system!