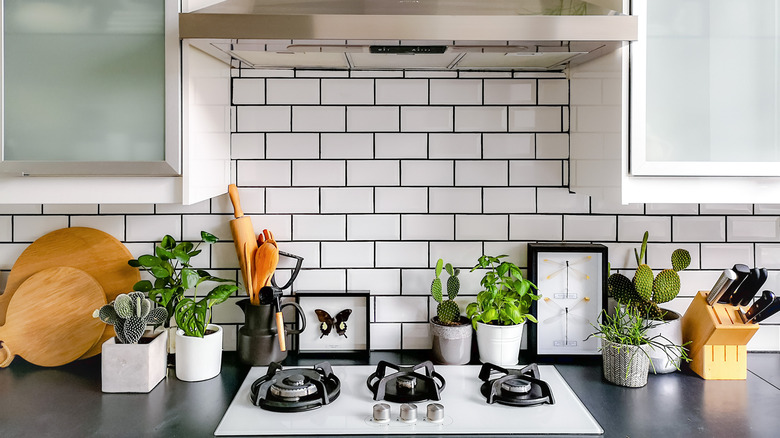
How To Properly Grout Your Own Tile
We may receive a commission on purchases made from links.
Grouting tile can be a relatively easy DIY project, but it's important to do your research before grouting tile for the first time so you can do it properly. Incorrectly grouted tile will both look bad and be unstable (via Architectural Digest). You will likely have to deal with more chips and repairs down the line if you grout incorrectly.
The first step in grouting tile is choosing which type of grout to use. There are three main types of grout. The most commonly used grout is cement grout. It is available with or without latex and can be purchased premixed. Cement grout is also the easiest type of grout to use. Epoxy grout is the second type of grout. It is harder to use than cement grout and can leave a hard-to-remove haze over the tiles. Epoxy grout is best used for commercial projects. Then there's urethane grout. This is a more expensive grout, and it needs at least seven days to completely dry before it is exposed to water.
After choosing the type of grout you're using you need to choose the color. Grout can either match or contrast with the color of the tiles. The only thing to keep in mind is that white grout gets dirty quickly and can be difficult to keep clean. If you like the look of pure white grout but don't want to clean your grout often, consider choosing a light beige or gray.
1. Prepare to grout

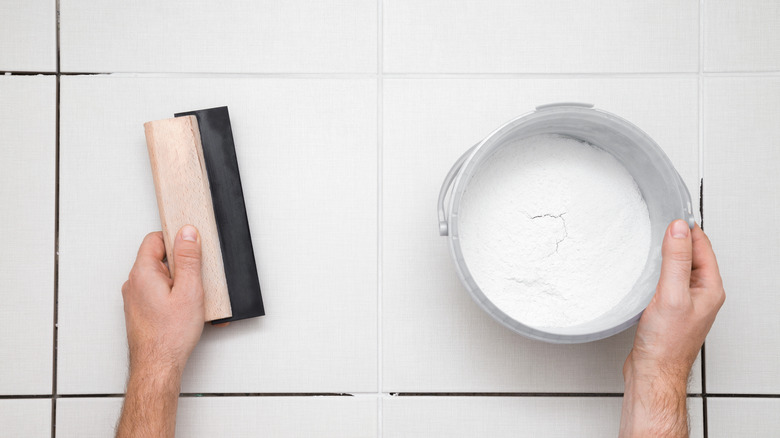
Before going straight to applying grout to the tiles, you need to have the correct materials and complete the proper prep work. You will need buckets, a grout float, sponges, and a soft rag. It's important to use a float and not a putty knife because the metal of the putty knife can scratch the tiles, per Architectural Digest. After laying the tiles on either the floor or walls, you should wait at least 24 hours and up to 48 hours for the mortar to dry, according to Pepper's Home and Garden. Once you are sure the mortar is dry and your tiles are glued, you need to clean the area to remove any dirt or stains.
Depending on the type of grout you purchased, you may need to mix it. When mixing grout, it should be left to set, also known as slaking, for 10 to 15 minutes. If you purchased premixed grout, you can skip the slaking step (via The Leaflet). Slaking will show you if you made the grout too thick or thin. Always air on the side of caution and use less water than you need because you can add more if it is too thick. A tile sealer should also be applied before grouting if you are using porous tiles. The sealant will protect the tiles and prevent grout from sticking to the tiles like glue, making it impossible to clean off.
2. Work in sections
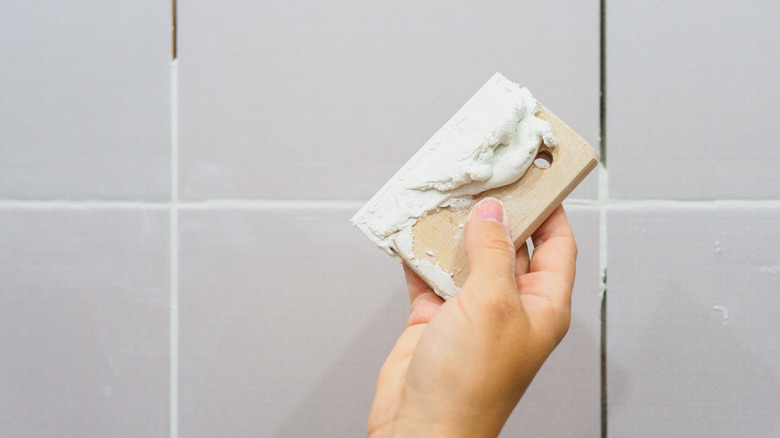
A big problem when grouting tile is that if you mix all of your grout before starting, it will begin to set in the bucket before you can finish your project. Because of this, it is best to work in sections. Only mix the amount of grout you know you will be able to use before it begins to set. Then apply it to the tiles in sections. Home Depot recommends working in 3-foot by 3-foot sections. This will give you the time to apply the grout, press it into the joints, and clean the excess grout of the tiles before moving on to the next section.
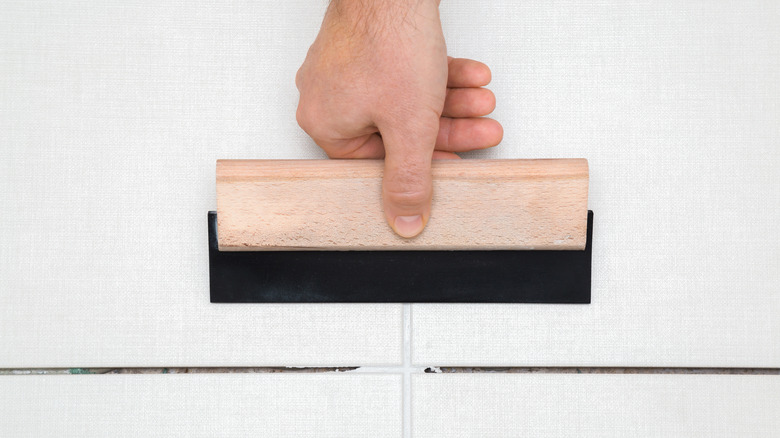
To apply the grout to the tiles, take your float and hold it at a 45-degree angle. Move in sweeping arcs to completely work the grout into all the tiles' joints. After you are sure that the joints are properly filled with grout, you can use your float to remove any excess grout from the section you're working in. To do this, hold the float at a 90-degree angle and wipe the excess grout, per The Leaflet.
3. Remove the grout haze
After applying the grout, it should be left to set for a few minutes. The exact time varies depending on the type of grout, so follow the package's recommended time. When the grout is set, use your sponge to wipe down the surface of the tiles. Be sure that your sponge isn't soaking in water while you do this, or the grout in the joints will wash away. You should move your sponge in circles and avoid scrubbing. If you scrubbed the tiles, it would only move the product around instead of removing it (via The Leaflet). Frequently rinsing out the sponge will help if you have trouble removing the excess grout off the tiles.
Once the grout is completely dry, in about a day, you can go back in with the soft rag or even a dry sponge and remove any leftover grout haze on the tiles. Don't add any water during this step because you want to buff the haze off the tiles. After the grout has dried and the grout haze is gone, the only steps left are to seal the grout so it can look new for as long as possible.
4. Seal the grout
Sealing the grout is an important step. It needs to be done because grout is naturally porous. Like with porous tiles, grout sealers will protect the grout from wear and tear and from absorbing stains, bacteria, or mildew. Adding sealer will keep the grout looking newer for longer because stains aren't able to set in and make the grout look dirty. There is a difference between grout and tile sealers, so make sure you don't use the same sealer from the prep step if your tiles are porous (via ZeroRez Pheonix).
The first step to applying a grout sealer is to allow the grout to dry completely. The time varies on the type of grout you used, so follow the manufacturer's directions. Once the grout is dry, it's time to apply the sealer with a small paintbrush if it didn't come with its own applicator. To do this, trace over the grout in the joints of your tiles. If you smear any onto the tile, there is a five-minute window to wipe it off, explains Home Depot. Then the sealer should be left to dry for at least a day.
5. Caulk the corners

Even though your grout is dry and sealed, the job is not done yet. Caulk is the final step for a project where two tiles are going to meet at a corner or edge. The caulk will create a waterproof seal and work as an expansion joint that will adapt to the climate, according to The Leaflet. To apply caulk, you will need to remove any grout from the corners because the caulk will not stick to the grout. The best way to do this is with a utility knife. With a utility knife, you can easily scrape away the grout in the tight corners.
Properly caring for your grout and tiles will keep them looking better for longer and prevent you from having to re-grout them sooner than expected. Grout should be cleaned every four to six months with a tile and grout cleaner to keep it looking fresh.