How To Build A Spare-Room Recording Studio On A Budget

We may receive a commission on purchases made from links.
So you want to be a rock-star. Or maybe you want to start a podcast, like almost everyone you know. Or perhaps you just want to do a really good job of reading public domain audiobooks for LibriVox. What you need is a home recording studio, and it's fairly simple if your spouse will give up their bowling trophy room.
The stuff you need is surprisingly similar regardless of whether you're singing, chatting, or reading into a microphone. The idea is to get the key components in your "signal chain" (the flow of music through your studio system) optimized for the best possible recording, according to the Give a Note blog.
Just keep your goals in mind, and be reasonable. You could easily spend $200,000 and two years setting up the perfect home studio. And while experience is ultimately the key to good recording, there are some expenses you can't avoid (via E-Home Recording Studio). Fortunately, we can give you some ways to simplify things to keep your financial investment and some of your time investment to a minimum.
We'll even teach you how to make one of those cool "On Air" signs to intimidate your kids into leaving you alone while you're in there belting out a bluegrass version of some Radiohead song. (Come to think of it, a bluegrass version of Radiohead would keep the kids away without any help.)
The home studio model
Home studios have become popular because computer technology has allowed individual producers to emulate (to some degree) enormously expensive audio tech at little or no cost, so the home studio will obviously be centered around a computer. This stripping down of the studio also makes every piece of equipment extremely important; everything is a single point of failure, and new home producers don't typically have the gear (or the skill and experience) to cover many mistakes.
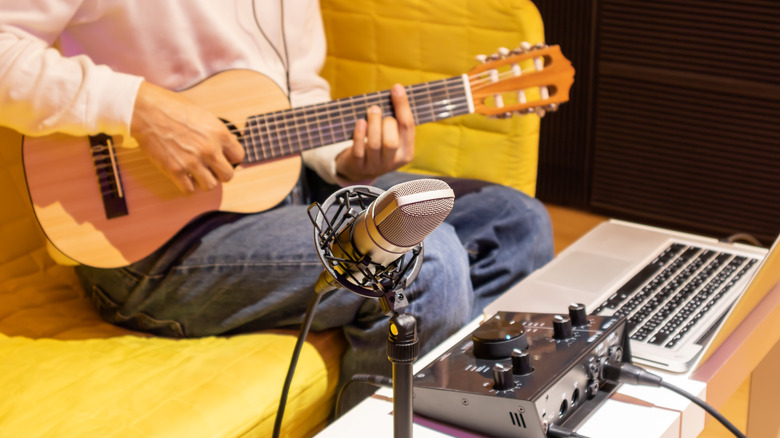
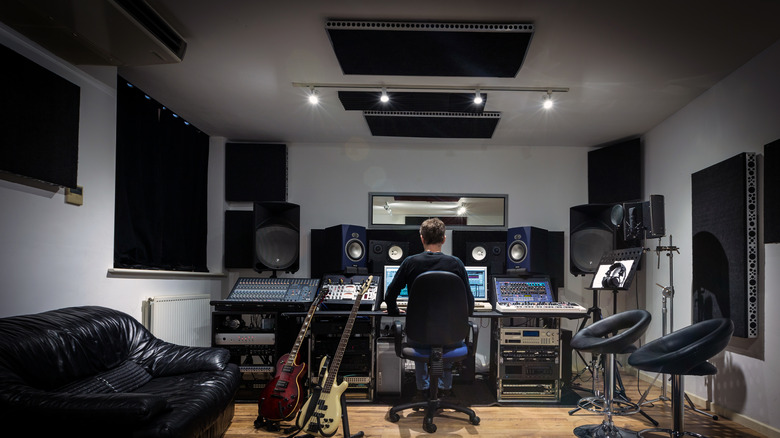
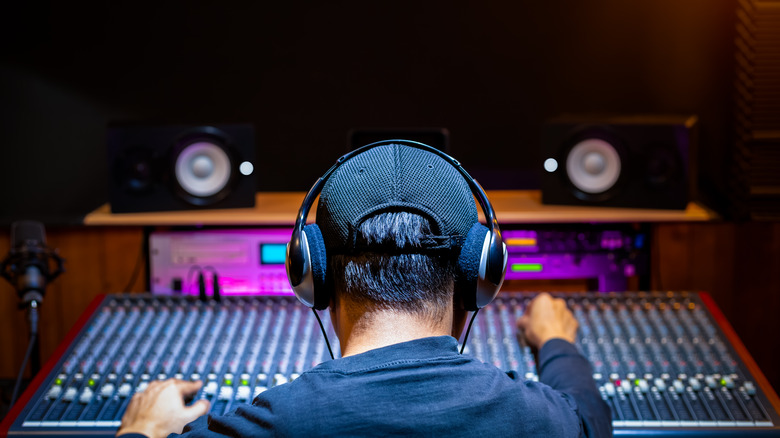
In a home studio, you're going to be typically singing (or speaking), playing, and mixing in the same space. These are often separate spaces in a professional studio, each treated for sound qualities a little differently from the others. (More on that below.) Within this room you'll have a "booth" for recording vocals, a desk for mixing, and areas for recording instruments. The start of this flow looks like this: sound enters a microphone, is boosted by line level by a preamp, then traditionally to compressors and EQs (now largely replaced with your editing software). The analog signal is converted to digital by an A/D converter and imported into your computer via an audio interface. The good news is that a modern desktop USB audio interface consolidates the preamp, digital conversion, and interface steps into a single device, according to E-Home Recording Studio.
As you play back edited audio, it's passed back to the interface, converted back to analog (via a D/A converter), and sent to either an amp for your headphones or to your studio monitors.
Your room and its acoustic treatment
A room that's perfectly and completely treated to purify sound can be a fairly terrifying experience. You can read about these anechoic rooms, perhaps at Antenna Test Lab, to see how you might emulate them, but you are not likely to get very close. Nor should you, really: an acoustically "dead" room has problems of its own.
You probably don't have a lot of choices in terms of room shape or size, so you will need to make the best of the space you do have. There are two keys to making this work: Acoustic treatment, and a vocal isolation booth. A well-done, nearly dead room can cost a fortune. But acoustic treatments keep your expensive gear and efforts from going to waste, and so are the most important part of your home studio.
Mixing in a space that hasn't been treated is like driving blindfolded, says Charles Hoffman of Black Ghost Audio. You don't have any idea what the music actually sounds like. Hoffman goes into a lot of technical detail, but the gist is that you want to minimize sound bouncing off of walls. You'll do this by strategically placing sound-absorbing panels in your studio. Absorb sound above your desk, in corners, and in walls to the left, right and rear of your desk. You may also want to soundproof a door.
It's okay for a room to have some acoustic flaws (that's "character") for general recording, but you need to isolate vocals as much as possible. You can build a booth of acoustic panels, or use a miniature portable mic booth, or both. One common solution is to hang moving blankets to form a recording booth.
Finally, decouple your studio monitors' vibrations from the floor by isolating them with pads or feet, which you can easily find on Amazon.
OK. Computer?
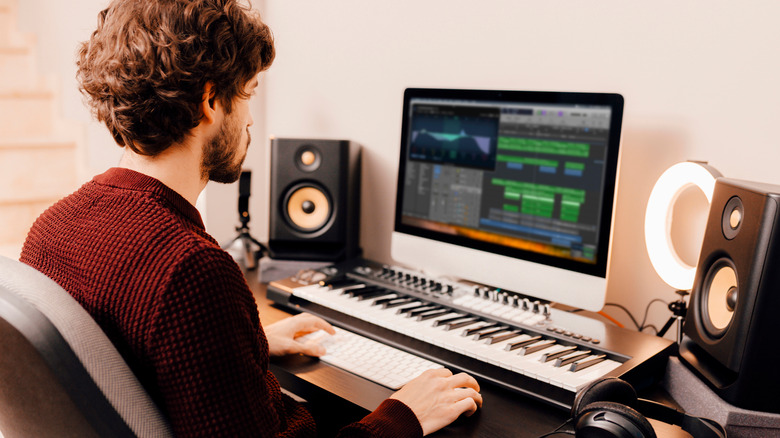
The most important piece of equipment in a home studio is clearly the computer where you'll be doing the work. It replaces mixing desks, scads of rack-mounted gear, effects pedals and the like, cables routed all over the floor and within walls, and walls covered with amplifiers, each treasured for its unique sound. You'll hear moderately scary system requirements for audio editing computers, but how much you'll really need is a function of what you intend to do. Putting 32 effects on a live guitar signal is a whole different ball game from recording a single mono voice track with minimal processing.
Produce Like a Pro recommends a 2.9 GHz i5 or better with 16 RB of RAM, a recent increase from a recommendation of 8 GB. In fact, a 2.4GHz quad-core machine with 4 GB or RAM is probably workable (via Producer Hive). There are always steps you can take to optimize your computer for audio production. These vary by operating system. Audient has a good guide for Windows. You'll also want a lot of drive space and at least one additional monitor.
There are ways to offload processing requirements to other computers, which will enable you to do more with less capable computers... or do a lot with capable ones. There's a lot of terminology for this, such as "DSP server" or "plugin farm," and a lot of ways it can be done. The Reaper digital audio workstation, for example, comes with this functionality by default. There are plugin solutions like Blue Cat Audio's Connector, and hardware approaches like SoundGrid servers that can cost thousands of dollars.
Digital audio workstation (DAW)
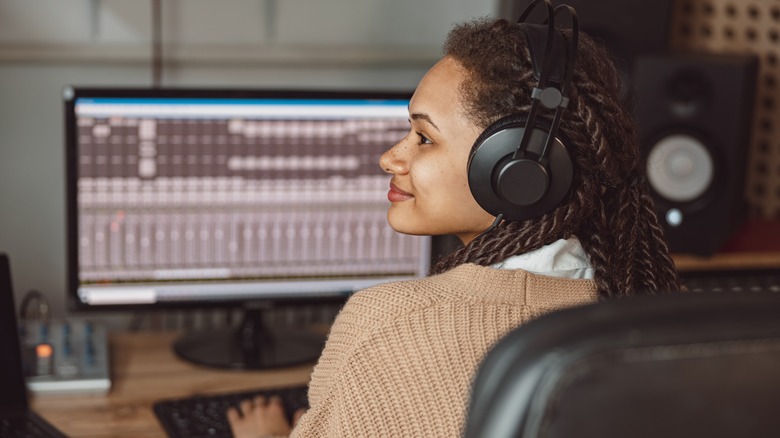
All of that replacing we talked about above is actually done by your Digital Audio Workstation (DAW), which makes it clearly the single most important component of your home studio setup. Because each DAW is different enough to require many hours of experience to master, producers tend to cling to their favorites with religious fervor. But the truth is that you can get DAWs for a wide range of purposes and mostly at extremely high quality for free, for relatively little, or for big bucks. In fact, some of the less expensive DAWs are equipped to enable high-end functionality you can't get anywhere else.
You can choose among several categories in choosing a DAW. Obviously, you can go full-price for the best software out there, which might be free (via Produce Like a Pro) or very cheap (via Reaper). You can choose free but limited versions of these (often expensive) packages, or you can go with free software. You might also choose software aimed at beginners, like Audacity, with the goal of upgrading later. Given the time investment you're about to make in learning to use a DAW properly, it makes sense to get the best DAW you can in its fullest form (this might be $0 or $2500) and bypass the lightweight offerings like Audacity and maybe even limited versions (there are many, often available for free, sometimes with the purchase of related hardware like a USB interface).
So how do you determine what's best for you? You likely don't know enough yet to make much sense of all the comparison charts available online (The DAW Studio, Admiral Bumblebee, and this admirable Linux software chart, for example), so it might make sense to find people online who are doing what you want to do and see what they're using.
Your USB audio interface
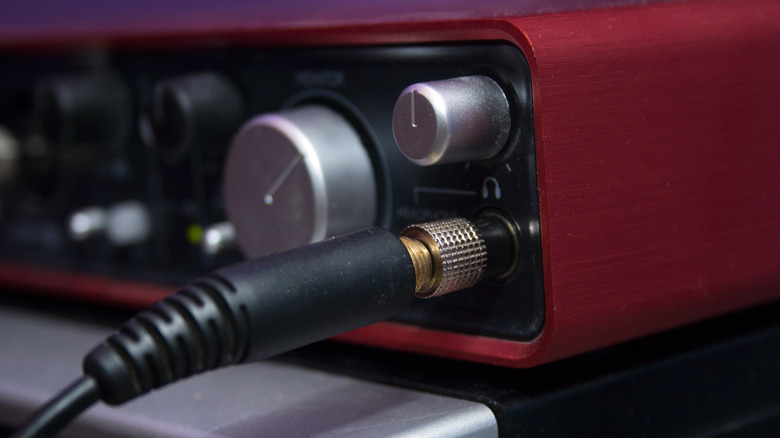
For most home recordings, a USB audio interface is the link between the analog world in which you create music and the digital world in which you'll edit it, so it is arguably the most important piece of equipment in a home studio. Steer clear of money-saving shortcuts like using your computer's onboard audio, using cheap USB adapters (usually 3.5 mm–to-USB), and using USB microphones. We'll discuss USB mics below, and treat the other two as essentially the same here. A dedicated USB audio interface created for music production will have better analog-to-digital and digital-to-analog converters. It will have a decent mic preamp (to bring microphone levels up to standard line level) and will usually accept balanced audio of the sort you'd get from an XLR mic. It will include 48v phantom power to drive condenser microphones. You'll get higher resolution audio, typically 24-bit/192 kHz. And it will include MIDI support, notes Produce Like a Pro. However good your onboard audio is, it's not that good.
Aim for getting the most bang for your buck in terms of either features (this probably means the number of inputs and outputs) or overall quality. If you might ever record more than one source at a time, you should look at models with two or more inputs. The gold standard for home recording seems to be Focusrite, but Behringer's interfaces are less expensive and highly rated. $70 will get you Behringer's single-input U-Phoria UMC22 (via Amazon), and you'll spend about $100 on the dual-input U-Pphoria UMC202HD (via Sweetwater) or $180 for the four-input model (also via Sweetwater).
Microphones

For recording vocals and any instrument that can be miked (this includes most of them, including electric guitars), it's difficult to imagine a more important piece of kit than your microphone(s). In fact, microphones might consume half of your home studio budget, but there are some good, affordable options.
There are a handful of considerations when it comes to microphones, says Musician's HQ. First, do you need condenser or dynamic mics? Condenser microphones (like the NT1, via Rode) are extremely sensitive and clear, good for recording vocals and acoustic instruments, while dynamic mics (like the Shure SM57, via Sweetwater) handle loud sound better and are great for miking electric guitars, drums, etc. Condenser mics generally require a phantom power source, usually delivered by your USB audio interface, a stand-alone device, or sometimes by the mic itself.
Another consideration is frequency response, which is a measure of how accurately the microphone outputs the sound you put into it. Many microphones "color" the sound either intentionally for particular sound sources (this is especially true of purpose-built podcasting mics, USB models, and others) or as an artifact of their design (condenser mics will tend to bump high frequencies higher, while dynamic mics often boost the low end more). Condenser mics will generally get you closest to a flat, unadulterated frequency response (via My New Microphone).
When choosing between USB and XLR microphones, buy the XLR mic. USB microphones can be quite good for simple applications like podcasting, XLRs are generally of higher quality, and they are balanced to reduce noise that is often picked up from the cabling itself. They also have the distinct advantage of being non-digital devices, meaning you can record without a computer present if you find yourself in such a situation (via Musician's HQ).
MIDI controller
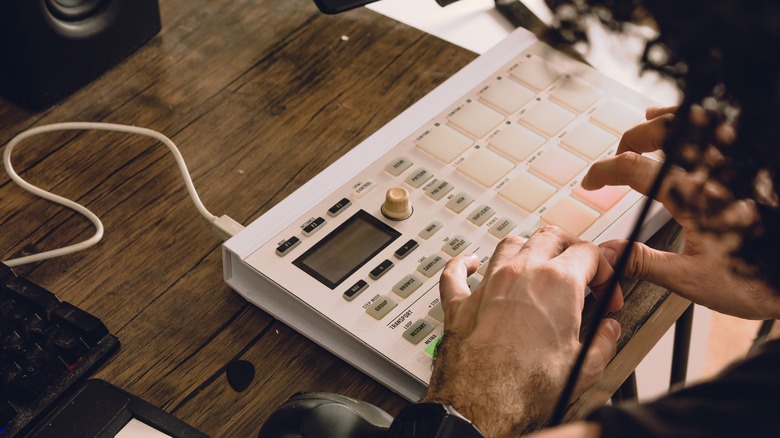
It's pretty common for novices to think of MIDI (Musical Instrument Digital Interface) as some sort of keyboard synthesizer, but it is actually a music-specific set of communications protocols, standards, and connectors that facilitate the creation, control, and transport of certain types of musical signals. If that sounds important, that's because it is. If you need MIDI in the first place, it might be the most important part of your home studio.
This is undeniably confusing and we'll only touch on it briefly. MIDI is not about recording sound, per se, according to the Indiana University Center for Electronic and Computer Music. Instead, it captures the characteristics of an action like a tapped keyboard key, which can then be transported and manipulated. And, along the way, you might choose to apply actual sound to the MIDI in the form of samples or virtual instruments (in case you decide to go for the oboe vibe instead of the eighties synthesizer vibe).
MIDI is also used as a protocol to control connected devices. For example, your DAW is probably controllable to some extent via MIDI or OSC, a newer and more capable, but less universal standard (via Britelit Immersive). In the home studio, this often looks like a small "control surface" (a box with sliders and knobs). Most DAWs support MIDI and OSC, and some also feature proprietary control mechanisms. Reaper also features a customizable browser-based control system that can turn many devices (phones, tablets, other computers) into control surfaces for your DAW (via Home Music Maker).
The style of music you play and your recording preferences will drive your choices in MIDI keyboards and control surfaces, and there's no real way to briefly generalize about them, but be prepared to set aside space and budget.
Headphones and monitors
Recorded audio, whether music or podcasts, is a thing you'll usually hear through some medium (almost always air), and as such your speakers are the most important component of your studio. These speakers might take the form of headphones or studio monitors, or preferably both.
As with microphones, what you're looking for is a neutral (flat) frequency response. This can be difficult to achieve with inexpensive monitors and extremely difficult with headphones unless they are specifically designed for audio mixing. Even the best general listening headphones often intentionally color the frequency response by boosting the low end and other trickery. You could consult frequency response test results available from the fantastic RTINGS.com, and maybe even compare your own preference targets to the raw data. Okay, so you're probably not going to do that, but you could. You can dive as deep as you want.
But here's the thing: Unless you get everything else exactly right, investing in an expensive pair of studio monitors will be, in part, a waste of money. This is particularly true of acoustic treatment. If you are recording and listening to mixes in a small rectangular room with hard surfaces everywhere, you're not going to get nearly as much out of a $1,000 set of monitors as you should (via Eastwood Sound and Vision). To that end, we recommend an inexpensive quality pair of monitors with room correction, a way of adjusting output for a less-than-ideal space. Consider the 3.5" PreSonus Eris E3.5 monitors at $99.95 a pair (or the larger 4.5" and new 5.25" versions), or the Mackie CR3-XBT ($99.99/pair) if you don't think the room-correction EQ will help.
We'll echo the common guidance on headphones, via MusicRadar: grab the Sennheiser HD 206 Closed-Back Over Ear Headphones at $28.97.
There's always a miscellany
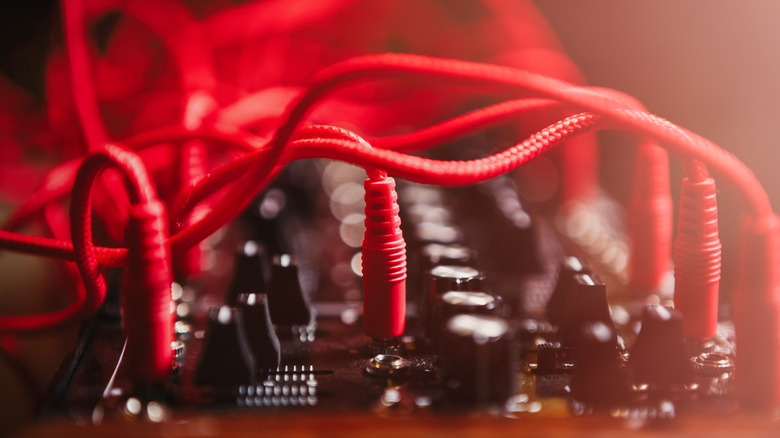
To borrow from Robert Earl Keen, the road goes on forever and the Gear Acquisition Syndrome never ends. While you might be able to stifle this impulse, there are some needs that are actually needs. Your signal chain is going to be mostly made up of cables, lots of them, running all over the place. And don't neglect cable management, a collection of products and strategies to prevent your tripping and impaling yourself on a dobro (via Produce Like a Pro). Exactly which wires you need will, of course, depends on which gear you acquire.
You'll also need more microphones if you plan on miking a drum kit or a full live band, though neither is a good idea.(via Sound Guys). On the subject of mics, and with all due love and respect to the late Adam Yauch who claimed he'd "never rock the mic with the pantyhose," most musical styles don't benefit from the persistent popping propagated by plosives spat at a microphone. To eliminate all the popping sounds, what you need is a pop filter. You can fashion one from a wire hanger and stockings, or invest $10-12 in an acceptable one from Amazon. And, unless you agree with MCA and strictly hand-held is the style you go, you're going to need mic (and other kinds of) stands. Stands keep your expensive new mic from crashing to the floor and becoming a $4 parts mic on eBay. Sweetwater has an unsurpassed selection.
When you first sit down to edit audio, you'll quickly become aware that you should have bought a chair and a desk. Pick yourself up off the floor and head to a thrift store. Don't spend a fortune on a desk when there are dozens of microphones to buy.
Bonus: Your very own On the Air sign
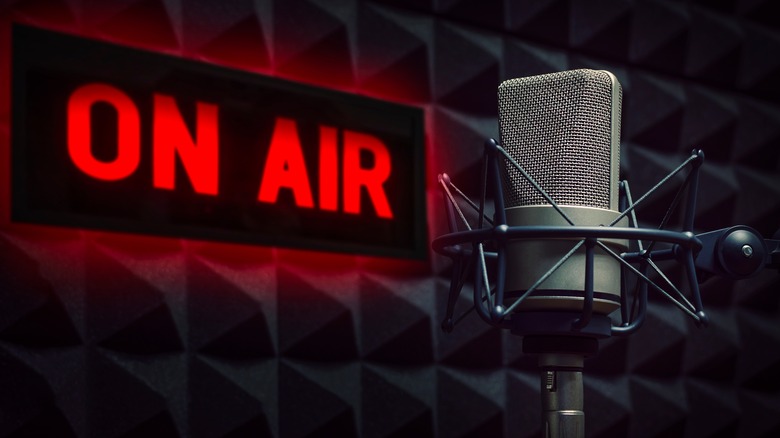
OK, remember that bluegrass Radiohead thing? That was mostly a joke, but the interruptions you can expect from family and friends are serious business. What you need is a classic On Air sign, and you have lots of options at various levels of complexity. Just remember that your pets (probably) can't read, so you're going to need a plan to deal with that, too.
Bob Clagett, who's always killin' it at I Like to Make Stuff has kids who like to make interruptions, so he created a remote control On Air light. Depending on how you feel about making your own vacuum former, Bob might be overkillin' it in this case, so have a look at a simpler but very cool version from The Frugal Girls or this even simpler one from Claire at Pillar Box Blue. If you don't feel like dealing with the DIY thing, Etsy has versions ranging from $25 to $400.