5 Spots You Are Missing When Cleaning Your Fridge

We may receive a commission on purchases made from links.
Your fridge is one of the most important appliances in your home, and likely one of the most used. Invented in 1913 and mass-produced in 1918, the refrigerator is one of the most convenient technological advancements to come out of the 20th century (via Whirlpool). That being said, you may not think about cleaning it as frequently as other appliances in your home.
While you may give the inside of your fridge the occasional wipe down or clean out, the odds are you're not cleaning it as thoroughly as you should. Generally, you should be giving your fridge a quick clean once a week, removing any spoiled food and cleaning up spills and dirt, as well as a deep clean every few months, per MaidLuxe. Even if you stick to this schedule, you still probably aren't cleaning everything you should. With so many pieces, it can be hard to know what you should pay attention to, and how. Keep reading to learn how to properly clean every part of your fridge.
1. Water filter
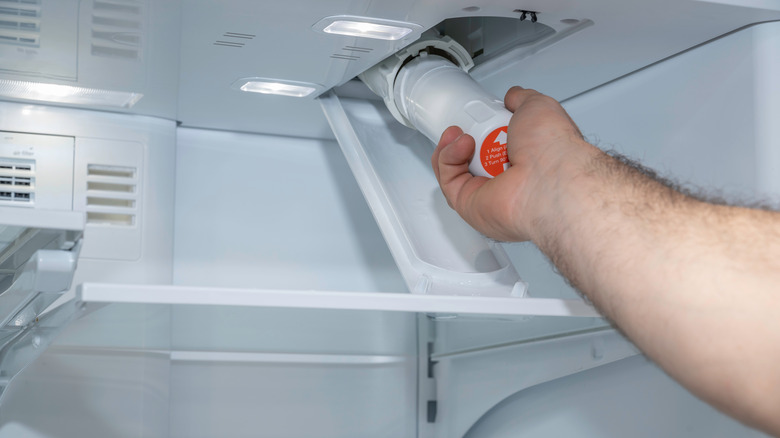
If you have a built-in water dispenser in the door or inside of your fridge, you shouldn't neglect it when it comes to your cleaning routine. When you give your fridge its weekly once over, consider using a cloth or towel with water and a little bit of soap to clean up the exterior of the filter, which will keep it muck-free and sparkly.
However, you also need to pay attention to the filter itself. Generally, you should be replacing your fridge's water filter every six months, which keeps your water free of contaminants, per Whirlpool. A good way to tell it's time to replace your filter is if your water tastes off or looks cloudy. Sometimes this will happen earlier than the six months mark, in which case you may be able to get away with just cleaning the filter. Sometimes grime or dirt builds up that can be simply rinsed off, according to Discount Filters. Remove the filter and knock off any dirt, and then soak it in a mix of soap, water, and vinegar for 30 minutes. Leave it to air dry completely, and then put it back.
2. Shelves and drawers

While you may give the shelves and drawers in your fridge the occasional wipe down, you should also give them dedicated soaks and deep cleans every few months. While you may not see it, over time they'll collect dirt and old food, and can even start to smell. Per Home Depot, begin by removing all the items from your fridge, followed by the shelves and drawers. This is also a great time to do a deep purge of any old or spoiled food.
Next, fill your sink or another large basin with hot water and dish soap, adding your shelves and drawers to the mixture. If you have particularly dirty or smelly shelves, let them soak for a while. Use a sponge to clean them, making sure to get into every nook and cranny. In the meantime, clean out the drawer cavities and fridge walls. Dry the shelves and drawers and let them return to room temperature before putting them back in the fridge, or else they may crack or split.
3. Under and on top

The outside of your fridge deserves just as much attention as the inside, especially since you see it most frequently. Wiping down the doors and sides of your fridge is a great idea, but don't neglect the harder-to-reach areas, including the bottom and top. Beginning with the top, you can simply use a towel or cloth with soap and water, or an all-purpose spray. If you have a hard time reaching it, grab a step ladder or stool.
The underside of your fridge may be a bit more difficult. Everyone is guilty of sweeping dropped food under their fridge, but that build-up makes it a bit more of an arduous task when it comes to cleaning. Begin by removing the grill on the bottom, which will help you gain better access, per Cooktop Cove. Using a coil cleaning brush, knock off the old dirt and food from the coils. Then, grab a vacuum with a handheld nozzle and suck up all the debris.
4. Coils

Keeping your fridge clean is important not only for sanitary and aesthetic reasons but also for optimal functionality. One very neglected area of your fridge is the back condenser coils, which help your fridge maintain a steady temperature, per Dependable Appliance Repair. If these coils get too clogged with dust and dirt, your fridge could experience temperature fluctuations, which can lead to higher utility bills, and even your fridge breaking.
Before cleaning the coils, put all your food in coolers and unplug the fridge. Then, slide the fridge out so you can get a better look. Consider gearing up with a mask so you don't inhale the built-up dust. Using the hose attachment on a vacuum, suck up all the old dirt and dust. Make sure to go in the direction of the coils so you don't damage them. Then, grab a coil brush and use it to get into the nooks and crannies of the coils. If you need to, give it another once over with your vacuum before plugging your fridge back in.
5. Ice maker
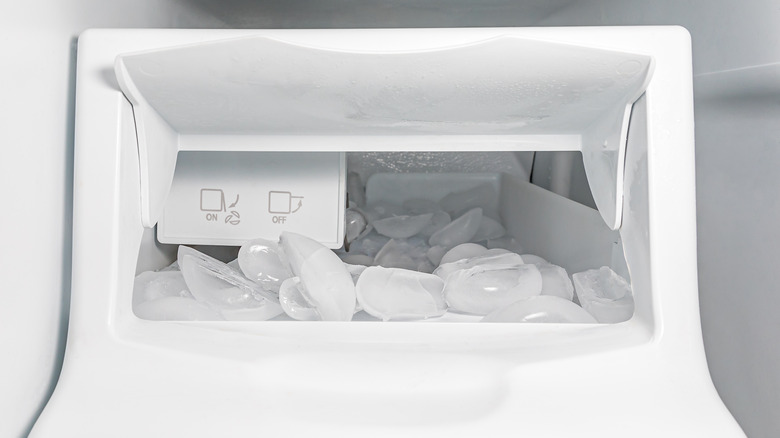
Finally, you shouldn't forget your freezer in the cleaning process. There aren't nearly as many pieces as there are in your fridge, so a general wipe-down and cleaning of the shelves should do the trick. That is unless you have an ice maker. A good way to tell that it's time to clean your ice maker is if the ice has been cloudy, odd tasting, or taking a while to come out, according to Maytag.
To clean your ice maker, begin by either turning it off or unplugging your fridge so it doesn't keep trying to make more ice. Next, either grab your fridge's operation manual or look it up online to find out how to remove the ice maker bin, per Appliance Care. Dump out your old ice, and then clean out the bin. Some can be run through the dishwasher, and others should be washed by hand with soap and water. You can also disinfect it with vinegar or bleach. Let this dry while you turn your attention to the freezer itself. Use a mild bleach solution to clean out the built-in part of your ice maker. Dry everything off thoroughly, then replace the ice maker and plug your fridge back in.