How To Bring Your Furniture Back To Life
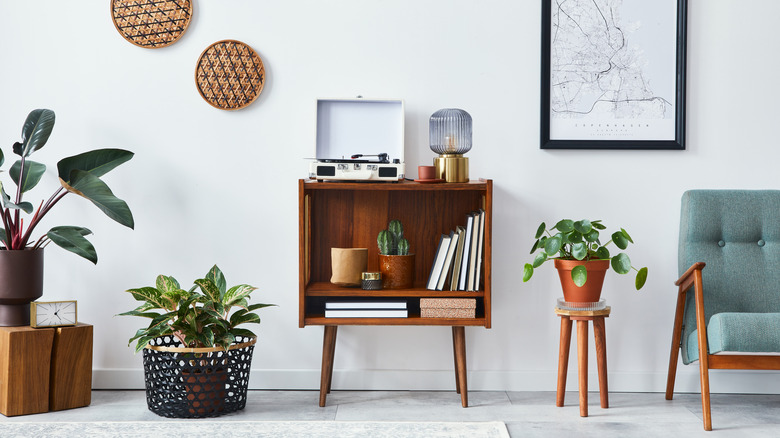
Vintage furniture is in fashion again. That's according to Forbes, which points out that classic styling is in demand. Consumers, especially millennials, value sustainability and want to reuse furniture instead of buying new pieces.
"In most cases, vintage furniture costs up to 80% less, is better made, and immediately available and brings character, uniqueness, and style to a room," Anna Brockway, co-founder and the president of online retailer Chairish, told Forbes. "It is also kinder to the planet."
Supply and demand is another factor. "Supply chain issues have increased demand for upholstered items such as sofas and accent chairs since the wait time to get these items brand new can be as long as 14-16 weeks," Alpay Koralturk, CEO and Founder of Kaiyo, told Vogue.
Consumers these days appreciate vintage style because it's cool and helps them feel like they stand out in a world of cookie-cutter home décor. Still, many vintage pieces need a refresh like new paint, stain, fabric, or accents. Whether you're buying vintage but want to revitalize the pieces, or you want to turn your old furniture from fine to fabulous, you don't have to settle. Instead, you can revive your favorite pieces with some simple techniques that can bring your furniture back to life.
Get a new look by reupholstering furniture

Reupholstering furniture is definitely a way to transform a piece from blah to bold. You could take the piece to a professional upholsterer, but it can be costly. While doing your own upholstery job can be more affordable, it can be challenging too. But it's doable as a DIY project.
Blogger Thrift Diving took some upholstery classes and shares what she learned, including using the existing fabric as a template for the new fabric, noting it's smart to cut half a half inch extra around the new fabric so you can have more room to work with. Next, pull a single thread to create a run in the fabric to make a straight line that's easy to cut. Make sure you center the fabric of your furniture when you're reupholstering and then work your way out to the edges.
When it comes time to staple, consider buying a pneumatic stapler, which uses an air compressor, and is just like the ones professional upholsterers use. Be sure to pull the fabric tight when you're stapling. It's important to keep track of any parts of the piece, like arms and legs, that you need to remove and in what order. This way, you can easily reassemble your furniture when you're done.
Repair ripped leather the DIY way

If you have leather furniture that's ripped or scratched, you have some repair options. Hiring a professional to do the repair could be a good idea for a big job, or if you're not sure about making the repair yourself. However, this can be costly so smaller issues might be fixed with the DIY route.
Clean your leather furniture using a leather cleaner, says Dr. Sofa, who recommends Lexol Leather Cleaner, as well as Armor All Leather Wipes. Next, use a leather repair kit. Dr. Sofa prefers kits that rely on air drying, instead of heat drying, since the heat method can potentially ruin the leather. Start the repair by trimming big tears in the leather, followed by placing a backing material behind the tear, and applying the glue to fix the rip and seal the hole.
Blogger Home of Cozy points out that small rips or holes in leather can be repaired with glue made for your specific type of leather. Simply apply a thin layer to the underside of the rip and push the material back together. A quick buffing with leather dye and leather conditioner can help to further disguise the repair.
Refinish the wood yourself
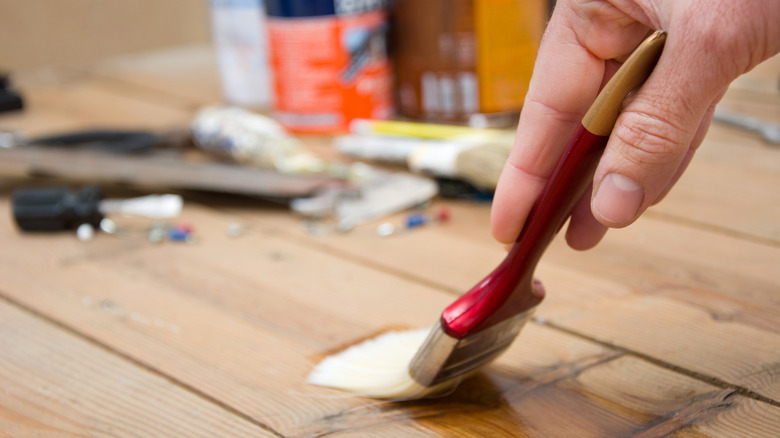
Ready to refinish your furniture? Lowes recommends cleaning the piece to remove dirt and assessing if any other repairs are needed. The biggest part of the job is removing the old finish. Leave the use of professional sanding equipment to experienced wood finishers. Most consumers do well by using paint strippers to remove old varnish or paint, as well as some sandpaper to finish the job.
Wood strippers need to be used with proper ventilation, eye protection, and gloves. First, apply a thick coat of the wood stripper and let it sit based on the time recommended on the label. You will know when the wood stripper is ready when it's soft, and you can cut into it with a putty knife. Then scrape off as much of the old finish as possible. Use medium-grade steel wool on stubborn areas. You may need multiple applications of the stripper to remove all of the old finish. Follow the product label instruction on how to clean up after application.
Once the furniture is dry, you can sand it with the grain — not against it — to finish the whole piece. Use grain filler, as needed for a smooth finish. Next, apply a sanding sealer, which is like a primer for your project. Then, choose a wood furniture stain such as oil-based, water-based, or gel, and follow the instructions on the label. Finish with a topcoat such as polyurethane, water-based polyurethane, lacquer, or a penetrating oil finish such as tung oil.
Change out the decorative elements
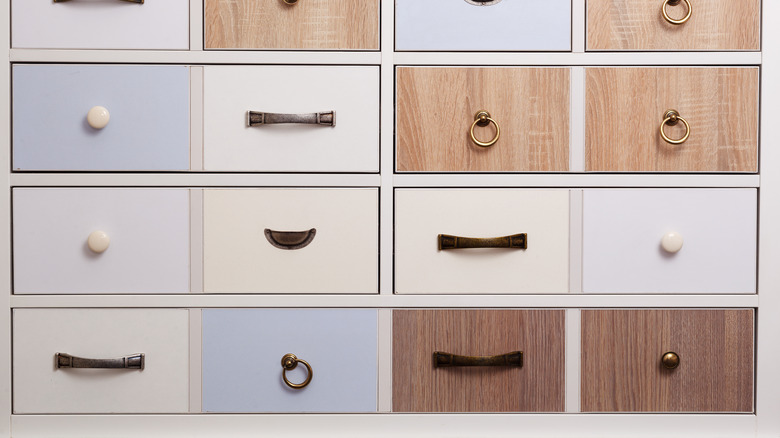
Charleston Crafted has a few tips for what to consider when changing your drawer hardware. This simple switch can bring new life to your dressers and nightstands. If you are replacing existing pulls, measure the distance that the current holes are from each other. Then, shop for pulls with these same specifications to make swapping them out a cinch. With the vast assortment available in both stores and online, you're sure to find an option that you love to fit your current piece.
If you want to take a custom, DIY approach to new hardware, repurpose household items into new drawer pulls. For example, take big jewelry pieces from your collection or antique stores and use super glue to attach the piece to the face of a standard draw pull. For a kid's room, use old Hot Wheel cars or animal figurines for a whimsical touch. In the kitchen, you can attach vintage silverware like old spoons for one-of-a-kind cabinet hardware.
Add color to your furniture
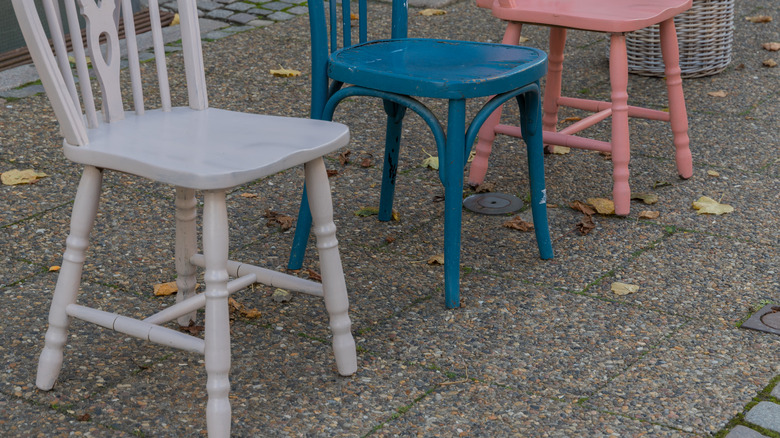
Make your furniture pop with color. Painting your furniture can transform it from dull to desirable. Consider whether you want your paint to have a distressed look or a smooth one. Distressed finishes typically have matte paint, and often feature visible brushstrokes, while smooth paint typically features satin or semi-gloss paint, producing an even finish that has a sheen.
Before painting, sand your furniture, especially if you want a smooth finish. But you may not need to sand the wood if you're going for a distressed look. You can use a foam roller for flat surfaces, and quality paint brushes for other areas. After painting, finish the surface with a sealant.
For added oomph, consider adding wallpaper to your furniture surfaces. Wallpaper from the 70s explains that non-woven wallpapers work well on furniture. Wallpaper is a fashionable option in many areas too, including on drawer fronts, a chest of drawers, wardrobes, and glass surfaces.
Make your furniture shine
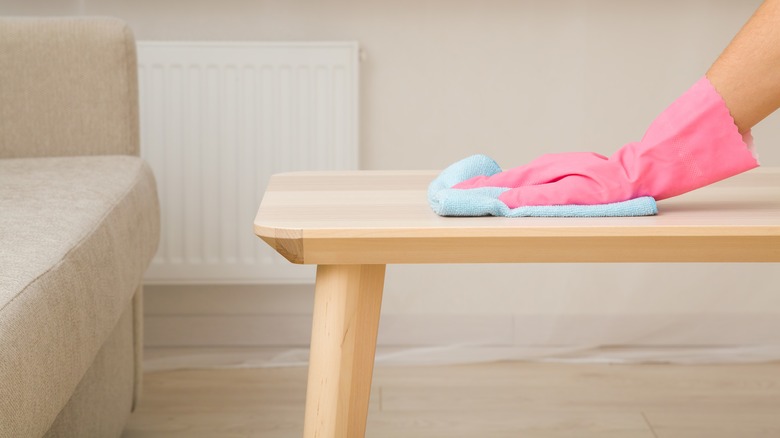
Sometimes all your furniture needs for a refresh is a good cleaning. Often, furniture loses its shine and luster, especially with furniture polish build-up, which can look waxy or dull. Clean My Space has the fix for this type of build-up: use a vegetable-based enzyme cleaner, or make your own DIY cleaning solution using water and two bags of unflavored unsweetened black tea. Place a damp cloth into the cold tea water and then wipe your furniture to remove the buildup. However, if you have unfinished wood, it's best to clean it with a dry microfiber towel. Unfinished wood will absorb a drop of water, while finished wood will bubble at the surface.
Did your bowl of steaming soup damage your wooden table, or did a sweating water glass leave a mark? You can fix heat or water marks on your wood with a condiment from your fridge — mayonnaise. All you have to do is treat that area with a layer of mayo and let it sit overnight, then buff out the stain.
Clean your couch
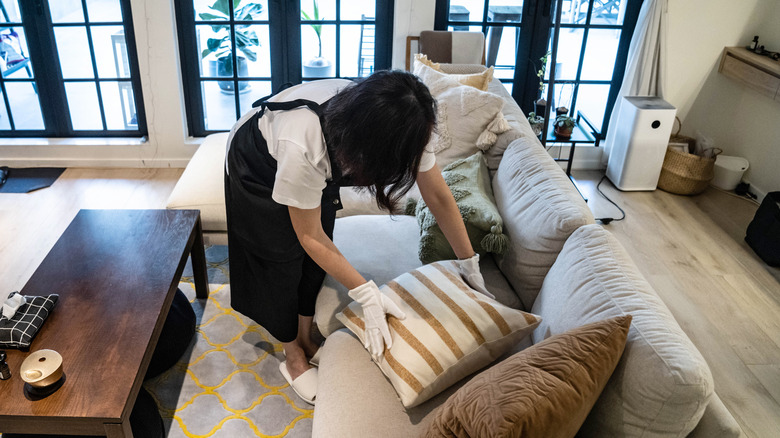
When it comes to cleaning your couch, Molly Maid recommends reading the cleaning instructions on the furniture label. For example, "X" means the furniture should only be vacuumed and can't be cleaned with any solvent-based cleaners or water, while "S" means solvent-based cleaners, not water, are recommended.
For a cloth couch, use a clean hand towel or brush to remove any dirt or debris from the couch. Next, sprinkle baking soda on the couch and let it sit for 20 minutes to an hour before vacuuming it up using a brush attachment. Spray tough stains with a DIY all-purpose cleaner using 1 tablespoon of white vinegar, 1 teaspoon of dishwashing soap, and 1 cup of warm water.
Clean leather couches with a dry microfiber cloth. Spot treat with a cleaning solution of equal parts vinegar and water and a microfiber cloth. The cloth can be damp, but shouldn't be wet. Use leather conditioner one to two times a year to keep the couch in its best shape.
Refresh wrought iron furniture
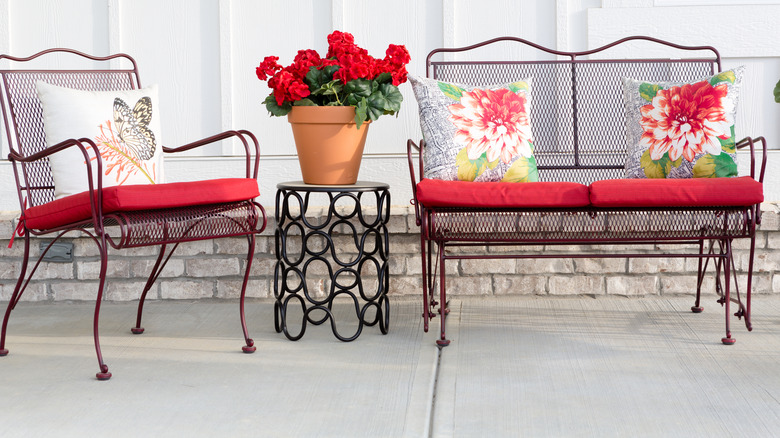
Wrought iron furniture is a classic outdoor look. But without proper maintenance, it can look old and get rusty. Start by using a brush or steel wool to remove rust. Sand the pieces using medium grit sandpaper and clean the furniture before priming. Use either weather-resistant or rust-inhibiting primer. After it dries, apply an exterior-grade enamel paint that also resists rust. Next, use a sealant to prevent fading.
Clean wrought iron furniture twice a year to keep it in its best condition. Automotive spray wax can be used once a year to protect the surface and help the furniture keep its luster. Refresh the look of your wrought iron set by investing in new, colorful cushions and pillows. Protect the cushions and the furniture by covering them when not in use, especially during colder months, when they could get wet and potentially get rusty.
Clean and preserve your wicker furniture

Wicker furniture is another timeless look. Keep natural rattan looking good by making sure it stays away from moisture. Wipe away any debris with a cloth and use a toothbrush to remove dirt that's tucked into crannies.
For resin wicker, which is more moisture resistant than organic rattan, it's OK to soak the furniture in water since it's waterproof. You can use a hose, or soap and water to clean the furniture. Follow up with a soft brush if needed to wipe away grime. If the resin wicker has mildew, try a spray mildew remover. Or for tree sap, use a product that removes sticky or adhesive messes. Wash the furniture and let it dry for two or more hours in the sun. No matter how well you take care of wicker, especially rattan, the product won't last forever. Monitor your furniture for dryness, fragility, and mildew or mold, all of which could be signs that it's time for new furniture.
Use it in a new, different, or unexpected way

Another way to bring furniture back to life is to place it somewhere different or use it in a new way. For example, if you have an old dining table that you no longer use in the kitchen, move it to another room with a new purpose, such as a craft table, a spot for puzzles, family game night, or as a home for your plants.
Look at yard sales or thrift shops for items you can repurpose with some sandpaper, paint, or wallpaper. Even something as simple as repainting an old folding TV tray table can give it a new style. Thrift Diving re-purposed a toddler bed turning it into a potting bench for her garden. She started by cleaning the bed, measuring it, and making a few cuts using a circular saw. Then she constructed a base, applied paint with a roller, and finishes with a sealer. She accessorized with a towel rail and pots.