How To Achieve The Plaster Wall Art Trend
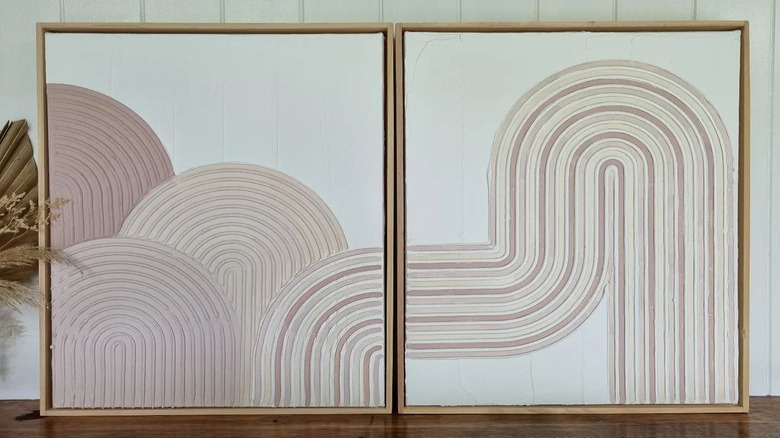
If you are a fan of good DIY art and have been looking around for new inspiration, then you must have crossed paths with the popular rainbow-plastered art on the internet. At first glance, this type of art looks like something pulled out of a museum; however, you will be surprised to find out just how easy it is to DIY from the comfort of your home. This type of textured art is trending, but for all the right reasons; you don't need to be a skilled painter, and it is so easy that even a child can pull it off with the basic tools.
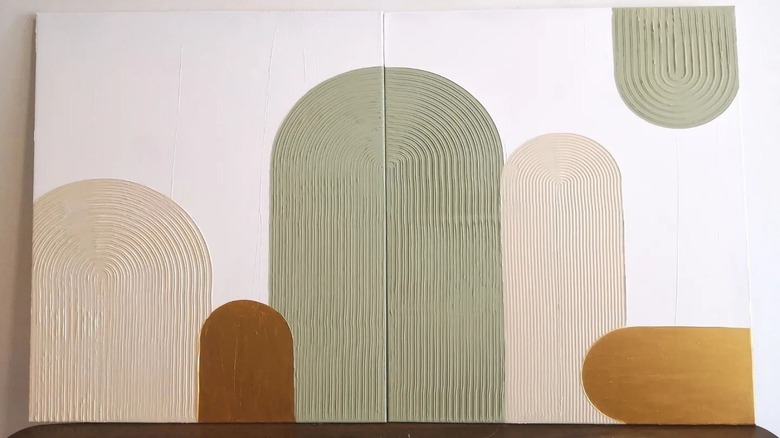
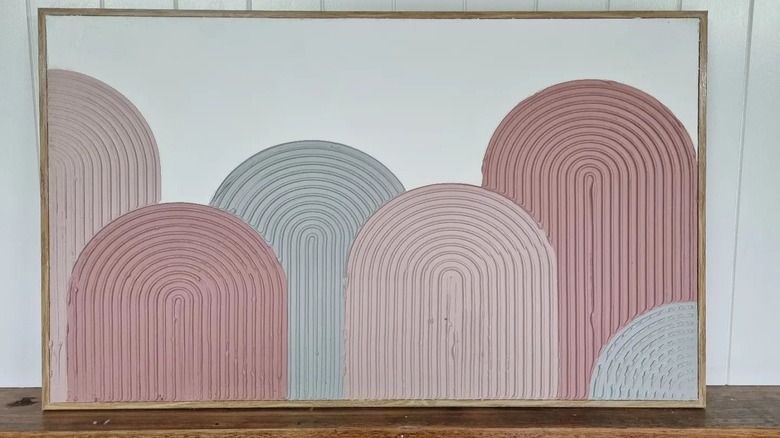
Similar to any other abstract art, the beauty of this textured variation is that they are truly unique. The fact that the pieces are handmade and the process gives room for personal creativity means no two pieces can be identical. So if you are looking for a piece of art for the empty wall in your living room or want to add another to your collection, here is how you can recreate your own abstract rainbow-plastered art without digging too deep into your pockets.
Assemble all the equipment
The first order of business is to assemble all the supplies and tools that you will need to use. For this type of art, you will need a canvas, ready-made all-purpose plaster, and plastering tools, according to TikTok user @shopaquarihome. You can also reuse an old canvas lying around in your garage if you want to save some money. When it comes to the specific plastering tools, you can use makeshift equipment like a comb with enough spacing or even a notched grout spreading trowel to achieve evenly spaced rainbow lines. With every supply assembled, it is time to get your hands to work.
Begin by applying the plaster on the canvas using a flat spreader in whatever fashion you like. A simple trick is to start from the center of the canvas, working your way evenly toward the edges. To recreate the curved rainbow appearance, use the notched grout spreader to achieve grooved arches on the canvas. Apply even pressure to the spreader and gradually drag it upwards to the point you want the curve to end, as illustrated in the TikTok. Now, hold and rotate the tool and drag it toward your direction. Make as many curves till you fill the canvas with texture.
Paint and frame
Once you are happy with the curves, you need to allow the plaster to dry before doing anything else. Depending on how thick the layer of plaster is, it can take up to five days to dry completely, mentions A House We Built.
Although you can frame it as is, adding some paint will take your piece to the next level. Pick a color that is eye-catching and also blends well with the existing interior décor. Regular acrylic paint will do the trick for you — but be sure to apply two coats, allowing each to dry before applying the other one. To give your piece of art a professional feel, consider adding a frame. If you want to make the colors pop, stain a wooden frame with a dark color that will contrast beautifully against a bright-colored wall. These pieces work well together, so consider adding more than one side by side!