Creative Ways To Decorate Your Home With Home Depot's Tile Samples
We may receive a commission on purchases made from links.
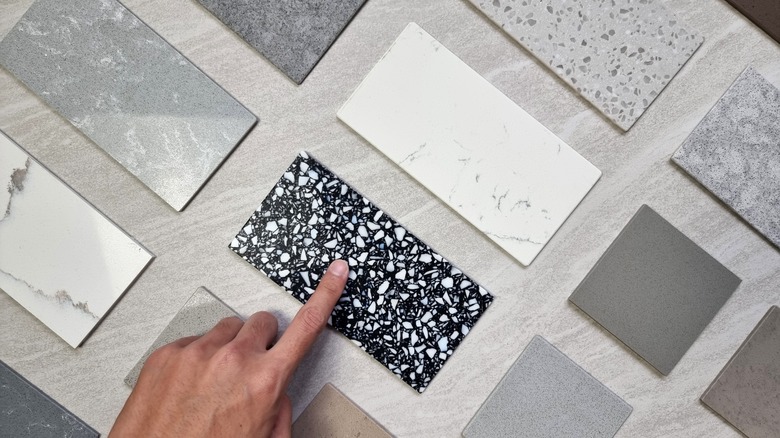
Home Depot offers tile samples for a few dollars a pop, but you can use them for more than remodeling mood boards. You can also utilize them for small DIY projects around the house, whether that's upcycling furniture or creating stylish organizational bins. There are two ways to go about this. One, you can use the tile samples you bought for a remodeling project, helping you utilize something you would throw out once the project wraps. This can include everything from floor tiles to shower tiles to backsplashes. Or, two, you can head to Home Depot directly and buy a few tiles specifically for the DIY, which won't break the bank since they are $2.99 a square. Whichever method you choose, plenty of crafty DIYs only require a couple of tiles.
You won't need a whole box of ceramics to pull off these specific projects. For example, if you only have one or two, transform them into chic coasters that can add a pop of color to your coffee table. However, if you bought a handful since you couldn't decide on your kitchen's backsplash or the tiling behind your bathtub, then you can use the different colors and designs to create a mosaic. Below are some fun ideas to try.
Tile an end table or coffee table
If you have an old end table, coffee table, or even a nightstand that needs restoration, let your tile samples help breathe some new life into it. You'll only need a few tiles because of the smaller surface area of these furniture pieces. Lay out your design on the tabletop. You might need to cut the tiles to fit the length or width of the table, in which case you'll need to use a wet tile saw.
If you want to paint, sand, or re-stain the furniture, do so before you start applying the tile. After the table has dried thoroughly, you can spread tile adhesive over the existing tabletop. Place the tiles over the glue, taking care to ensure that they are properly lined up. Then mix and apply your grout and add a sealant. If you have plain tiles, you could even consider drawing or painting on a design or pattern before sealing them. This will allow you to create a more customized look for your new table.
Create a custom centerpiece
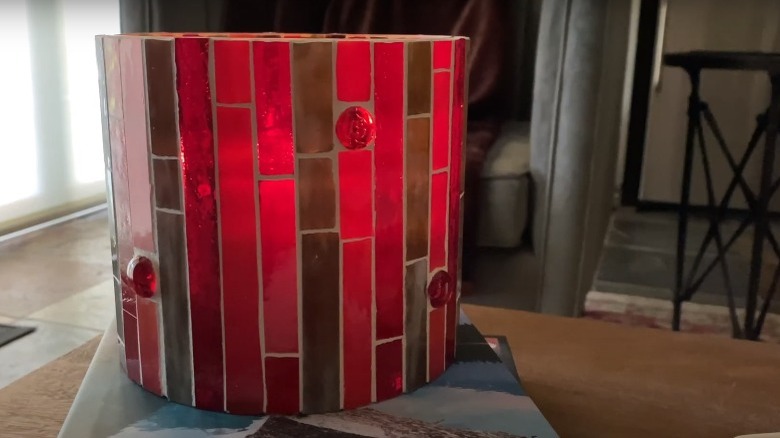
If you're always looking for new ways to decorate your dining room table, look no further than those tile samples. You can use them to make a centerpiece in several ways. One idea involves using small glass mosaic tile squares to make vases to hold flowers. You'll need a cylindrical vase (no neck) for this project. Just cut the mosaic tiles to be the appropriate height for the vase, roll the tile strip around the cylindrical vase, and trim off the excess. Then, use the clear adhesive of your choice to apply the tile to the base; wait until it dries, and you'll be all finished.
The other option is using your tile samples to make a decorative tray or runner to display glass vases or knick-knacks. For this project, you'll need some ¼-inch thick plywood cut to the right size for your table's dimensions. After sealing the plywood, apply a tile adhesive, lay out your tiles in the desired pattern (cutting them with a wet saw if needed), and apply grout between them. You could add some decorative molding along the perimeter of the tray/table runner, but that is up to you and what you think will look best.
Make coasters or placemats
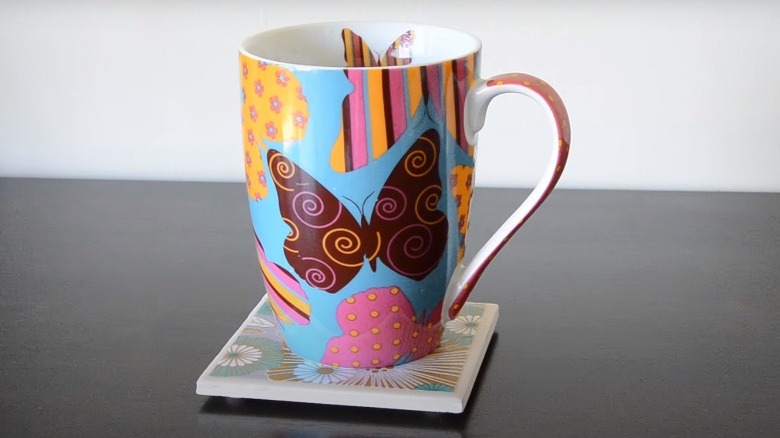
While tile may not be the material most traditionally used for making coasters, no rule states that you cannot use it for such purposes. Moreover, making some tile coasters for your coffee table or dining room table can help you achieve a cohesive and elegant look that is sure to catch all your visitors' attention.
Start by cutting your tiles into approximately 4-inch squares. Then, choose a scrapbook paper design that you like and cut it down to fit on the tiles, leaving a small border around the edge of the tile. Cover the tile with Mod Podge, and carefully place the cut scrapbook paper over it. Then, just apply several additional coats of Mod Podge over the paper to seal it, letting it dry between coats. Once the coaster has finished drying, you can glue on a felt base to protect your furniture, and it will be ready to use. Alternatively, you can also use the blank tiles without adding any extra decorations to them. It depends on how crafty you want to get!
Make a plant stand
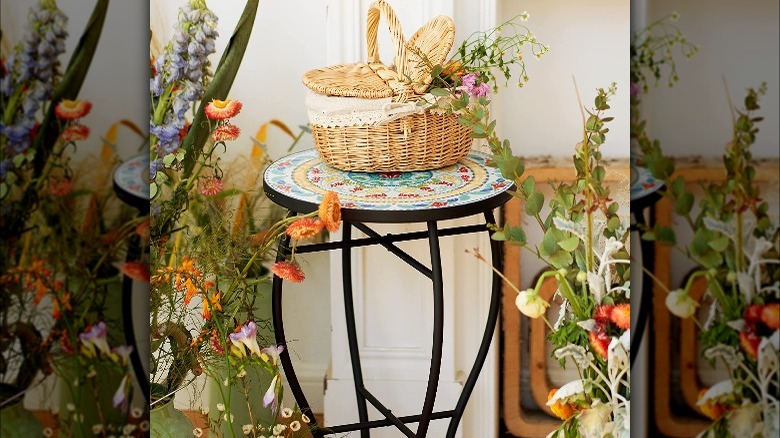
Don't throw out those tile samples; use them to make a plant stand to display beautiful greenery in your home and help your plants get sufficient sunlight. One way to complete this project is to tile the top of a stool to turn it into a stand. Start by choosing the tile piece(s) that you will use, and choose a coordinating paint color for the stool. Then, cover the stool with the tile using tile adhesive, grout, and sealant. Once everything dries, your new plant stand will be all ready for use.
Another way to make a plant stand using tile samples is to build legs using thin wooden slats. You can then attach a larger, single tile to the wooden legs, forming the top of the stand. Make sure that you use a strong glue to keep the tile in place. Then, let it dry completely before placing any planters on it. This method can help you craft a more modern-looking plant stand, but just be careful not to load it down with anything too heavy.
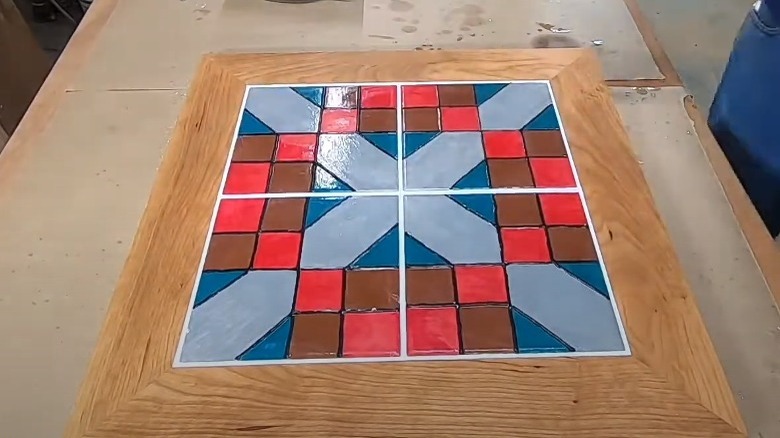
Decorate your walls
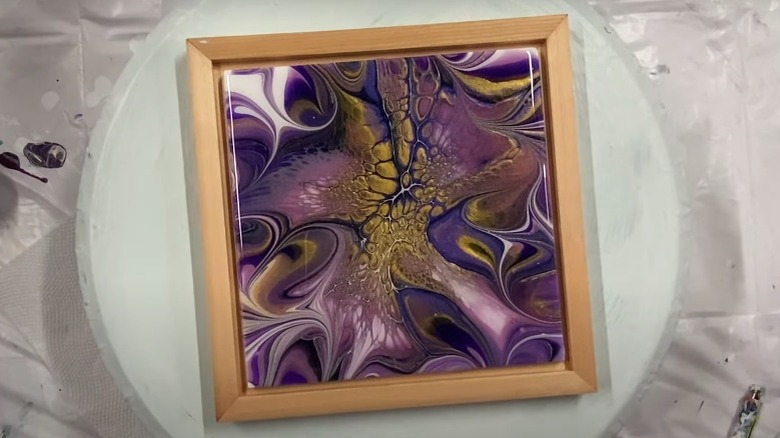
While your mind probably goes right to the floor when you think about tiles, did you know you could also use your leftover samples to create artwork to hang on your walls? Many tiles are decorative in and of themselves and would add a nice touch to your living space. However, even if you have plain tile samples, you can easily transform them into something frame-worthy with a bit of paint.
Once you have your tile(s) ready, use slats of wood and some plywood backing to make a custom frame. Cut the slats to fit around the tile, angling each corner to create a square or rectangular frame. You can then stain the wood for a desired finish. Then, attach the tile pieces to the plywood backing using some adhesive and glue the frame around the edges of the backing. Let it dry, then hang up your new artwork to enjoy.
Create front porch decor
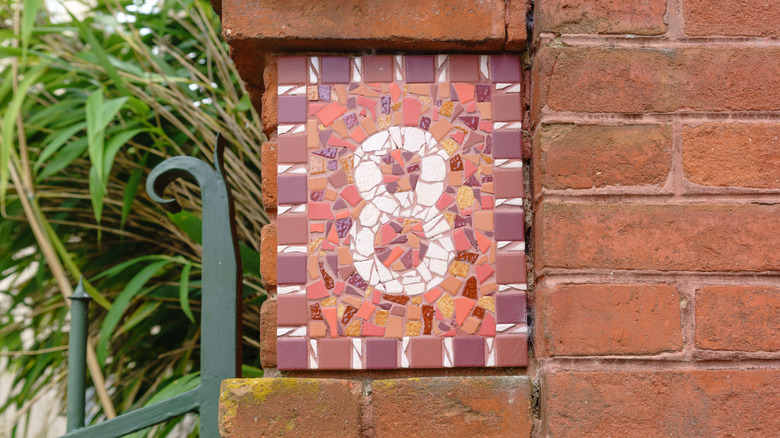
Those tile samples can help with more than just decorating the inside of your home. They can also come in handy for adding some character to your front porch. You can use broken tile pieces or square mosaic tiles to create a numbered plaque with your home's address. Not only will the finished product be colorful and attractive, but it will also serve the purpose of identifying your house for guests.
There are a few different ways you could approach this project. The first is to purchase large MDF house numbers to match your address. Start by spray-painting each number black or another darker color. Then, apply your adhesive and start putting on the individual tile pieces, choosing various colors to create something that you'll love.
The other way to approach this project is to create a custom mosaic on a piece of wood and use the tile pieces to make the numbers in your address. If you plan to try this idea, choose one darker color tile to make the digits in your address, then use lighter colors to create a mosaic pattern around the house number.
Keep office supplies organized
If you have four smaller square tiles, some wood, and adhesive, did you know you can make a DIY pen and pencil cup? That's right, with just these few basic materials, you can keep your office supplies organized while adding charm and beauty to your desk. You'll want to use either 4- or 6-inch tiles, depending on how large you want the pencil cup to be. If your tiles are larger than this, you can always cut them down to size using a wet saw.
If possible, choose tile samples with a colorful pattern or design to add more character to the supply holder. However, you can always draw your own design and seal the tile if you only have solid-colored samples. In addition to the 4- or 6-inch tiles, you'll also need a wood base of the same size. Simply lay out the pieces to form a cube, with the wood piece on the bottom. Use a strong adhesive to glue the edges together. Follow the packaging directions to let everything dry completely; then, you'll be all set to start using your new creation.
Make decorative nameplates
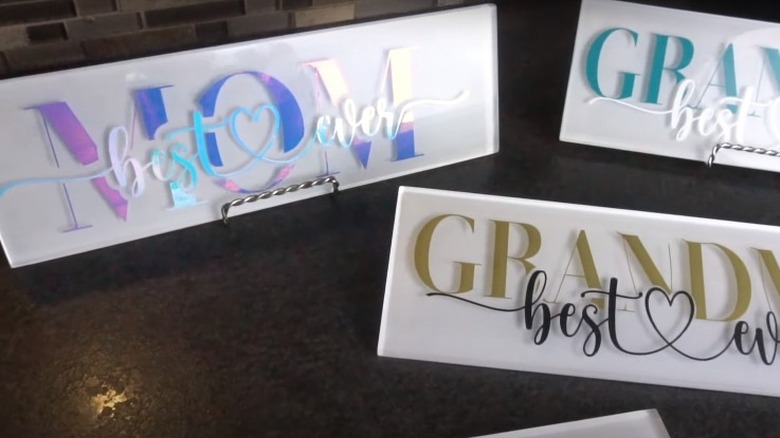
Do you have some leftover subway tile samples you grabbed when finalizing your renovation plans? If so, they — or other similarly-sized tiles — can be used to make decorative nameplates for a child's room (or any other room in the home). Traditional subway tiles are 3 inches wide by 6 inches long, making them the perfect size for hanging on a door or wall to indicate which room belongs to which family member.
You can decorate the tiles using colorful scrapbook paper and other embellishments to match the likes of the intended recipient. Decoupage the scrapbook paper to the tile, then add letter stickers to spell out the name along with other embellishments, such as ribbon or rhinestones. You could also add some more stickers to highlight some of the likes and interests of the person the nameplate is for. Think about the types of sports they like, their favorite movies or books, which games they like to play, their favorite animal, and anything else that could help you personalize the design.
Create mosaic planters
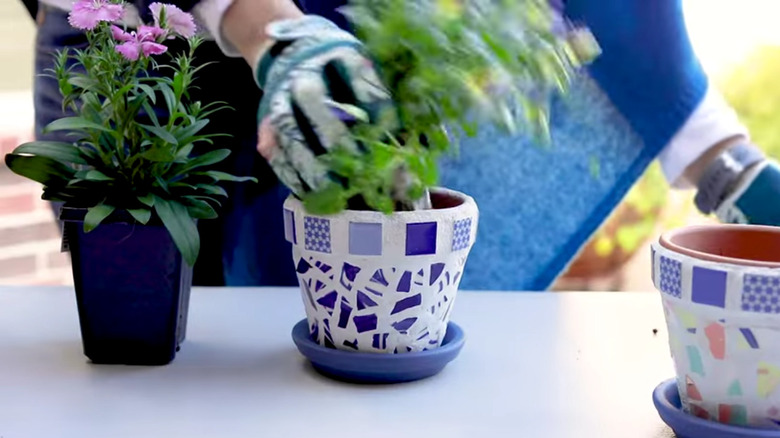
House numbers aren't the only way you can put your mosaic skills to use to repurpose those tile samples. They can also help you create unique and colorful mosaic planters to proudly display your indoor or outdoor plants. Even better, the planters are not too difficult to make — you'll just need some terracotta planters of the desired size and tile samples of different colors.
Start by carefully breaking each tile into smaller pieces. Then, plan out your design on the ground before applying the adhesive to the planters. Once you've decided how to decorate, you can cover sections of the pot with glue and stick on your tile pieces. Once your design is finished, let the adhesive cure for the amount of time recommended by the manufacturer, then apply grout between the tile pieces. Buff away the excess grout, apply a sealant, and put those beautiful planters to good use.
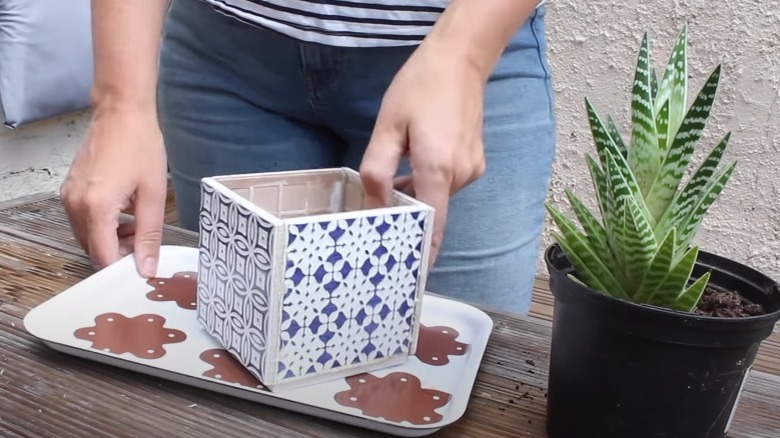
Keep your bathroom essentials neat and organized
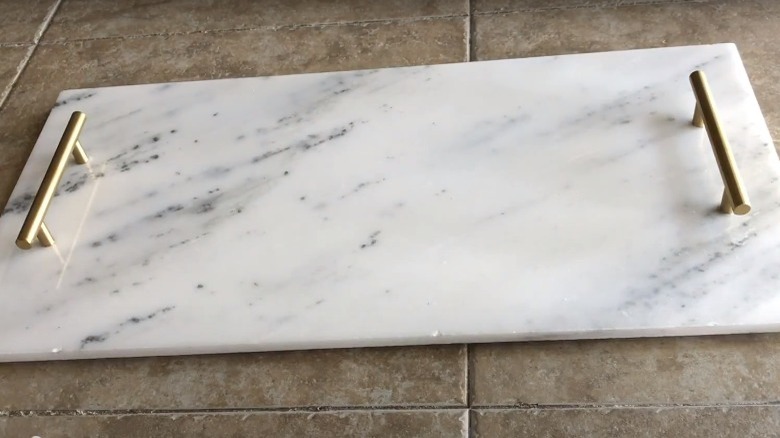
If your bathroom counter is constantly in disarray, you can help control the clutter and keep your soap, toothbrushes, and other essentials organized by creating a tile tray. A larger piece of marble tile would be ideal for this project, but it could also work with square ceramic tiles, depending on your available counter space. In addition to the piece of tile, you'll also need a strong adhesive and some handles (like drawer pulls) in a finish that coordinates with the rest of your bathroom and the selected tile. Some felt pads for the bottom of the tile will also help ensure it doesn't scratch your counter.
Once you have all your materials laid out, the rest of the project should be pretty straightforward. Start by attaching one felt pad to each corner of the tile. Then, center the handles on either end of the tray and use the adhesive to connect them into place. Be sure to follow the manufacturer's recommended curing time before attempting to lift or move the tray. Once cured, you can fill it up with your toiletries or leave it mostly empty as a decorative piece in the bathroom (or, really, any other room in your home.)
Make wall hooks for hanging keys, jewelry, and more
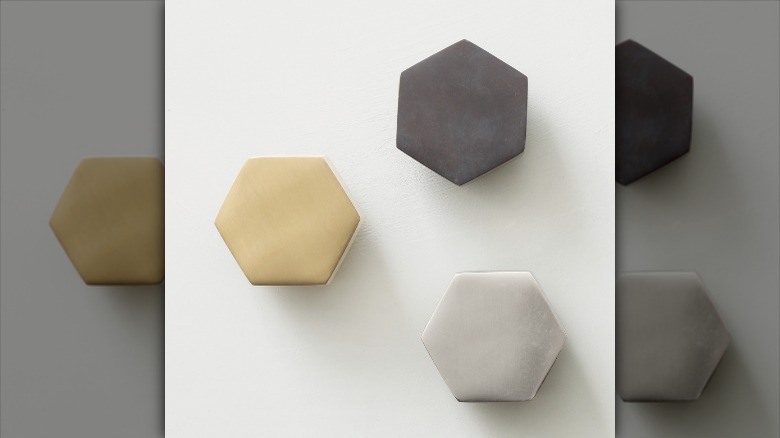
Did you know that you can also use tile samples to make hooks to keep jewelry, lanyards, scarves, keys, and other smaller items organized and easy to find? Yep, you read that right, turn your tile samples into wall hooks to add functional and attractive storage to your bedroom, closet, bathroom, or any other room in your house. If you have any smaller tiles that are around about an inch, they'll work perfectly for this project. Square tiles will work, but round or hexagonal ones might look a bit better.
To make the hooks, you will need some small wooden blocks (narrower than the width of your tiles). Secure one piece of tile to the end of each wooden block, then attach each block to the wall in the desired locations using a drill and bolts. Voila! You have a new storage solution that you'll actually be excited to use!