What Happens When You Add Salt To Your Paint?
Upcycling old furniture is a fun DIY project, and if you've been looking for a way to make your pieces more unique, you might want to reach for your kitchen cabinet for a box of salt. When added to paint, salt creates an interesting, textured look that can transform a piece of wooden furniture. If you're redecorating and looking for a beach aesthetic, this painting trick is perfect. The salt will make the paint look crackled or like it's been beautifully worn down by time, which is perfect for coastal designs. Regular kosher salt works great for this, making it an inexpensive project.
To achieve the desired effect, you'll need plaster of Paris, a palm sander, salt, flat white latex paint, and two colors of flat paint that look good together. Flat paint works well for creating a textured appearance because it can become distressed when scrubbed. If you don't want to use kosher salt, salt washes can be purchased and added to your paint.
Mixing paint with salt
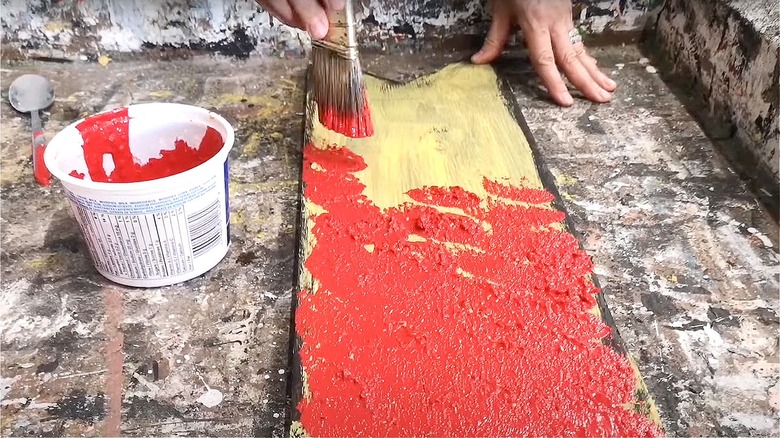
First, you'll need to decide which color you'd like for the first coat. This color will peek out from underneath the color you use for the second coat. Combine 1 tablespoon of salt with 1 cup of your base paint and 3 tablespoons of plaster of Paris, creating a thick paint. If it's too thick, try mixing in a little water to thin the mixture. While you may be tempted to mix all your paint at once, it's best to do it a little at a time, since the effect turns out better when it's first mixed.
It's a good idea to clean the furniture before you start painting to ensure the salt paint adheres to the surface well. Once you're ready, slap your paint onto the wooden furniture. The goal of this project is to get a lot of texture, so don't worry about being messy. Add a thick layer of paint, letting it be inconsistent and gloppy. You can also try dabbing the paintbrush or using brush strokes to create more texture.
Finishing your salt paint project
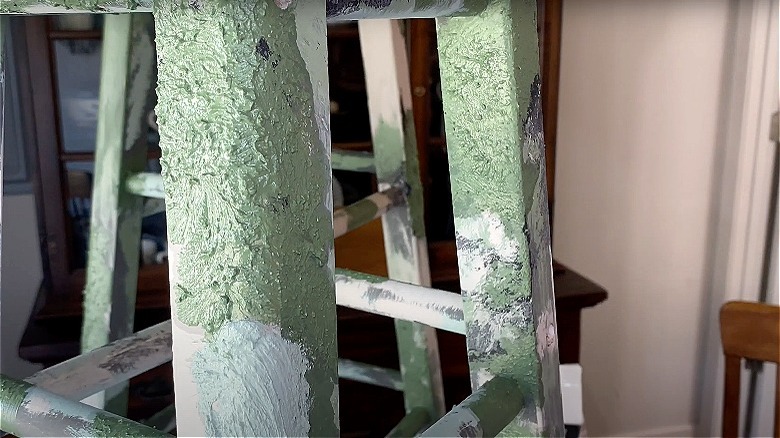
Once the first coat of your salt paint is dry, repeat the process with your second color, completely covering the first layer of paint. For more of a chipped look, skip adding salt to the second color. If you'd rather the wood show under the top coat instead of another color, simply make both coats the same color. Paint the second in the same manner, with chunky globs of paint splattered across the piece. After it's dried, add a thin layer of latex paint using a dry brush.
Let that sit and once it's dry, use 120-grit sandpaper over the entire area. With this part of the DIY painting project, you can get extra creative, sanding more in some places than others to reveal the underlying colors to make it unique for you. When you're finished, clean it with a wet cloth. You can also try using a scraper to remove some of the paint in chips.