The Hanging Wall Storage DIY That's Perfect For Newbie Woodworkers

For those new to the world of woodworking, starting with simple and novice-friendly projects is essential to build foundational skills and gain the confidence needed to take on more complex ones. Basic tools and straightforward guides are all you need to make many of the beginner-level woodworking projects out there like small tables, floating shelves, and storage racks — this DIY wall storage rack shown on TikTok is the perfect project to start with, as it's useful for your everyday items.
There are so many benefits to learning how to woodwork. Doing things with your hands is a good mindfulness practice that comes with the fulfillment of creating something from scratch. It is also a great creative outlet that lets you innovate and provide solutions to needs that pop up around the house. Moreover, by being able to engineer things yourself, you won't have to spend too much on buying certain items or hiring professional help. This wall rack can be brought to life with just a few materials and will give you something to hang up loose items like hats, scarves, and umbrellas to keep the entryway clutter-free. It can also be installed in other parts of the house like the bedroom, mudroom, or garage.
How to build a storage rack
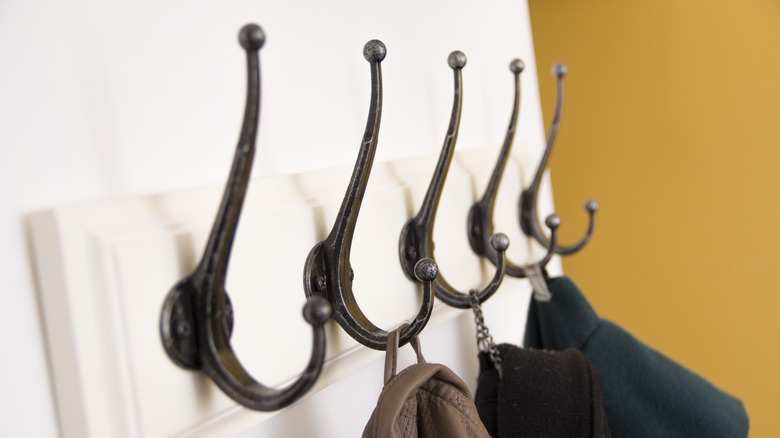
You'll need wood pieces, stain or paint, command strips, little hooks, screws, and a drill. You can get wood from any home improvement store or use any scrap wood you have lying around — one tip for getting wood without buying it is to see if you have any old furniture that can be upcycled. For the hooks, you can get double- or triple-prong on Amazon for $11 and $18 respectively with screws included. Build sells double-prong hooks from Hickory Hardware in a nice, rustic antique brass finish for $4.65 a piece. Both products come in various finishes to match the color you choose for your rack base.
The first thing to do is to stain or paint the wood and let it dry completely. Next, fix the hooks to the surface. Measure how far apart you want them, mark the spots, and then use the drill to make small pilot holes. Mount the hooks then finally affix as many command strips as you need on the back of the wood, to hang your new rack up on the wall.
Different techniques for newbies
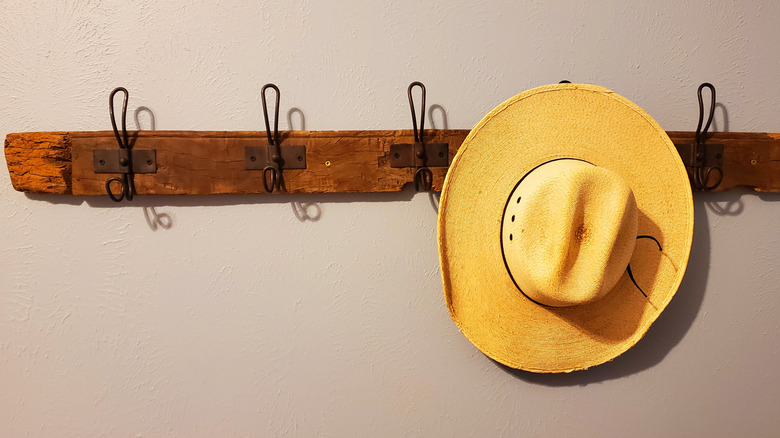
A variation of this project, shown in this TikTok, involves a few more steps. Instead of attaching separate hooks, the creator demonstrates how to build the hooks into the rack. He uses what looks like a Forstner bit to drill bigger holes into two thin planks of wood and saws through the holes on one side to create the hooks. He goes over the surfaces with a hand sander, stains the two racks, and proceeds to make them into a freestanding hat rack.
Both versions of this hanging wall storage DIY are perfect for newbie woodworkers because they require few tools, and the steps aren't complex. If you're using leftover wood from a former project you might want to sand off the previous paint to give it a fresh look, alternatively, you can leave it as is to give the rack a more rustic appeal. There are also various ways to customize the look, from painting the base to the hook selection, so you can definitely have fun with this project and make it your own.