The Ultimate Guide To Repairing Water Damage: From Demo To Painting
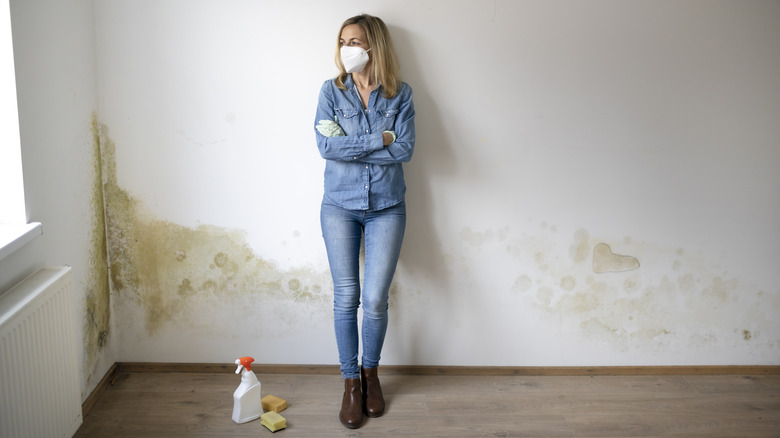
No homeowner wants to deal with water damage caused by a natural disaster, frozen pipes, or internal flooding due to mishaps like an overflowing toilet. If water damage does happen, quick cleanup and repair are the best ways to avoid long-term issues. While you may want to get to work repainting damaged walls or ceilings as quickly as possible to settle back into your normal routine, don't act too quickly. Water damage requires more than cosmetic fixes.
Painting over damaged walls or ceilings is a different process from simply applying a fresh coat of paint to brighten up a dark house or refresh the look of an outdated room. Repairing and prepping surfaces before painting yields the best and longest-lasting results. These steps produce professional-looking finishes while protecting your walls and investment. Following these guidelines can also potentially protect your health from issues like mold or mildew.
Dry out the affected rooms and walls
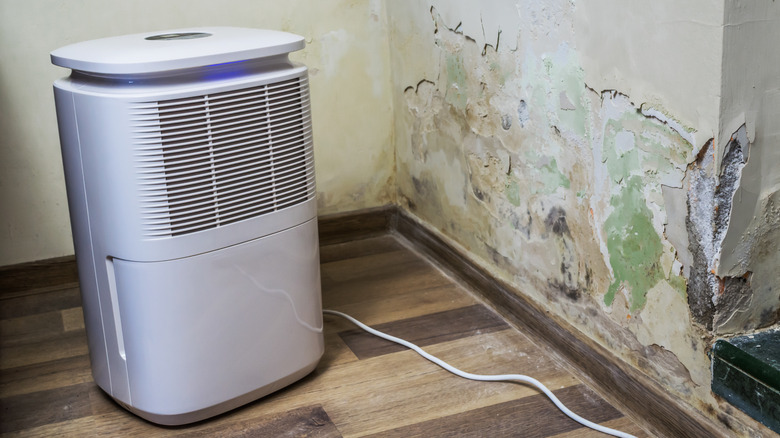
For larger areas of damage, or when water leaves walls, ceilings, or floors damp for long periods of time, the area will need to be completely dried before making any repairs. Professional contractors and damage cleanup experts urge homeowners not to skip this step. If you do, mold or other fungus can take over. If the weather permits, open windows to increase airflow and promote drying. This is an effective method of decreasing humidity in the home by introducing drier air into the room.
However, if the outdoor humidity is higher than indoors, keep windows closed and rely on dehumidifiers and air movers like industrial fans. Air movers are powerful fans that increase air circulation and speed up evaporation. Dehumidifiers remove moisture from the air, helping to reduce humidity levels. They also help draw water out of porous materials like drywall and carpeting. For best results, position these devices throughout the room for increased air circulation.
Inspect molding and trim
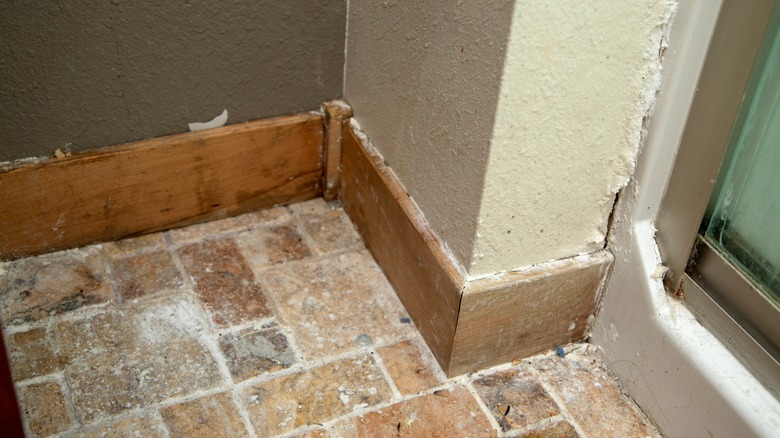
Water damage can be subtle, so it's important to thoroughly inspect areas, even though they may not look damaged. Molding and trim often look like solid wood but can be made of composite wood and glue. Therefore, they can act like sponges and draw water into the core of the materials.
Start by visually examining the molding and trim for any signs of discoloration, swelling, or warping, which are clear indicators of water exposure. Touch these areas to feel for softness or sponginess, as water-damaged wood will often lose its rigidity. Pay special attention to areas near sources of potential water leaks, such as windows, doors, and areas where pipes run through the walls.
Use a flashlight to highlight any changes in texture or color that may not be visible under normal lighting conditions. Sometimes, water damage can cause paint to bubble or peel, so look for these signs as well. Lastly, inspect the areas where the molding and trim meet the floor and ceiling, as these junctures can be prone to water seepage, especially in cases of flooding or leaks from above.
Don't forget to check the ceiling and floor for damage
Like other areas of the home, it's important to check beyond what you can see. One important reason to do this is that drywall wicks water and can draw it to the ceiling below if there is standing water on the floor. Check the ceiling to ensure it isn't bowing or sagging. Additionally, inspect for cracks, bubbling, or flaking paint and do a sniff test to check for obvious mildew or musty smells. The cleanup pros at Servpro advise that if the leak was on the top floor, it was likely due to a ceiling leak. And if there was damage to ceilings on the ground floor, the biggest culprits are typically a pipe or bathroom on a higher level of the home.
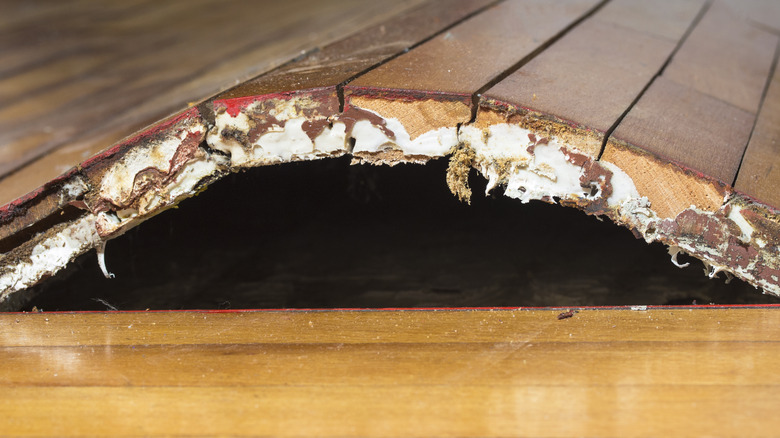
For floors, look for signs of warping or swelling of the flooring material. Tiles may become loose, and hardwood floors might exhibit cupping (where the edges of the planks rise higher than the center) or crowning (where the center of the plank rises higher than the edges). Pros recommend feeling the surface for dampness or soft spots. Lastly, walk across the floor and listen for unusual sounds, such as creaking or popping, which could indicate that the subfloor or joists have been affected by water damage.
Check for hidden water damage
It's possible that your home has incurred hidden water damage. Even though you may have cleaned up debris, repaired water-stained walls, or used an industrial dehumidifier to remove moisture within a room, there could be damage behind walls. If parts of your home smell musty or have a mildew odor — think mushrooms or an old basement — it's worth digging deeper. Try to locate the source of the odor. You may need to open up a small part of the wall to inspect for signs of water damage or mold. If in doubt, consult a mold remediation professional.
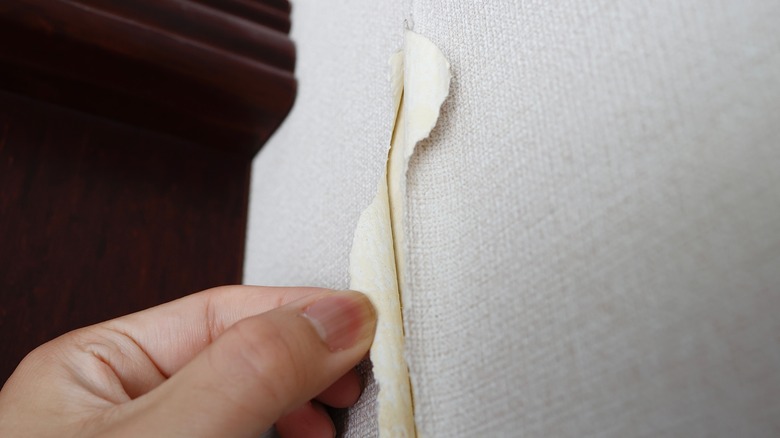
Check for bubbling paint or peeling wallpaper. This is a sign that water seeped into or behind the wall, causing the surface to swell. For wallpaper, gently peel back a corner to look for signs of damage. In addition, inspect the wall closely to look for other signs of damage, such as buckling or cracking.
If the walls look OK but seem cool or slightly moist to the touch, there's a way to test for moisture without invasive procedures like ripping out wallpaper or tearing out a portion of the wall. Restoration service pros advise using a moisture meter for an accurate guide to the moisture inside walls, especially drywall, which is porous.
Repair damaged walls or surfaces
When you're confident that the cause of the damage has been resolved, it's time to move on to repairs. If you incur major damage, you may need large-scale renovations that include ripping out damaged walls or repairing framing. For projects of this size, hiring a contractor may be your best bet. This will ensure that all local building codes are followed, and the structural integrity of your home is maintained.
If the damage is less severe, a do-it-yourself approach is cheaper. Create a list of needed materials before heading to the store. For small areas of damage, such as bubbling or peeling paint, you'll need to sand the paint down to the drywall or scrape off large areas of defective paint with a putty knife. Then, fix any small dings or gashes by applying an even layer of putty or spackling paste to even-out surfaces such as wood, drywall, or plaster. Finally, sand with fine paper when dry. To get rid of ugly water stains or brown marks, combine 1 gallon of water, 1 tablespoon of ammonia, 1/4 cup of vinegar, and 1/4 cup of borax in a large bucket. Then apply to the walls with a soft sponge, trying to dab the stain rather than rubbing deeply into the walls.
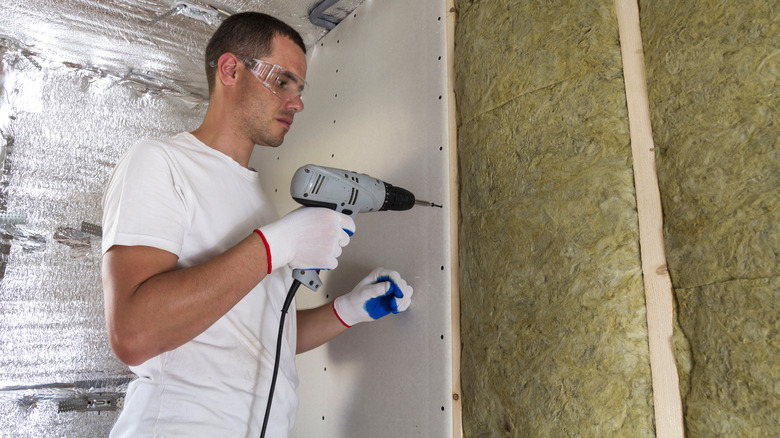
Remove heavily damaged drywall
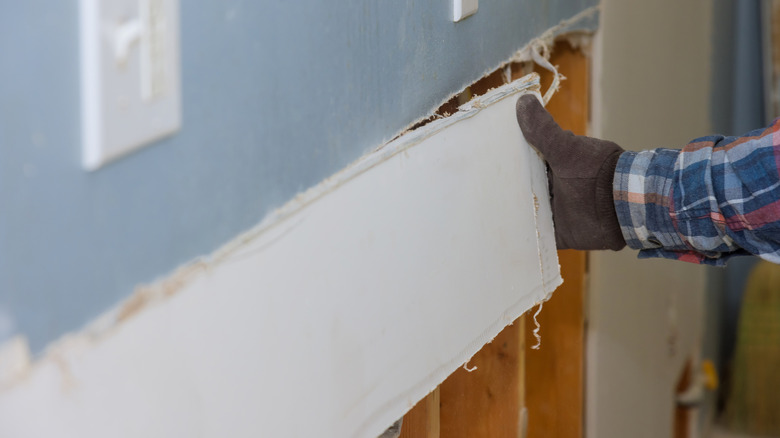
When the drywall is heavily damaged, removal is best. Drywall is porous, and is more susceptible to damage than hardwood. If there are cracks, buckling, sagging, swelling, mold, or mildew, these are signs that the damage is severe enough for either complete or partial drywall removal.
There are a few best practices to remove drywall with minimal mess. Stay away from the sledgehammer. While it looks cool on home renovation shows, it's the fastest way to leave debris all over the floor. Instead, use a utility knife with an extra-long blade to smoothly cut away sections.
Start by scoring the inner corners of the wall, then use pressure to make a clean cut into the drywall. Next, with a drill, remove all the screws on the wall. If there are hidden screws, you can use a Studball finder to locate them, then place your drill directly over the area for removal. Once all the screws are removed, gently tear away the drywall in sections. They should tear away neatly where you made score marks.
Check for damage to insulation
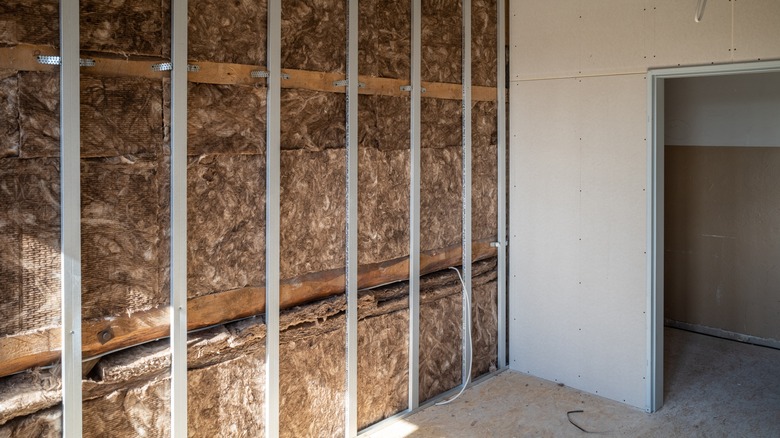
Once you've removed the drywall, check to see if the insulation layer is damaged. Water damage to insulation can compromise its thermal performance and lead to mold growth. For accessible areas or areas where the drywall has been removed, visually inspect the insulation for any signs of water intrusion. In attics and basements, look for discolored, compressed, or sagging insulation, which indicates water exposure. Fiberglass insulation may lose its fluffiness, becoming heavy and compact. Alternatively, cellulose and foam insulation might change color or appear warped.
Water-damaged insulation is a breeding ground for mold. Look for visible mold growth on or near insulation, which can range in color from black, green, white, or yellow. If you suspect water damage but cannot access the insulation directly, consider hiring a professional. They can conduct a comprehensive assessment, including using thermal imaging cameras to detect moisture without intrusive measures.
Hang new drywall
Once the old, damaged materials are removed, it's time to put up the fresh wall. Luckily with a few simple tools and patience, nearly anyone can hang drywall like a pro. It starts by measuring the area to be covered, cutting the drywall sheets to size using a utility knife for scoring, and snapping them along the cut lines.
Hang them from top to bottom securing the panels to the ceiling joists using drywall screws spaced about 16 inches apart. Make sure the screw heads are slightly recessed without breaking the paper surface. Position the drywall sheets vertically, starting from one corner and working your way across. It's important to align the edges with the center of the studs to provide a solid anchor for the screws. Pay extra attention, making sure the seams between panels are tight to minimize gaps. After all the panels are secured, apply joint tape and compound to seams, corners, and screw indentations, smoothing it out to create a seamless surface.
Install baseboards and trim
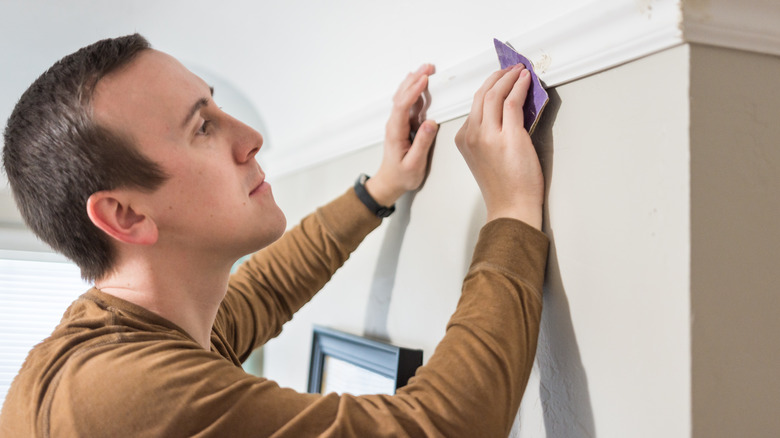
Once the drywall is complete, move on to the trim. If the original pieces of woodwork are still in good condition (without any structural damage, bubbling, or bulging), you can reuse them. After all, they are already measured and cut and will save time and money. You'll likely need to wipe the existing pieces down with a damp cloth and repaint them for an even and clean appearance.
If you need to replace the damaged trim, you must take a few extra steps. Match the trim to the existing type in your home. You'll also need to cut pieces down to size. For the corners, they need to be cut at 45-degree angles. If you don't have the tools, many hardware stores can cut pieces to your measurements, but you might need to pay a small charge for each cut.
When all the pieces are cut to size, paint the trim. Then, use a nail gun or hammer and finishing nails to secure the baseboards and trim into the wall studs. For corners, make sure the angled cuts fit together snugly. Lastly, fill any small nail holes with wood filler and apply caulk along the top and bottom edges of the baseboards to seal any gaps.
Choose the right primer for the job

Before applying the paint, you'll need to find a primer that's best suited to your situation. Many paints claim to be two-in-one with paint and primer. These options may be fine for quick coats of paint on undamaged walls but aren't the best option for tougher jobs. Today's primers are created to increase the longevity of paint — meaning your walls will look new and resist cracking or bubbling much longer than if you didn't use a primer. Additionally, primer can even out rough surfaces, block stains, and neutralize dark paint colors, requiring fewer coats of paint color.
For moisture-prone rooms, especially bathrooms, choose an anti-mold primer. These products include brands such as Kilz Mold & Mildew Primer for interior or exterior and Zinsser Mold Killing Primer. For homes in particularly water-damage-prone areas, contractors recommend Fiberlock Aftershock Fungicidal Coating, an EPA-registered product.
Whatever your primer needs, remember that there are two types: oil-based or water-based. Generally, latex paint does not adhere well to oil-based primers. There are exceptions, so read the labels carefully before getting started. Lowes recommends using water-based, stain-resistant primer for walls made of drywall.
Prep walls before painting
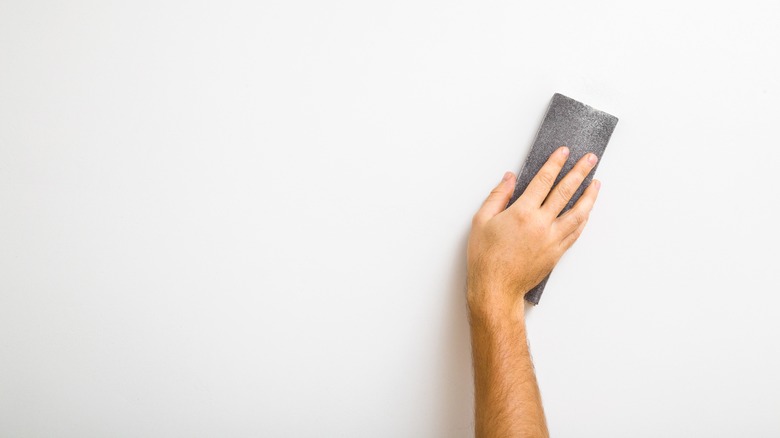
It's almost time to paint. Before getting started, take a few steps to prep your walls for painting to ensure the best final appearance — and keep the mess to a minimum. If you are repainting over existing paint, fill in any cracks or holes with spackling paste. For new drywall, ensure it's lightly sanded (with fine-grit sandpaper) so the joint compound is flush with the wall.
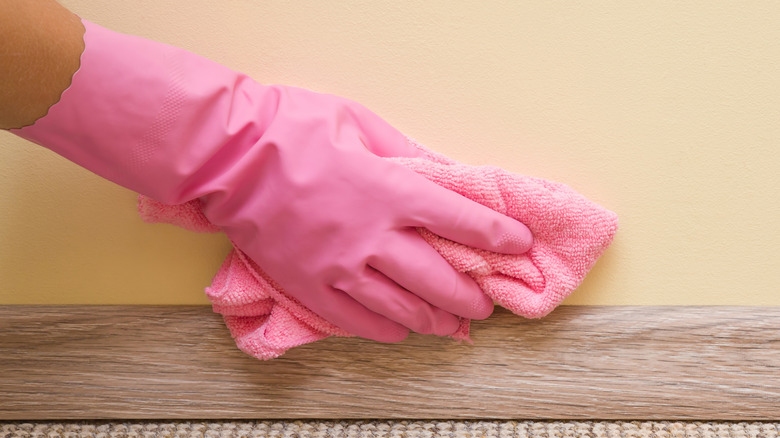
When finished, wash the walls down with a damp sponge to remove any dust or debris. This is essential for a smooth, quality finish. Mix a solution of non-abrasive detergent, like gentle dish soap, with warm water. You only need about a teaspoon of detergent for a bucket of water. Use a soft sponge or cloth to wash the walls in sections from top to bottom to prevent streaks, and rinse the sponge frequently in clean water. After washing, rinse the walls with a clean, damp cloth to remove any soap residue, and allow the walls to dry completely before painting.
Cover and protect surfaces
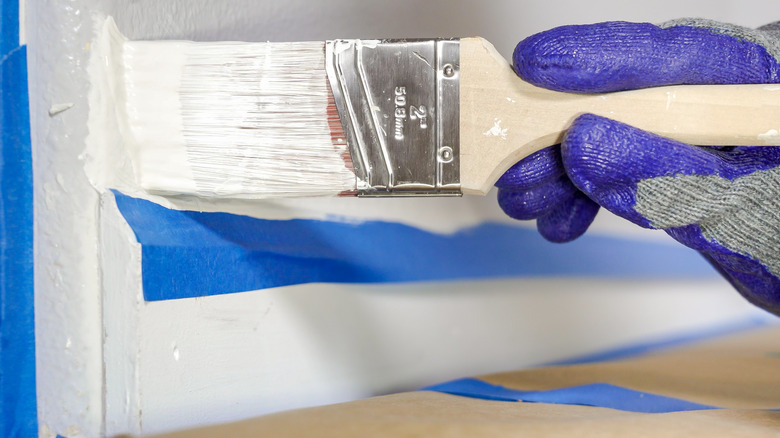
After the walls are washed down, allow them to dry for a few hours. You can use a fan to speed up the process. Then, it's time to apply painter's tape to areas that need to be protected from the wall color. This can include baseboards, trim, windows, outlets, or adjoining walls. Apply pressure to the tape once applied to get a smooth, straight paint line and prevent paint seeping under it.
To protect large furniture and floors, use paint tarps (also known as drop cloths). There are two main types: canvas and plastic. Canvas tarps are durable, absorbent, and slip-resistant but are often heavy, making them ideal for floors or smaller pieces of furniture. Plastic tarps are lightweight and waterproof, making them a good choice for covering large objects like furniture. To protect floors, lay down canvas tarps or heavy-duty paper and secure overlapping sections with painter's tape. Repeat the process throughout the whole room, and secure the tarp to the floor with tape to prevent slippage.
Match paint colors

Once it's time to paint, it might not be as easy as simply going to the store to pick up a few gallons of your existing color. Paint fades, especially dark hues like green, red, and blue. So, if you are only repainting one wall in a room or a section of a wall, the new color may not perfectly match what's on the other walls.
To begin, identify the paint already on the walls. If you don't know the brand name and color, you can remove a small chip from the wall and take it to a paint or hardware store with color-matching technology. It's best to choose a hidden area, such as behind a large piece of furniture or a light switch plate. These areas experience the least amount of fading. The chip should be at least the size of a quarter to allow for an accurate match.
Before committing to painting the entire room or wall, purchase a sample size and apply it to a small section of your wall. Allow it to dry completely, as paint darkens as it dries. Check the color at different times of the day, as natural and artificial lighting can alter the appearance. In addition, keep in mind that the sheen (matte, eggshell, satin, semi-gloss, gloss) is just as important as matching the color. The same color can appear different when the sheens aren't consistent.
Apply paint like a pro
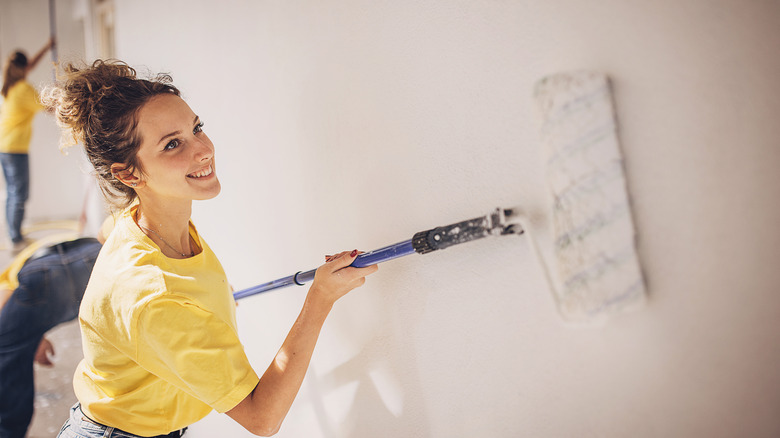
You've made it to the final step of repairs, and painting is the only thing between you and your improved room. To ensure the best look, take guidance from professional painters. While you should do small areas, such as those around trim and light switches, with a small brush, the best way to paint a wall is to invest in a high-quality roller and accompanying equipment.
First, choose the right roller type. The experts at Glidden Paint recommend using 1/4″ roller covers or foam rollers to produce the smoothest finish. Once you've attached the roller cover to the paint roller frame, use a damp rag to moisten it. Don't skip this step because it will help it absorb the paint more evenly.
Another pro tip is to use a pole extension that screws into the paint roller frame. Adding more length allows you to cover more wall area in one full sweep, avoiding starts and stops that can result in streaks or uneven layers. In addition, you can apply more and more even pressure using a long pole. Be sure to let each layer of paint dry between coats, and read your specific paint for guidance. Darker colors often require more coats for an even appearance.