TikTok Identifies A Must-Have Tool For DIY Cabinet Installation
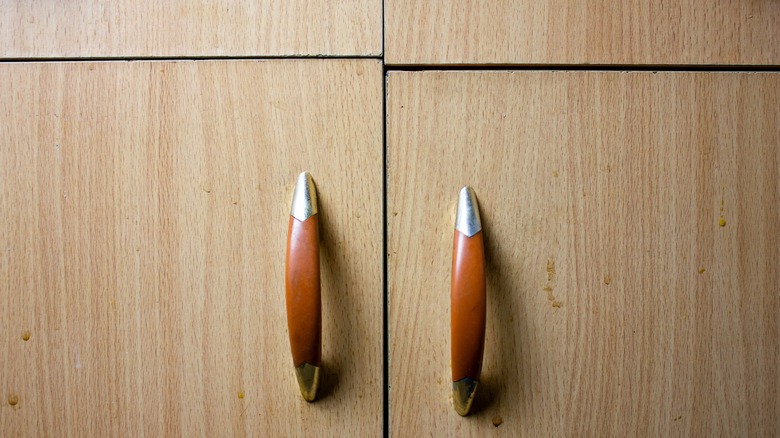
Ask any woodworker, "What's that old saying about clamps?" Before you finish the sentence, you'll hear this: "You can never have enough." And we have another clamp for you that you probably don't have but you might desperately need. If you have to install cabinets, even once, a claw clamp is indispensable for the job, according to TikTok home repair pro @winnidesigns. The idea of the clamp, also known as a face frame clamp, is that it both pulls side-by-side cabinets together and makes the fronts flush with each other. And your cabinets are one place where you don't have any wiggle room for imprecision.
This kind of precision is not always the norm when it comes to DIY home improvements. In many cases, there are built-in processes that lessen the need for precision, usually in the form of installing finish trim. But if you install cabinets unevenly, trim wouldn't be able to cover the problem. If the top of the cabinets protrudes further than the bottom, the entire cabinet carcass is out of square. As a result, the doors and drawer fronts would be uneven, doors would open at different angles, and the countertop installed on the cabinets wouldn't be level or firmly resting on the cabinets at every point.
How to use a claw clamp
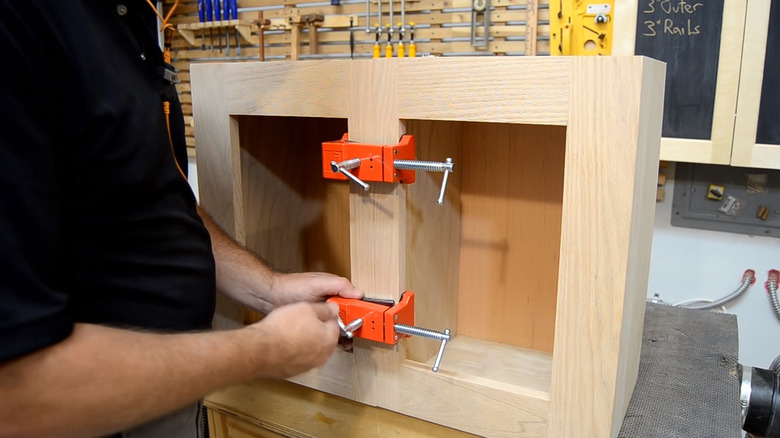
Another woodworking aphorism advises: "Measure twice, cut once, then force it to fit." While measuring is an important part of installing cabinets, claw clamps do this last step, forcing two adjacent cabinets to fit perfectly together regardless of any variation in the cabinet dimensions or the floors and walls where you're doing the installation (much more likely). To understand this magic, you only have to work through how a pair of claw clamps are used.
Start by putting the jaws of one clamp inside two adjacent cabinet openings, then turn the secondary handle on the side to bring the clamp's jaws together. Before the side handle is fully tightened, turn the main handle on the back of the clamp to begin pushing an adjustment plate against the front of your cabinet frames, pushing them into alignment. Don't over-tighten because now you'll repeat this process with your second claw clamp, and it needs room to move, too. Return to the first clamp and, moving between the two handles a few times, gradually tighten each until the two cabinets are well-aligned and firmly clamped. Repeat this fine-tuning with the second clamp. Use the built-in guides to drill pilot holes in the face frame, then flip the guides aside and install screws. (And be sure to check out our tips for drilling the perfect pilot hole first.) Remove the clamps, and you're all done aligning your two cabinets!
Tips for clamping and connecting cabinets
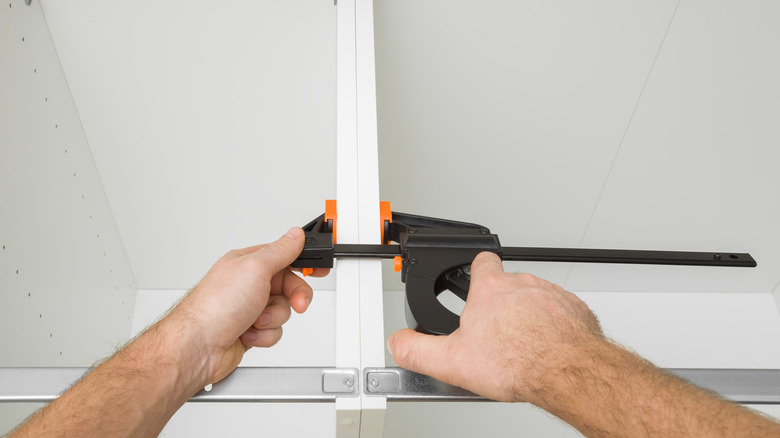
If you do some prep work upfront, you can get the same job without claw clamps. Any clamps are better than none. A ratcheting bar clamp, which most DIYers will already have, will do the job in a pinch, as will a large spring clamp. Any clamp that can be operated one-handed while you move the cabinets into alignment will work if you take enough time and care with the task. There are even edge clamps that look like C clamps with three handles that will do the same work of aligning your workpieces in two planes, though they don't typically have a claw clamp's large pads to protect cabinet faces, so take care if you use them. And don't over-tighten even claw clamps, which can damage cabinet face frames.
The prep work will make everything go smoothly, with and without claw clamps. It's tempting to screw your cabinets to the wall when you first bring them in, but either hold off or only screw them in part-way at first to allow a little play so you can align things before clamping. Remove cabinet doors and drawers to get them out of the way and avoid damaging them while clamping. Never pre-drill screw holes before clamping (the sawdust will get in the way later). And, finally, don't drive your screws in too far — or not far enough. The screw head should be flush with the edge of the face frame stile.