Make Use Of Empty Shoe Boxes With These Clever Organization DIYs For Your Home

Footwear is definitely a necessity, but each pair purchased comes with a cardboard box that is typically discarded once the new shoes are worn for the first time. According to the U.S. Environmental Protection Agency, 53.9% of all packaging that is tossed in the trash is recycled, but a whopping 20.9% ends up in a landfill. To reduce waste, shoppers can take their empty shoe boxes and turn them into tools to help organize the household.
Finding new ways to use empty shoe boxes to create order within the home isn't that hard, as the boxes are easy to alter and decorate. They work great for everything from storing seed packets and organizing children's toys to displaying makeup on a vanity. These clever DIY projects also feature simple instructions, so even the youngest members of your home can get in on the fun and help make your living space neat and tidy.
Drawer dividers
While most drawers offer one large space for storing your clothing, kitchen utensils, and office supplies, the extra room allows for items to shift around and quickly become more difficult to find at a glance. Additionally, more delicate items become susceptible to breaks, as they bump up against other supplies in the drawer. To make the best use of the space in your drawer, you'll want to create dividers out of old shoe boxes. The structured layout keeps the contents organized and protected from harm.
Remove the contents of your drawer and place as many empty shoe boxes as will fit inside. You can insert them vertically or horizontally, as well as use shoe boxes of different sizes to take full advantage of the space within the drawer. If you need, you can also cut a box to fit any remaining empty spots. Take the shoe boxes back out and give them a decorative touch by covering them with either patterned contact paper or a stylish fabric. The contact paper will stick by itself, but you'll need a little hot glue to attach the fabric. Set the boxes back in the drawer and fill them with your desired items.
Earring organizer
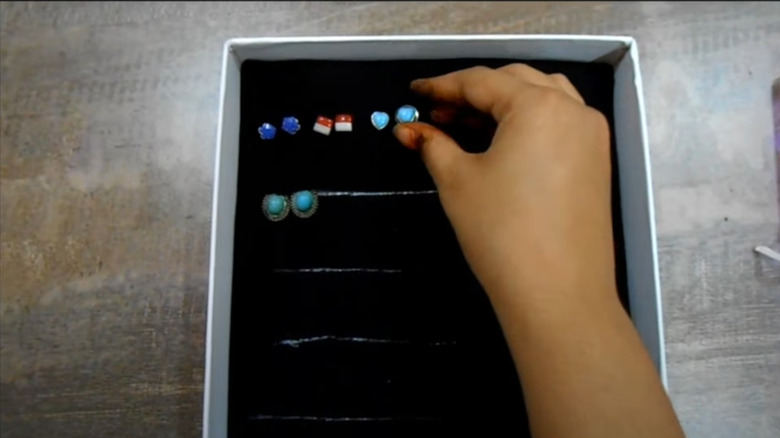
Earrings not only add style to an outfit, but they also draw attention to the face. Since there are earrings for just about every occasion, chances are you have amassed quite a collection. Simply allowing the earrings to sit in a drawer isn't ideal. The jewelry can become tangled, damaged, or even separated, making it hard to find a matching pair. To prevent these issues, consider constructing an earring organizer using empty shoe box lids.
For this project, you'll need four shoe box lids. Three of the lids will stand vertically to display the earrings. When you place them inside the fourth lid, they will have the support they need to remain upright. It can also help to add a bit of hot glue or super glue to the bottom. You can use the lids as-is or paint them using a non-toxic paint. Next, poke holes inside the lids where you want the earrings to go using a push pin. Keep in mind that some earrings hang longer than others, so you'll want to take care where you place the holes. Install the earrings when you're done by pushing the earrings through the holes and attaching the studs behind the lid.
Seed storage
In order to preserve seeds, you'll need to place them in seed packets and store them in a location that remains cool and dry. Additionally, you'll need to make sure they aren't sitting by a window, as the sunlight can reduce seed viability. If you do a lot of gardening, chances are you'll have an abundance of seed packets. Creating a seed storage box then becomes ideal, as it keeps the seeds labeled and organized for quick identification.
All you need to make storage for your seeds are two empty shoe boxes and a pair of scissors. Use the first shoe box as your seed storage box, and cut the second shoe box up to create dividers. Measure down the center of your seed storage box, and cut a strip from the second box to fit as the center divider. Then, cut one-inch slits down the center divider, spacing them out so that each section will fit a few seed packets. Put a dab of glue along the bottom of the divider and press it down inside the center of the box. Measure the width of the seed storage box and cut out as many horizontal dividers as you have slits at the center. As you cut, create a top, so you can add labels to the dividers later on.
Finally, cut slits in the bottom of each horizontal divider and install them by interlocking the bottom slit with the slit in the center divider. Add labels using either a permanent marker or a label maker.
Art supply caddy
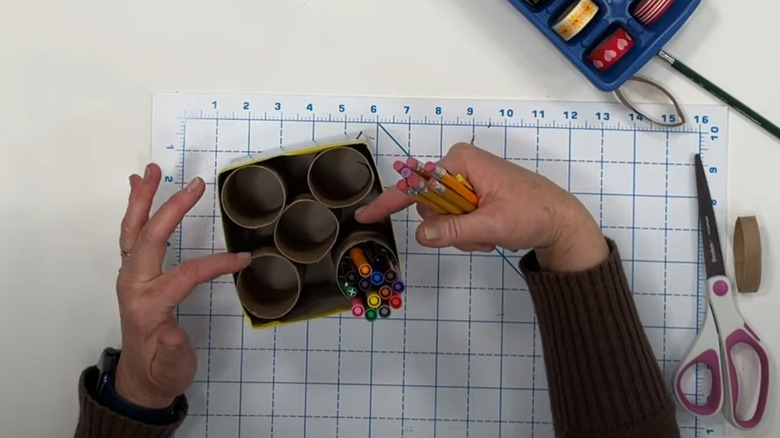
Whether your children are budding artists or you consider yourself an avid crafter, you're sure to have a number of supplies on hand to create magic when the mood strikes. Art supplies are one of those things that can take up a lot of space when not organized. Since art sets often include a great deal of items, it's also easy to lose pieces from the collection. Creating an art supply caddy using an empty shoe box and several toilet paper towel rolls is a great way to sort, store, and keep your art supplies at the ready.
For this craft, you won't need the shoe box lid, so you can set it aside for one of the other projects, such as the earring organizer. Take the shoe box and decorate it to your liking. You can cover it in contact paper or draw a design on it using markers or paints. Arrange empty toilet paper rolls inside the shoebox. They should stand by themselves if you use enough to fill the box. You can also add a touch of glue to the bottom if you wish. Place your colored pencils, paintbrushes, pipe cleaners, and other art supplies inside the toilet paper tubes for easy access the next time you're ready to work.
Toy storage
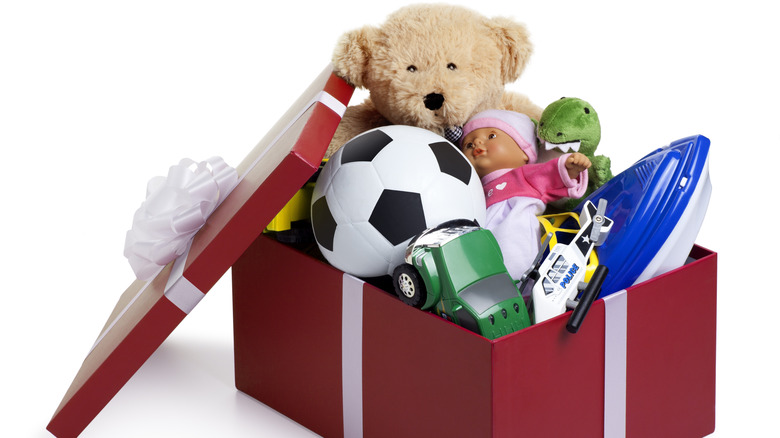
While toy chests are excellent for storing everything from stuffed animals to board games, they don't work well for toy sets that include a bunch of smaller parts. To properly organize smaller toy sets, you'll want to create toy storage containers from empty shoe boxes. These boxes are ideal for keeping everything from doll clothes to Lego sets to wooden blocks neat and tidy. You can also label the boxes for quick identification.
First, grab one empty shoe box for each collection of toys that you'd like to organize. Decorate the box and the lid using either construction paper, wrapping paper, or paint. You can use fabric if you wish, but it will be harder to attach a label to the fabric. Cut a leather strap into strips to form handles on each of your toy storage boxes, and then attach them to the front of the boxes using metal paper fasteners. Above the handle, add a label to identify the box's contents. You can do this with a label maker or by writing out the label on a small piece of white typing paper. Glue the label in place, and your box is ready to be filled with toys.
Cord and cable organizer
Homes today are filled with electronics that each have their own charging cords and cables, such as cellphones, tablets, laptops, and e-readers. It's easy for the cords to get tangled in a junk drawer or go missing altogether. If you have two empty shoe boxes laying around, repurpose them to organize all the cords and cables you have in your home or office.
Use one shoe box as your main storage box and the second box to create dividers to fit inside the main one. You need to cut one long piece to fit down the center of the main box, and two smaller pieces that match the width of the inside of the box. Once you have the pieces cut out, decorate the box and the dividers using contact, wrapping, or construction paper. Put a little glue along the bottom of the center divider and press it into place. Cut two 1-inch slits in the top of the center divider where you want the two horizontal dividers to go. Add a 1-inch slit to the bottom of each of the horizontal dividers and then slide them over the top slits in the center dividers. You now have enough compartments to store six cords. Consider adding a label to each compartment for easy reference.
Thread spool box
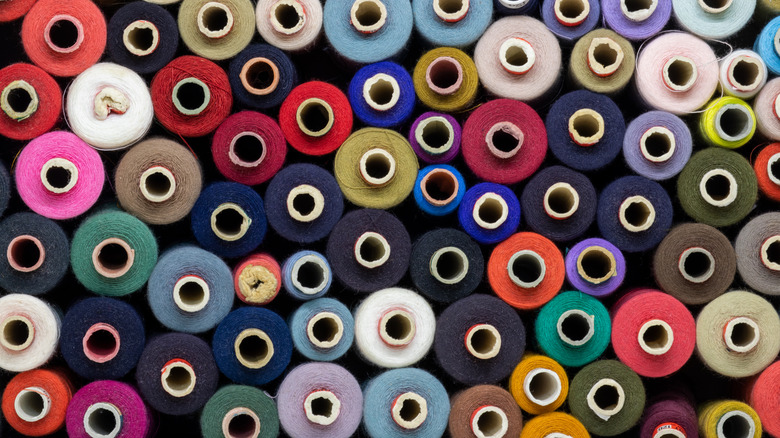
If you're an avid sewer, you know your sewing room is another area of the house that can quickly become disorganized. With dozens of bobbins and spools of threads in a wide variety of colors on hand it can be difficult to hunt through a container to find what you're looking for. As long as you have an old shoe box in your possession, you won't have to. You can create a thread spool box that will display each of the items, so that you can quickly grab the color you need to complete your project.
Decorate an old shoe box to match the theme in your sewing room. Paints and patterned contact paper work best, as you will have a hard time pushing the dowels through fabric. Once the thread spool box is to your liking, push the pegs up through the bottom. You will slide the spools over the dowels from inside the box. The number of pegs will depend on the size of the box, as well as the size of each spool of thread. Naturally, you'll be able to fit more of a collection of smaller spools than a set of larger ones. Place one spool of thread over each dowel and you're all set!
Decorative rope basket
Are you searching for a more modern-looking storage basket? If so, you can create this decorative rope basket from an old shoe box and use it to organize the extra hand towels and washcloths in your bathroom. It can also be placed in a guest bathroom and filled with soaps, lotions, and other hygiene items that you wish to have at the ready for your visiting friends and family.
With this craft, you won't need the lid. You can save it for use in making the earring organizer. Take the bottom of the shoe box and begin wrapping it with jute rope, being sure to use hot glue underneath as you go to secure the rope to the box. Once the box is wrapped with jute on the outside, add fabric to cover the inside. Cut a pillowcase to fit or use a decorative fabric to do this. You'll need to cut a piece big enough to cover the box lengthwise and over the smaller sides, with extra fabric to drape over. The edges can be glued together, and then the extra fabric can be set inside the shoe box. The ends that drape over can be folded to create a cleaner look before being glued in place.
Makeup tray
To make efficient use of your vanity, dresser, or bathroom countertop, you'll want to organize your makeup and personal hygiene items. One way to do this is to create your own makeup tray, which provides a dedicated space to display your favorite perfume, body lotion, and nail polish. Makeup trays can also add a decorative element to your space, and it turns out you can make one using an old shoe box lid.
Take a shoe box lid, flip it upside down, and paint it using acrylic paint. You can paint the outside and inside the same color or choose different colors that offer a complementary look. There's also the option to switch to a glossy paint for the outside of the box. This adds a bit of shine to the piece. Find a decorative placemat to add a bit of style to the inside bottom of the box, and cut it to fit. Attach the placement using a spray adhesive. Add your makeup products and you're all done.
Ribbon organizer
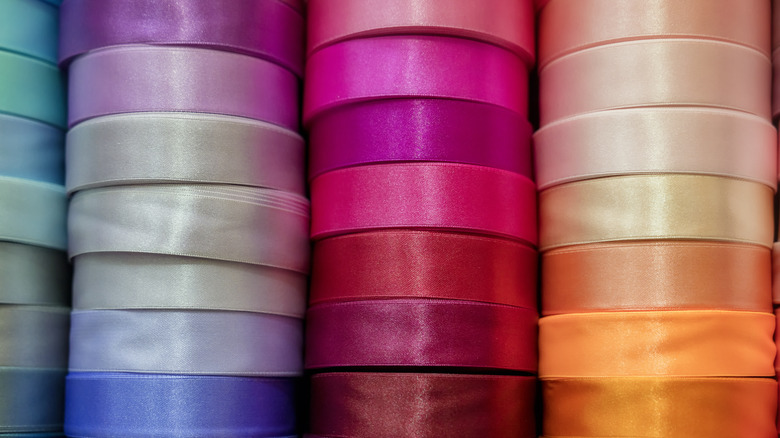
Spools of thread aren't the only craft item that can quickly overtake a space. Ribbons also get quite messy if not properly stored, as they easily unravel and become tangled. If you have more than five or six ribbon spools, consider constructing a ribbon organizer using an old shoe box, a dowel, and two large buttons.
Decorate an empty shoe box using either contact paper, paint, or a combination of both. Once decorated, measure the length of the box and cut a dowel that is one inch longer than the length. Cut slits slightly larger than the diameter of the dowel in the center of the sides about halfway down to place the dowel inside. You'll need a utility knife to do this. Slide the dowel through the center hole in the spools of ribbon. Drop the dowel down inside the slits and then glue a large button to each end. The ends should be resting just outside the box and the buttons will keep the dowel from sliding back inside the box.
Photo organizer
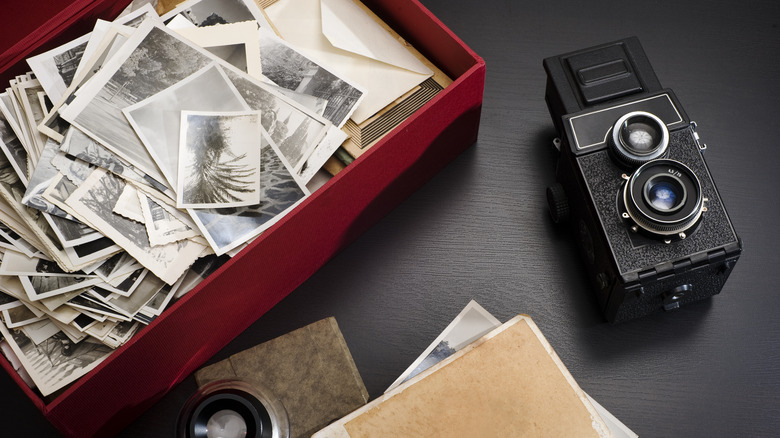
Photos capture treasured memories that provide a great deal of joy when a person glances back at them. That's why it's so important to keep the photos protected from dust, light, and moisture damage. In addition to keeping them safe, you'll want to organize them, so that you can quickly locate the set of images you need. One way to do this is to repurpose old shoe boxes as photo organizers.
Determine how many shoe boxes you need by deciding how you want to organize them. Do you want to organize them by the year they were taken, or by a theme, such as birthdays, vacations, and holidays? Next, decorate the box to match the year or theme. For example, you could use Christmas wrapping paper on a shoe box that is organizing Christmas photos or an old map for a box dedicated toward vacation memories. Add a label to the front of the box, so you know what's inside without opening the lid. Set your photos inside the box. If you'd like, you can also add a few dividers and label those. For example, if you want to organize 10 years worth of your child's birthday photos, you could use a divider to separate each year.
Ornament storage
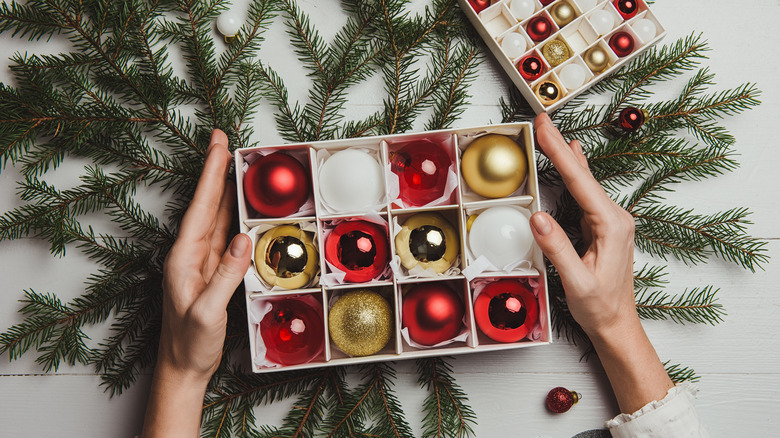
At the end of each holiday season, you'll find yourself needing to sort and store all of the festive decorations for use the following year. Christmas ornaments especially are quite fragile and need to be carefully packaged, or you risk them breaking. If you have a few unused shoe boxes handy, use them to organize and protect your ornaments. Within the shoe box, you'll add compartments that separate each ornament, offering insulation and shelter from harm.
Decorate the shoe box by covering it with a holiday-themed wrapping paper. Measure the inside dimensions of the box and cut a piece of felt to match. Glue the felt to the bottom of the box, as this provides extra cushioning to keep the ornaments safe. Create dividers from an old cardboard box as well. You'll need one long piece to fit down the center of the shoe box and several smaller pieces to turn each space on either side of the divider into a series of squares. The dividers can be glued into place. How many you use depends upon the size of the ornaments you need to store. Some are larger than others, requiring more space. Just keep in mind that you don't want the ornament to have too much space, otherwise it will move around in the box. Add the ornaments and store until the following year.
File organizer
Chances are you have a filing cabinet for all of your long-term storage, but what about your day-to-day paperwork, such as monthly bills, medical documents, school papers, and important receipts? These are all files you may wish to have at the ready but will clutter up your desk if they are just left out in a big pile. This handy shoe box hack will help keep temporary files neat, tidy, and readily accessible until you have time to tackle them.
Set the shoe box horizontally in front of you and mark the center on either side. Use this point to cut out a big V on each side and then fold the box so that the bottoms touch. Tape the edges to secure the shape. You'll notice that the new front and back of the box are now open. You'll need to cut a piece of cardboard to fit across these sides. Secure them with a little hot glue. The file organizer is now complete. However, you'll want to decorate it to match your office space. Both wrapping and contact paper are an excellent choice.
Keepsake box
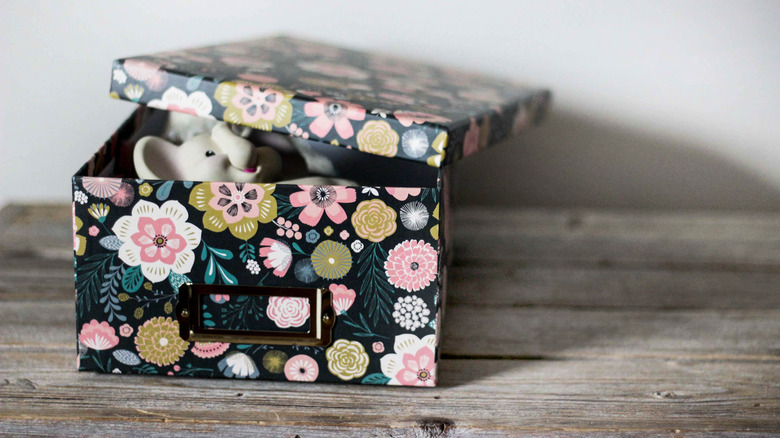
Looking for a way to store treasured memories, such as sentimental objects, childhood journals, family heirlooms, cards, and items from your baby's first year of life? Keepsake boxes are the perfect solution. You may be surprised to learn that you can quickly construct keepsake boxes using old shoe boxes. This option also allows for a personal touch during the creation process, which is nice if you're making the box as a gift for someone else.
With this project, you're going to use the shoe box as is but decorate it to match the treasures it will hold. A child's keepsake box can be wrapped in bright and colorful scrapbook paper or painted using the colors of the rainbow. Unicorn, dinosaur, or superhero stickers can be added all around the box. A box holding antiques or family heirlooms would be better suited to a silver paint with shiny embellishments, such as diamond wrap or a brooch. Additional supplies that work well for keepsake boxes include, patterned papers, decoupage items, stencils, washi tape, fabric, fake flowers, ribbon, and printed artwork. Decorate both the box and the lid. If you'd like, you can also add a label to the box.