DIY Hacks That Will Completely Transform Your Cabinets
We may receive a commission on purchases made from links.
Cabinets take up a sizable chunk of kitchen real estate, so keeping them functional and aesthetically appealing can make a big impact on your space. And while it would be nice to have a brand new set of beautiful, custom kitchen cabinets installed, many people don't have the luxury of doing so. A bespoke cabinet design and installation can run you thousands of dollars, depending on a number of factors like your kitchen size, materials, and your region.
Luckily, there are simple, budget-friendly things that you can do on your own to elevate the look and feel of your cabinets. Whether you're a renter or a homeowner, a beginner, or a power tool aficionado, the DIYers of TikTok have you covered when it comes to sprucing up your primary kitchen storage. Keep reading for their tips, tricks, and project guides that will allow you to transform your cabinets for a low cost and high reward.
Make your hardware harmonious
In this viral TikTok, @_amanduhh__ decides to DIY paint all of her kitchen cabinets. The project is a large undertaking with many steps, but we think her choice to spray paint all of the hardware gold, even the hinges, is what really elevates this project. In addition to creating a cohesive hardware finish, consider the style of your kitchen and the size of your cabinets to choose the hardware that's right for your space. Knobs are cost-effective and easy to install with a single screw (or strong glue, like in this DIY!). However, pulls may be better suited to large cabinetry.
Extend your cabinets to the ceiling
To give your cabinets a built-in look, you can extend them all the way to the ceiling. Remove and reposition any crown molding and add some cabinet-grade plywood, which you can get cut to size at a home improvement store like Home Depot. This project will make your ceilings appear higher by drawing the eye upward. As a bonus, you'll never have to think about that dust collecting on top of your cabinets ever again.
Cover cabinets with renter-friendly peel-and-stick paper
If you live in a rental and don't have permission to paint your cabinets, contact paper or peel-and-stick wallpaper is the next best option. The key to this DIY is primarily in the patient and detail-oriented application. But, choosing a high-quality peel-and-stick wallpaper for the cabinets will make the process that much easier. While shopping, look for a product that is flexible, labeled waterproof or washable, and has grid lines on the back for straightforward cutting. To get the white ash wood grain look in this TikTok, try the d-c-fix option peel-and-stick option sold on Amazon.
Add under cabinet lighting
Adding lights under your kitchen cabinets is not only functional as it provides much-needed visibility for practicing knife skills and preparing meals. But, the extra detail can also add an element of luxury. The EZVALO lights from Amazon that @sierra.honeycutt uses for this hack are adhesive, rechargeable, and dimmable. They also have motion sensor capabilities to turn on exactly when you need them (midnight snack, anyone?). If you're wondering what light temperature to opt for with these lights, or any others, for that matter, we recommend the warm light version to keep things looking soft and ambient.
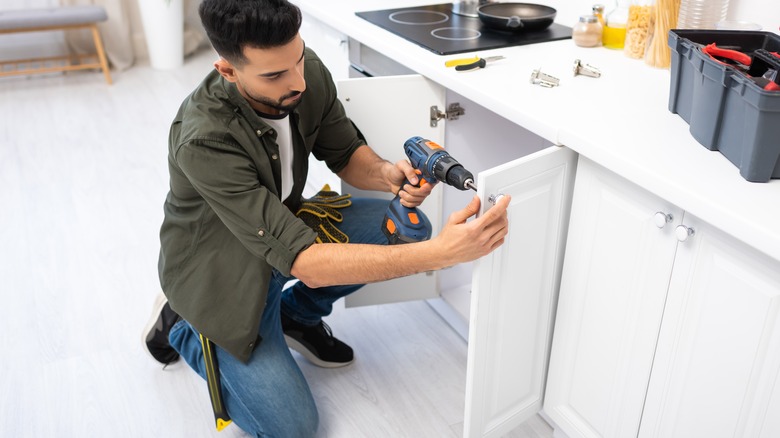
Change your hinges for a high-end feel
When kitchen cabinets slam closed, it can make them feel cheap, no matter how nice they look. There are many different types of cabinet hinges, but if you have concealed European-style hinges, you can swap them out for soft-close ones yourself. You'll need to first identify the type you currently have, and purchase the appropriate soft-close counterpart. From there, expect to spend some quality time with a screwdriver. If you don't want to swap each hinge, you can install soft-close dampers in each cabinet, which can be found on Amazon.
Create farmhouse style cabinet fronts
This hack takes simple cabinets and gives them a rustic twist. Start by removing the center panel of each cabinet with a router tool. Then, trim and glue metal grates, which you can purchase in sheets from Home Depot, to the open center. Make this hack your own by choosing a unique metal pattern or by painting the grate an unexpected color. And if you're not comfortable with the use of power tools, you can get a similar look by just trimming the metal grate to the size of your cabinet center panel and adhering it directly to the surface.
DIY your own shaker style cabinets
If you're feeling ambitious, try following this affordable DIY to make your own shaker-style cabinet doors. This approach doesn't require a table saw, but it does require a circular saw. If you don't have access to one, use the services at your nearest home improvement store, like Lowe's or Home Depot, to pre-cut all of your stiles, rails, and panels to size. For the holes that help join the stiles together, you will need a pocket hole jig. These can be pricey, but the MulWark mini kit available on Amazon is only about $30 and well-rated by customers, to boot!