Mistakes Everyone Makes When Growing Tulips In The Garden
We may receive a commission on purchases made from links.
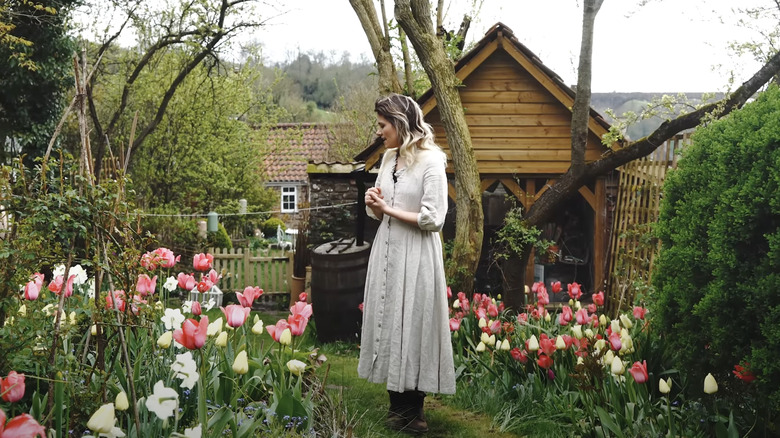
There are over 3,000 tulip cultivars, each with a slightly different shape, color, and height. These perennials come in many shapes and sizes, blossoming in shades of cream, pink, red, orange, yellow, purple, violet, and even motleys of contrasting colors. Although they vary in appearance, most tulips bloom in spring, have a symmetrical shape, and prefer well-drained soil in drier and colder climates. Ignoring these needs and other prerequisites for growing tulips can lead to an unsuccessful spring garden.
Learn how to plant tulips and keep them thriving throughout the year to add a rainbow of unparalleled color and beauty to your landscape. Know when to plant them and care for them throughout their lifecycle so you can nurture strong and impressive blooms for years to come. Below are thirteen common mistakes made by amateur gardeners. Read on to learn what you might be doing wrong and how to remedy any mishaps.
Buying bulbs and waiting to plant them
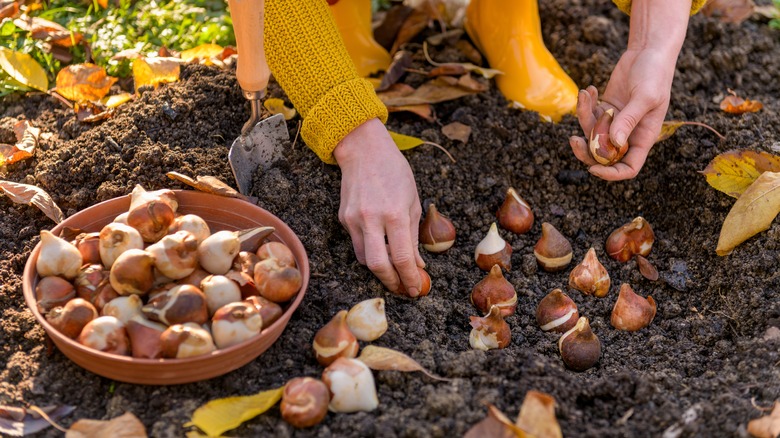
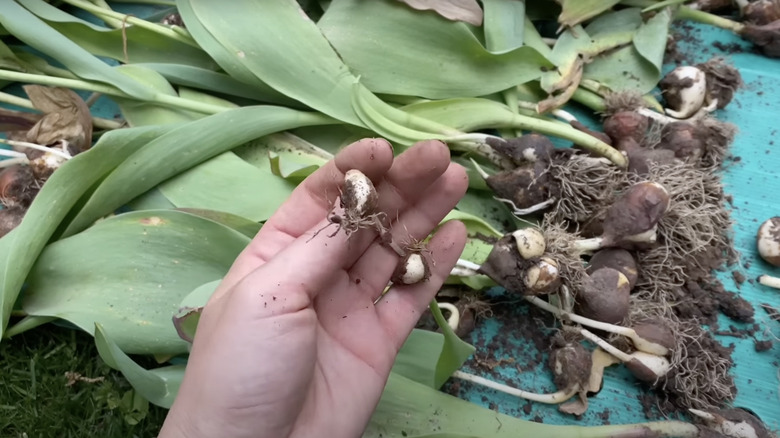
Tulips are often grown from bulbs, which are the round-shaped growths that form between the stem and the roots. Bulbs grow underground from fully matured buds and have stored reserves with enough energy and nutrients to produce new stems, roots, and flowers when removed and replanted. When tulips bloom and wilt, many gardeners dig up their bulbs to replant for another round of flowers. The mistake many make is waiting too long to replant their tulip bulbs, leading them to decay while in storage.
Once harvested or purchased, try to plant your bulbs within six months. They perform best before this window is up, although they may be good for up to a year. Keep in mind that the longer you wait to plant them, the less energy the bulb retains, making it more difficult for your flower to flourish once given the chance.
Purchasing only one variety of tulip
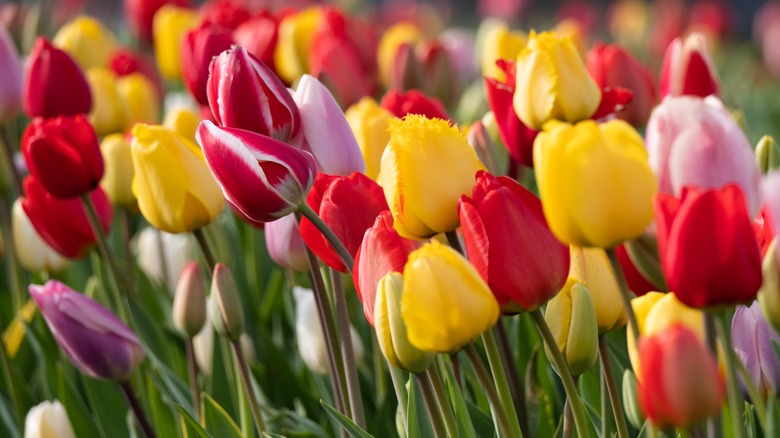
There are thousands of tulip hybrids out there, and most only bloom for a few days to a few weeks. If you only purchase one variety, your tulip garden won't exceed expectations, temporarily adding a rainbow of color to your landscape for a short stint. However, if you're careful to pick early- and late-blooming varieties, you can have beautiful colors throughout the entire spring season.
When determining when specific types will bloom in your garden, you can always turn to Google or a local nursery for assistance. Some popular early spring varieties are emperor, single early, and double early tulips. After a short delay, cultivars like Darwin hybrids and triumph tulips bloom mid-spring. During your garden's grand finale, you can close out the season with choices like fringed, single late, and double late types. Plant multiple early, mid, and late bloomers to have a festival of colors throughout the season.
Planting tulip bulbs during the spring, summer, or winter
Tulips prefer the cold and need time for vernalization after being planted. This is a period of over three months at 40 degrees or lower, where the bulbs set in the soil. Vernalization enables bulbs to grow healthily with taller stems and larger blooms. Many amateur gardeners make the mistake of planting bulbs between late winter and late summer, which doesn't give them the chance to vernalize properly.
Autumn is the ideal time to plant your tulip bulbs. This is usually around the time the soil has already started to cool, and it should stay that way through the rest of the fall and winter, giving your bulbs the perfect environment to prepare for their spring bloom. People who reside in USDA zones 3, 4, and 5 should plant their tulips in September, zones 6 and 7 should plant in October, and zones 8 and 9 should aim for November.
Expecting the same bloom without yearly replanting
Modern tulip cultivars often last three to five years, and their perennial nature means they will bloom year after year. However, these blooms can significantly diminish due to many environmental factors. If your tulips grow in a bed with companion flowers, summer waterings may cause buried bulbs to rot. Cold winters and dry summers are ideal, so if you live in other climates, your bulbs may not last another year.
If you live in a climate with tulips' preferred weather, your flowers stand a better chance in the following years. However, if you live in another area or have them planets alongside other flowers, your best bet is to dig up the bulbs after the stems, leaves, and flowers start to wither at the end of spring. Store the bulbs in a ventilated, dry area around 70 degrees Fahrenheit. You can put them in paper-lined wood boxes or sand-filled containers. Some people also hang their bulbs in mesh bags from the ceiling. Check them once a month to ensure none of the bulbs are rotting or growing mold, as one diseased individual quickly infects the rest of the batch.
Ignoring your tulips after they finish blooming
If you want every spring to be as colorful and vibrant as the last, you shouldn't just sit back and hope for the best. As discussed previously, many tulip hybrids are fussy and likely to only bloom for a single season, such as double early, lily flowering, single late, and single early tulips. If you leave them alone, they may return the next year, but there's no guarantee the flowers will be as robust or long-lasting.
The easiest way to guarantee perennial tulips will return is by explicitly planting cultivars known to naturalize well, such as Darwin hybrid, Greigii, and lady tulips. You can also help the flowers retain energy for the next year by snipping off the heads as they begin to wither and die at the end of their season. If you want to go the extra mile, dig up the underground bulbs, wipe off the soil, let them dry, and safely store them until replanting in the fall.
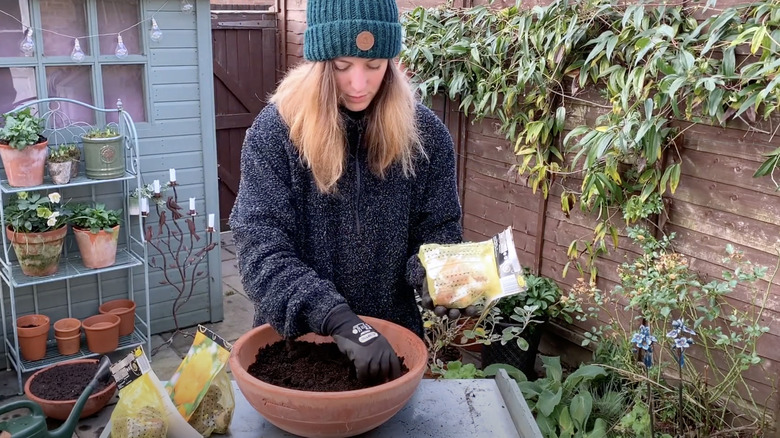
Thoughtlessly putting tulips in pots or container gardens
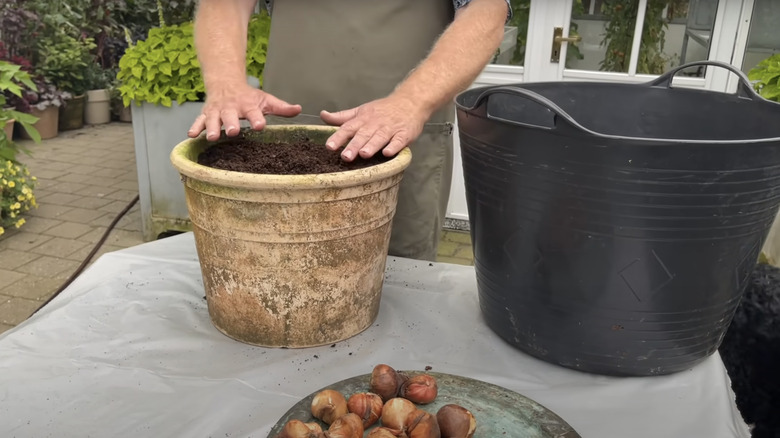
Tulips are finicky regarding temperature and water conditions; they prefer a dry state above all else. When exposed to excessively wet conditions, they're more prone to root rot and fungal diseases. Growing them in pots and container gardens is tricky business because all plants grown in enclosed spaces are already susceptible to such problems. The enclosed spaces are more likely to retain water since there aren't miles of soil and rock for water to disperse to, as it would in natural earth.
If you must plant your tulips in a receptacle, look for terra cotta pots with drainage holes. Terra cotta material is porous and wicks water, helping to remove excess moisture that could rot and decay tulip bulbs. Seek out a container that is at least one foot tall and wide, though most gardeners agree that even bigger is better. Each pot of this size only has room for about 20 flowers. With this in mind, you may want to pick cultivars that bloom at the same time for container planting so your pot doesn't look desolate and underwhelming.
Choosing the wrong variety of tulips for container gardens
Leggy tulips, such as Darwin hybrids, single early, single late, and lily flowered cultivars range from 18 inches tall to over 2 feet. At such high heights, they are at the mercy of the wind, and powerful gusts can blow over their fragile stems. When these tall varieties are planted in raised pots and containers, they are even more exposed to wind, making them more likely to break and fall. This is especially likely for Darwin hybrids since their oversized flowers blossom up to 6 inches across, making them very top-heavy.
When container planting, stick to tulips that are shorter and more compact in stature. Emperor and Wildflower tulips are both early-blooming cultivars that don't grow beyond 10 to 14 inches on average. Their short heights make them less vulnerable to the wind and, therefore, more suited for raised container planting.
Planting outside of their approved USDA hardiness zones

All plants are assigned to different areas according to the U.S. Department of Agriculture's plant hardiness zone map. Since tulips require vernalization throughout a cold winter, they're best suited for zones 3 through 7. Zones 8 through 13 are too warm for bulbs to vernalize properly, and zones 1 and 2 are too cold, therefore hindering the tulip's growth.
Properly raise tulips by planting them outdoors only if you live in the mid to northern areas of the United States. Southern Alaska is also ideal for tulips, but going too far north may be too brisk for the flowers to flourish. If you do want to raise tulips in the south or far west, give your bulbs a fighting chance by forcing vernalization in your refrigerator. Put the bulbs in a paper bag, and keep them in the side door of the fridge so they aren't too close to cold-blowing air. Instead of planting them outside, take advantage of your air conditioning and decorate your indoors with tulips instead.
Picking the wrong soil and conditions
Soil is categorized into three main types: sandy, loamy, or clay. When flowers are grown in the wrong type of soil, water may drain too quickly or not quickly enough, restricting them from meeting their needs. The soil also needs to have the right pH level; a low level makes it difficult for them to absorb nutrients, while a high level causes them to absorb toxic levels of nutrients.
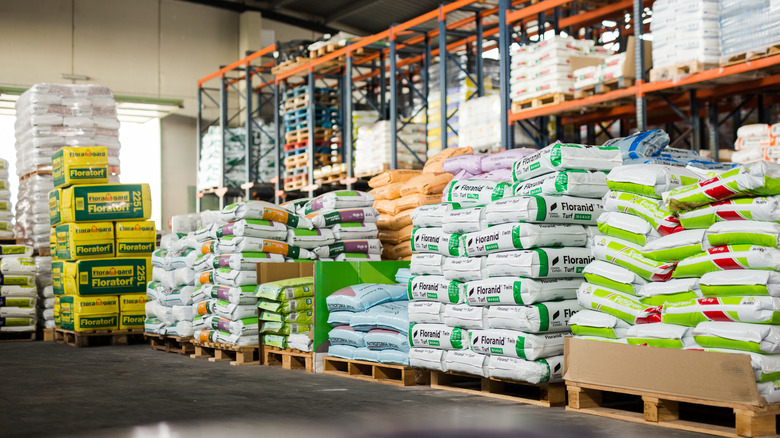
Avoid accidentally sabotaging your tulips' chance at life by ensuring you're using the correct soil type. Tulips prefer sandy soil, which is effectively self-draining and dry. The pH should be neutral, at around a level 6 or 7. Ensure you have the right soil by picking up a bag of Home Depot's $9.47 all-natural garden soil and $12.99 soil meter that can detect your garden's pH level. Other bags of soil may also be appropriate, just make sure they're labeled, "for planting flowers." Home Depot's website also has a convenient calculator for estimating how many bags of soil you'll need.
Following incorrect procedures when first planting bulbs
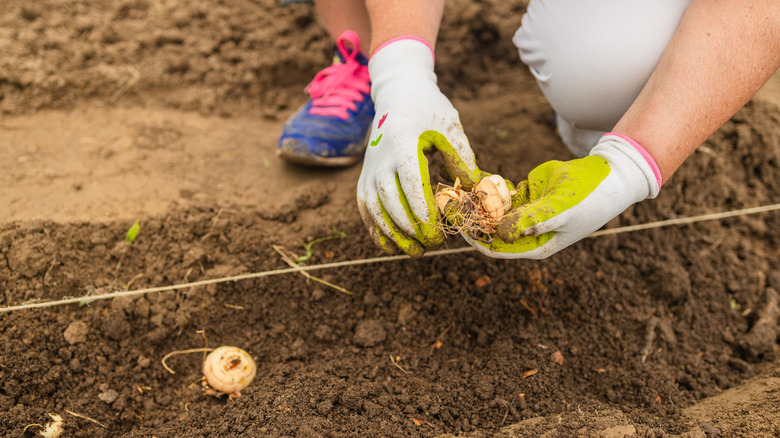
Making sure your bulbs are in good condition and you're planting at the right time in the right soil is only half the battle. You must also plant bulbs correctly to ensure they undergo vernalization. Don't just toss your bulbs in a hole; make sure you're burying them deliberately.
Insert each bulb at least a half foot deep—the depth should be roughly three times the size of the bulb. For example, a 2.5-inch bulb should be planted about 8 inches deep. Put at least 4 to 6 inches of space between each bulb and while many sources say to plant them upright, Hans Langeveld, co-owner of Longfield Gardens, says, "It's a myth that it has to be planted with the pointed end up, even if planted sideways or upsidedown the sprout will still find it's way up." Once the bulbs are arranged, cover them in soil. If you live in a very dry area, water them immediately, but if you live in a place with adequate rainfall, the rain will trigger the growth for you.
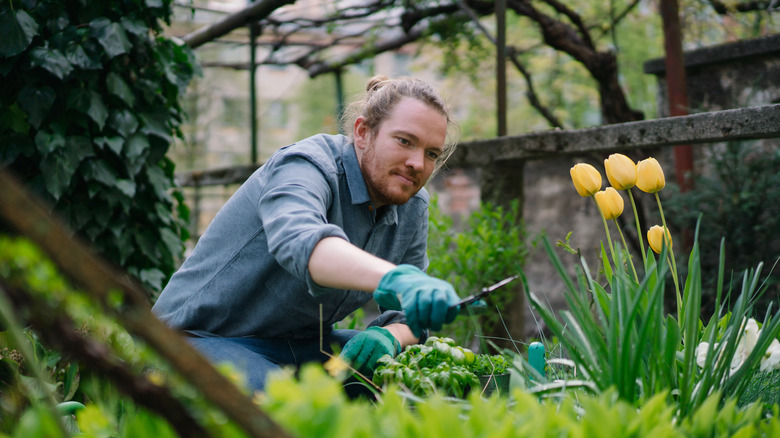
Removing leaves when deadheading tulips
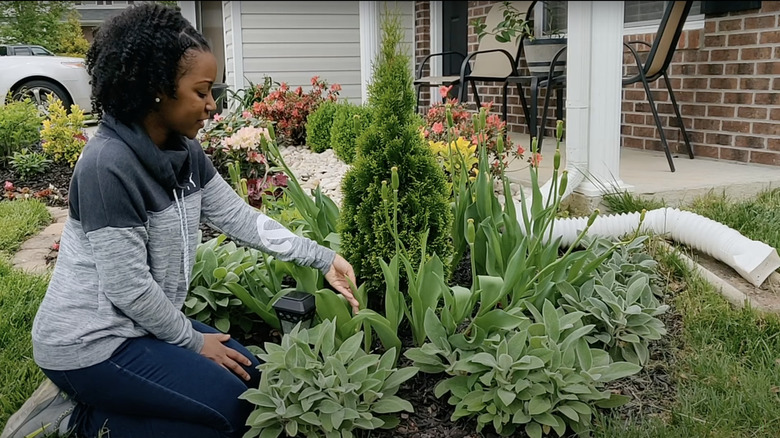
If you aren't digging up your bulbs and leaving your perennial tulips alone so they can re-bloom the next year, pruning is still necessary. However, don't recklessly trim your plants, as you may remove healthy and vital foliage by mistake. Even after flowers are gone, healthy leaves continue to conduct photosynthesis through sunlight, storing the energy tulips need to thrive the following year.
Don't cut the leaves and flowers from your plants until they are visibly deteriorating. Once they turn yellow and wilt, they no longer create energy but waste it. It's then safe to remove the dying foliage, leaving the stems, bulbs, and roots behind so they can wait out the summer, fall, and winter until it's time to shine once again. Make sure you sharpen and sanitize your garden shears with a minimum 70% isopropyl alcohol solution before you begin. You want to cut the foliage as cleanly as possible to prevent risk of infection or disease taking your tulips during dormancy.
Not being diligent in preventing common tulip pests
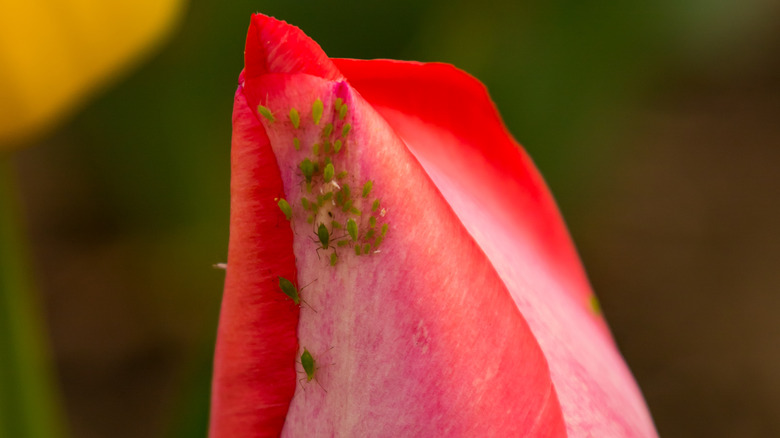
Tulips thrive outdoors in natural soil, but they're also vulnerable to pests. If you don't keep an eye on your plants, they can quickly get infested by aphids, bulb mites, and thrips. The bugs are tricky to see without a magnifying glass, but you'll often see signs that your plant is unhealthy, such as spots on the leaves and flower itself. These bugs are often drawn to tulips without any precautionary measures in place.
The best and most natural way to protect plants is by treating them with insecticidal soaps, which are non-toxic to people and pets and don't harm many benign bug species. These soaps suffocate and dehydrate insects, eliminating their direct threat and preventing them from reproducing. The only downside to using these earth-friendly soaps is that they are impermanent solutions. They wash away after rain and waterings, meaning your plants aren't protected until the solution is re-applied. Luckily, tulips prefer drier conditions in dry climates, meaning their treatments should last longer than they would with other plants.
Missing common symptoms of disease
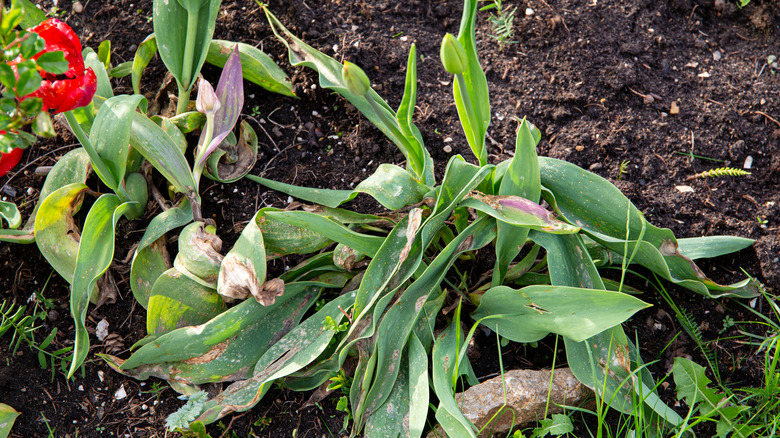
Tulip fire and grey bulb are common issues that affect tulips not in peak health. These diseases show by twisting and withering stems and leaves, causing brown spots on leaves and flowers and leaving grey and black mold in patches on your plants. They quickly spread through your garden, making it important that you remove the affected plants as soon as possible.
Once tulips are contaminated, it's difficult to clear the infection. You shouldn't replant flowers in the same site for at least three years to avoid coming in contact with lingering fungal spores. The best way to approach these issues is to prevent them in the first place. Start by ensuring your tulips have good air circulation on all sides by not crowding them with tall and dense companion plants. You should also control the aforementioned pests, as insects like aphids and thrips are notorious for spreading these diseases.