8 Creative Ways To Cover A Muddy Pathway On The Side Of Your Home
We may receive a commission on purchases made from links.
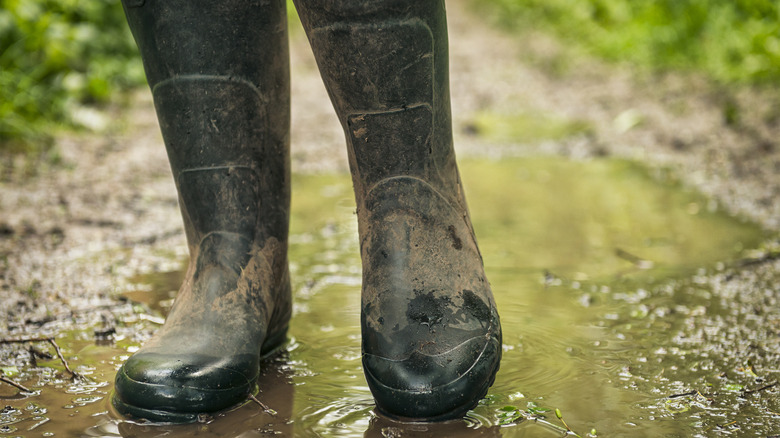
It's not uncommon for homeowners to spend most of their time and energy on their front and backyards, while neglecting the side garden areas that adjoin their neighbors' properties. Those areas that serve as pathways from the front to the back of the house tend to be devoid of grassy lawns and lush foliage. Over time, they can become bare dirt tracks that transform into muddy messes whenever it rains. Especially in homes where pets and children live, muddy footprints inevitably find their way into the house where they sabotage the efforts of even the most meticulous homeowners who try to keep their interior rugs and floors clean.
When you're fed up with the mud problem, it's time to create a clean walking area alongside your home. Fortunately, there are several options for DIY pathways, requiring a variety of materials and installation procedures. From simple mulch or gravel paths to more elaborately constructed boardwalks and paver walkways, we've curated a collection of ideas that'll banish the mud. Read on to discover eight doable project options for covering that muddy pathway on the side of your home.
Pavers provide a clean and dry pathway

A DIY paver walkway offers a substantial and permanent solution to the problem of a muddy area beside your house. If you choose to improve the pathway with pavers, you'll have multiple materials to choose from. These include concrete, brick, flagstone, cobblestone, bluestone, limestone, sandstone, rubber, and more. For example, concrete pavers, as well as interlocking rubber pavers and plastic pavers that mimic flagstone, are available at The Home Depot in a variety of shapes, colors, and textures.
Before laying the pavers, you'll need to take several steps to prepare the muddy ground. After planning the exact location, width, and length of your pathway, clear the soil of all grass and debris, making it as level as possible. Then, excavate the pathway to the depth of the pavers' thickness and install edging restraints along the outer boundaries to keep the pavers from moving over time. Since the area is known to be muddy, it's important to ensure that the walkway directs water away from the house at a slope of 1 inch for every 4 feet. You may want to also line the walkway with landscaping fabric to deter weed growth. Next, lay a base of crushed gravel followed by a layer of clean sand along the entire length of the pathway. Level out the base, and place the pavers in the sand. Finally, fill the joints with fine-grain sand, sweeping it over the surface with a broom.
Permeable grid pavers stabilize the muddy surface and provide openings where grass can grow
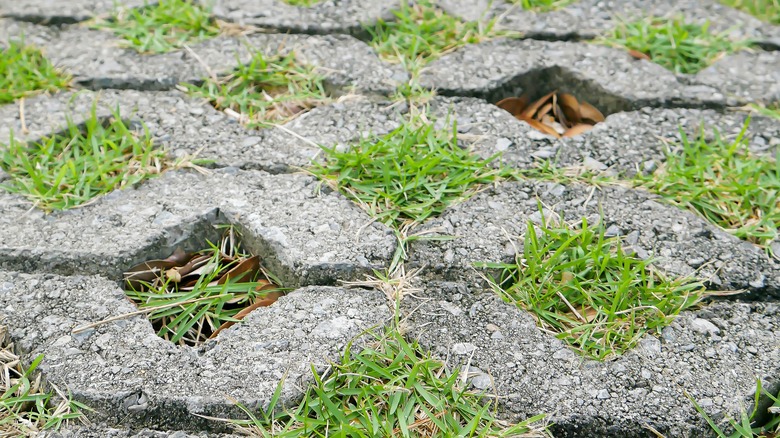
Perhaps you'd like to solve the mud problem while also encouraging grass to grow in the area beside your house. You can accomplish both objectives with permeable grid pavers that provide a firm footing, along with the natural look of a grassy lawn. Plastic grids, like this option from The Home Depot, offer interlocking sections made from high-density polyethylene (HDPE). As an alternative, you can DIY your own concrete grid with a mold, such as this one on Amazon. Whether made from plastic or concrete, the permeable pavers offer a structure to stabilize the soil, along with openings that allow the grass to grow and rainwater to drain away. As an alternative to grass, you might fill the sections of the grid with fine gravel or sand. Either way, the result may be a visually pleasing fix for a muddy pathway.
To install permeable grid pavers, you'll need to clear the pathway area of weeds and debris. Next, excavate the soil to the depth of the grid system and lay out the sections. You can cut the plastic type of grid to fit your walkway and then anchor it to the ground with plastic stakes. Fill the openings with soil and grass seed. When the grass grows up through the plastic or concrete grid, it can be watered and mown like any other section of your lawn.
Wooden boards and decking material create a slightly elevated walkway
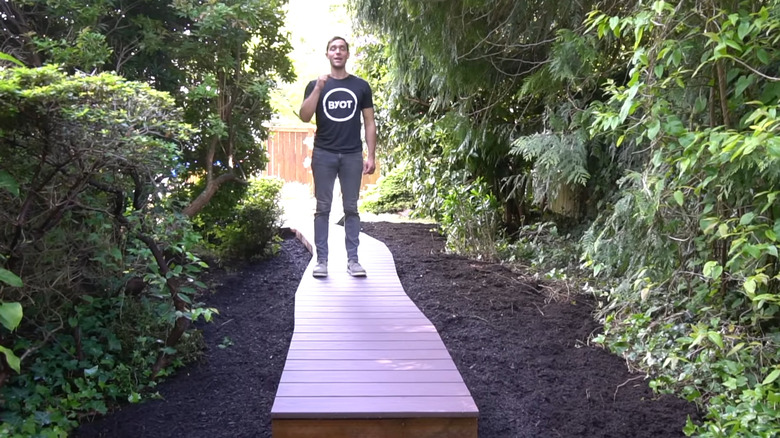
Similar to a boardwalk at the beach, a walkway built with wood or composite decking material provides a dry, stable path even when the ground below it is soggy. The walkway construction includes a frame consisting of upright posts with sleeper boards attached to form lengthwise supports. On this frame, you'll lay boards across to form the walkway.
After selecting the location and length of your pathway, you'll want to plan for at least a 36-inch width, allowing ample space for walking. Clear the area of weeds and debris and level the ground, using landscaping fabric and gravel to prepare a clean surface. Install upright supports made of pressure-treated wood, burying them 6 to 12 inches in the ground. Then, create a frame by attaching the lengthwise sleeper boards on each side, as well as one running down the middle of the walkway. After the frame is built, cover the wooden surfaces with waterproof joist-seal tape, such as this tape from The Home Depot. The next step is to install the crosswise boards made of wood or composite decking material, nailing or screwing them to the sleeper boards. You might want to recycle boards salvaged from old pallets made of hardwoods like oak, ash, or poplar. Avoid soft woods, such as pine and fir. If your boards are natural wood rather than composite material, you'll want to treat them with a sealant like this one from Lowe's.
Pre-made, roll-out wooden walkways are easy to install
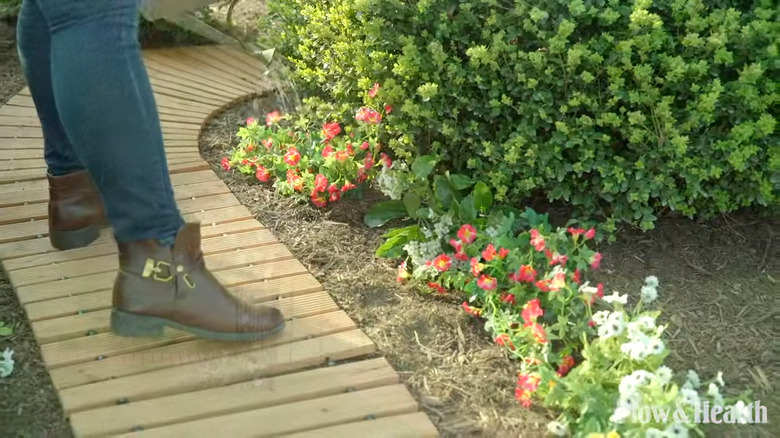
Perhaps you don't want to get involved in a major DIY project installing a permanent walkway with substantial materials like concrete pavers and decking boards. Instead, you're looking for an innovative walkway design that offers a super simple solution to the problem of mud in the area beside your house. If this is the case, you might use a roll-out wooden pathway like this one from The Home Depot or this one from Plow and Hearth.
Installing one of these walkways in your yard is as easy as rolling out an area rug on the hard floor in your house. Simply roll out the walkway directly on the ground, even on grass. To stabilize it, you might use landscape anchor pins. Additionally, you may want to create a bed of mulch or gravel to provide a clean border on either side of the wood pathway. The roll-out sections are available in lengths from 4 feet to 12 feet in your choice of straight or curved shapes. Sold completely assembled, the walkways consist of wooden planks joined together with flexible wires and rubber spacers. For durability, the wood is pre-treated to be weather resistant and washable with a garden hose.
A log slice walkway contributes visual interest to your landscape
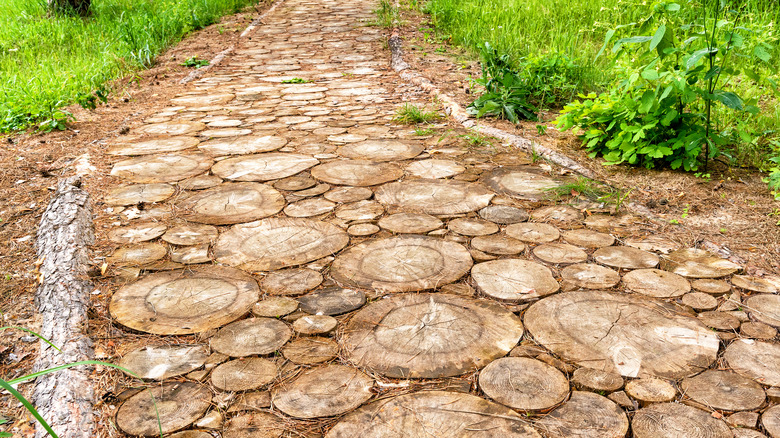
A log slice pathway is similar to one that features pavers or stepping stones. The difference is that the flat discs paving the walkway are cut from a downed tree. With the rings and swirls of the tree visible, the log slices contribute a natural beauty to your landscape.
Start by clearing the ground of all grass, weeds, and debris. After establishing a clean and level surface, install edging on either side of the pathway. Follow up with a layer of sand approximately 2 inches thick. Then, use a chainsaw to cut slices from a downed tree that has had time to dry out. After cutting the slices approximately 2 to 4 inches thick, you'll need to treat them with a sealant like shellac or marine spar varnish. This will prevent cracking and rotting due to moisture and weather. Allow the sealant to dry and then proceed to place the log slices on the prepared pathway area. As you install the wooden discs, use an I-beam level to ensure that they provide a safe and even walking surface. Fill in the spaces between the log slices with small pebbles or coarse sand. Alternatively, you might fill in with soil and sow a ground-cover plant that will grow up between the log slices.
A gravel walkway offers drainage
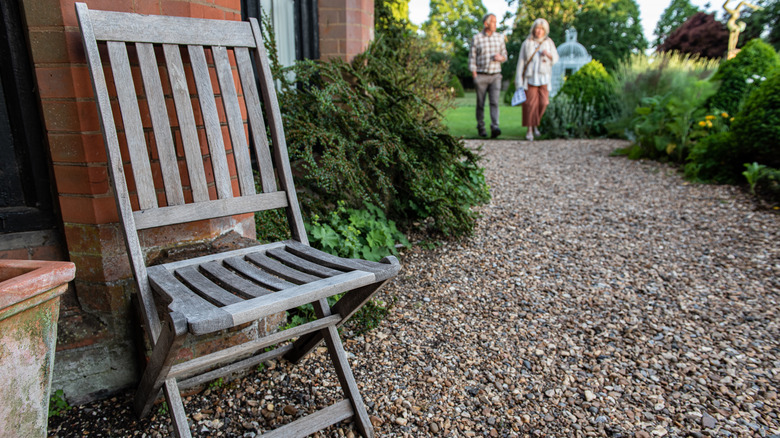
If the pathway beside your house stays muddy after a rainstorm, the problem may be due to poor drainage in that area of your yard. One of the best solutions for drainage problems is to cover the area in a thick layer of gravel. Gravel allows the rain water to seep down through the tiny stones and disburse into the ground, while your walking surface stays mud-free. You can choose from several types, including pea gravel, river pebbles, red lava rock, marble chips, and more.
To install a DIY garden path with gravel, you'll need to clear and level the ground, removing grass, weeds, and debris. Then, use garden hoses or ropes to lay out the shape of the walkway. For a linear path, curved or straight, make sure that the width remains consistent along the length of the walkway. Install edging made of metal or durable plastic to hold the gravel in place. Next, excavate to a depth of at least 4 inches and cover the pathway with 2 inches of crushed stone, tamping it down to compact the base material and flatten the surface. Then, add a layer of landscaping fabric, followed by at least 2 inches of a gravel type of your choice. Rake out the gravel so that it smoothly covers the entire walkway area, filling the space between the pieces of outer edging.
With numerous types available, mulch is a go-to treatment for muddy areas
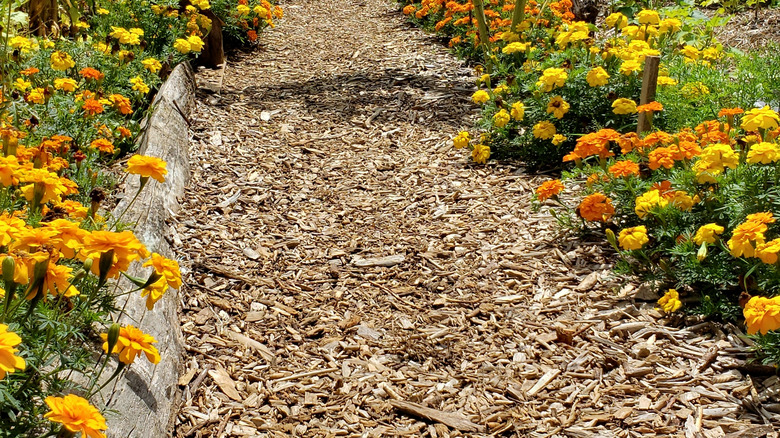
Mulch is one of the least expensive materials for covering a muddy area, and it's easy to install a mulch pathway. Choose shredded mulch or wood chips from a variety of wood types, including cedar, pine bark, cypress, and more. As a long lasting alternative, you might choose rubber mulch.
The first step is to plan the length and width of your pathway. An 18-inch-wide path allows single-file walking, while a pathway that is 36 inches wide accommodates two people walking side-by-side. Remove the grass and weeds from the area to prepare a clean soil base for the path. Install plastic landscape edging, like this option from Lowe's, along both sides of the walkway. Alternatively, you can use bricks or stones to form linear edges that hold the gardening mulch in place.
Excavate the pathway to a depth of 1 or 2 inches, leveling any uneven spots. Lay out weed control fabric along the pathway, or cover the area with a thick layer of newspapers or cardboard. Finally, it's time to add a covering of mulch at least 2 inches thick. Use the backside of a rake to spread the material evenly within the boundaries of the edging. To maintain a mulch pathway, you'll need to remove weeds, rake out any debris, and top it off with fresh mulch every year.
Install artificial turf grass to solve the problem of a muddy pathway
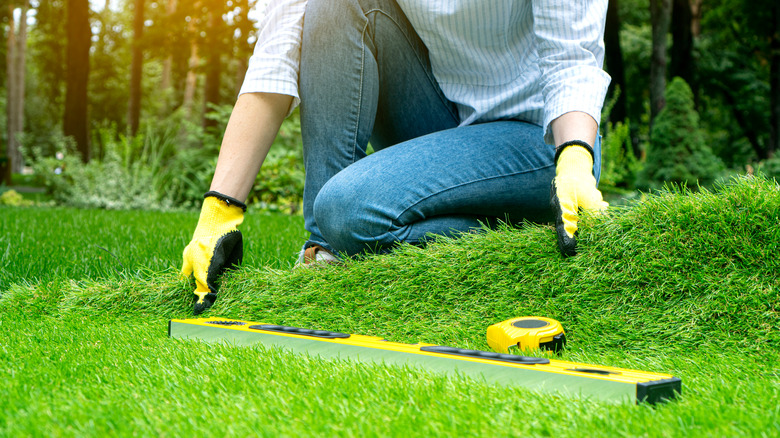
Artificial turf grass is a realistic-looking, synthetic product made from nylon, polypropylene, or polyethylene plastic materials. Examples include a fescue-look product from The Home Depot, as well as this similar type of artificial turf from Lowe's. An installation of artificial grass will solve the problem of mud in the walking area beside your house, while negating the need for fertilizer, pesticides, or grass mowing.
You'll need to prepare the ground surface before rolling out the artificial turf. Excavate the existing grass, weeds, and soil to a depth of 2 to 4 inches. Next, lay out a landscaping fabric or weed barrier, and secure it to the ground with landscaping anchor pins. Top the fabric with at least 2 inches of fine gravel or crushed stone, tamping it down to compact the surface. Then, it's time to roll out the artificial turf. Cut it with a box cutter or utility knife to fit your area, tuck it under the borders, and secure it with landscape anchors. To weigh down the turf and hold it securely against the ground, you'll need to add an infill material, such as silica sand. Use a drop spreader to apply the infill and then spread it evenly with a stiff-bristle push broom.