Grab A Dollar Tree Garden Staple & Turn It Into An Adorable Coffee Mug Display Shelf

We may receive a commission on purchases made from links.
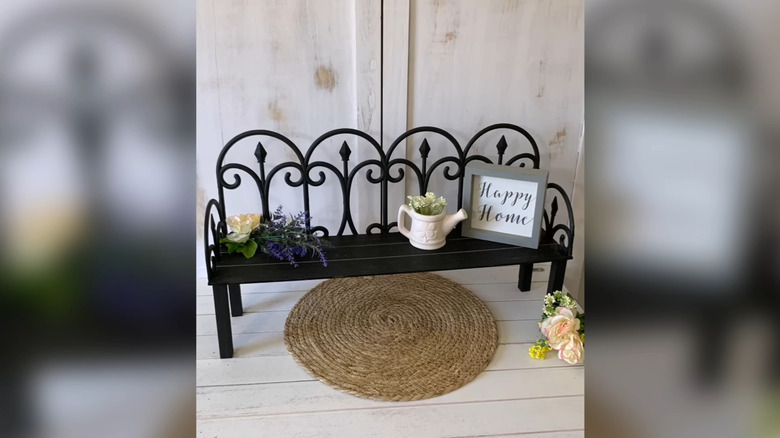
We're always on the lookout for creative ways to display mugs, and today's idea by YouTuber Hot Humble Pie is a great one. Call us biased, but it's probably the most unique of them all. She created a cute little bench to hold small flowers and picture frames. Trade these for mugs, though, and you've got yourself a coffee mug display shelf. Oh, and guess what it's made from? Dollar Tree's garden fences!
Set it on your countertop or add it to your coffee station. Either way, it's sure to bring a little kitsch into your kitchen. Just note that this décor hack works best for lighter-weight mugs, considering it's not the sturdiest. That being said, you can also limit your display to one or two daily mugs (to keep them easily accessible). Then, fill the remaining spaces with small knick-knacks, like matchbooks and figurines.
For this DIY, you'll want to head to Dollar Tree's garden aisle. Scoop up two Black Garden Fences, one garden wood stake, and a wooden sign (like the Vertical Welcome Plaque or Crafter's Square Wood Plank). Feel free to pick a sturdier piece of wood if you're going to store heavier items. Set aside a hot glue gun, a pair of scissors or tin snips, some paint, and whatever saw you have on hand.
How to make a bench shelf display using Dollar Tree garden supplies
The first order of business: Cut your garden stake into four 5-inch pieces. These will serve as the bench's legs. Remove the rope from your Dollar Tree sign. Then it's time to assemble everything. Flip the board face-down and glue each leg to each corner. You could even use the remaining garden stake to connect the front and back legs for added support.
Once that's done, trim the sides of the fence (to make the backrest and arms). You'll also want to cut away the fence's stakes if they don't align with the bench's frame. But even better if they do, since you can just secure them to the back legs. If that's not an option, glue the fence's scrollwork onto your bench instead. Now, for the arms: grab the second fence, cut two arches, and attach them to the sides of the seat. Make sure they stick to the backrest as well.
All that's left is to personalize the bench. While black paint would certainly conceal visible clumps of hot glue better, that's not the only option. Consider something playful like blue, pink, or green to add a pop of color to your kitchen. And if you'd like to dial up the bench's vintage feel, look no further than chalk paint. Don't forget to add a top clear coat, like the Rust-Oleum Clear Matte Spray Paint, so the paint on the seat doesn't scratch off.