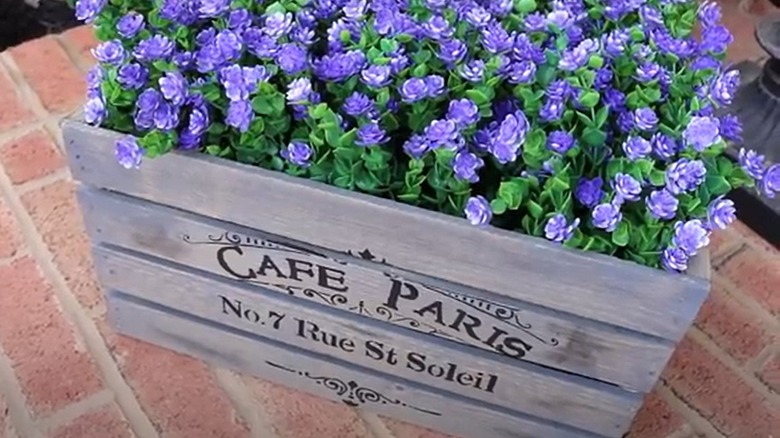
Reuse A Thrifted Crate To Create Adorable Decor To Beautify Your Porch Or Patio
There's something about bare wood that makes a crafter's fingers itch to create. A thrifted wooden crate — or one snagged on the cheap from a big box store — is an ideal canvas for DIY projects, and their holding capacity makes them a pretty as well as practical addition to porch or patio decor. You can easily add rustic charm to your porch on a budget with this simple upgrade. The unpainted container is ready for any color you throw at it, and it's customizable in infinite ways. The cherry on top might be a stenciled phrase, painted holiday images, or even an experimental painting technique.
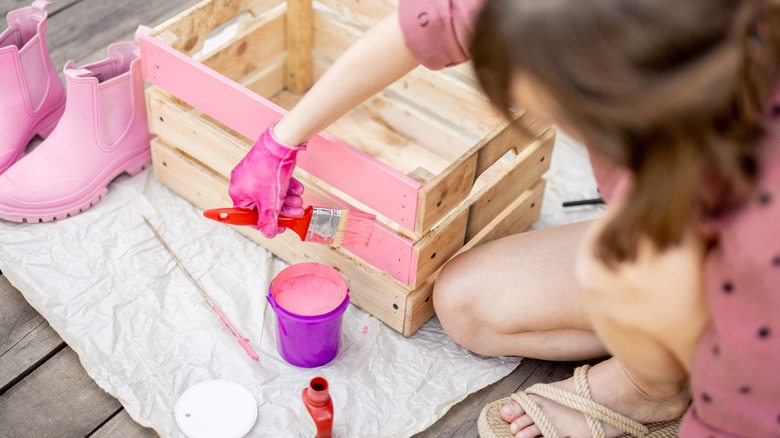
Pick up a can of paint that strikes your fancy, one or more stencils, and some additional paint colors for your stenciled accent. You'll also need some sandpaper, repositionable spray adhesive, and paint brushes; opt for a sponge dabber for applying the stencil paint, but if you have extra makeup applicator sponges, those are great for working the paint along the edges of the stencil. There are also products specially made for holding stencils in place temporarily, such as Stencil Ease Adhesive Spray.
Top off your wooden crate decor piece with real or faux flowers, or use it store gardening tools or a collection of umbrellas for quick access during June showers. If your crate comes with built-in handles, take advantage of its portability by lugging it to new spots for entertaining or convert it into an indoor feature once the warm seasons are over. You can also outfit its underside with casters if you plan on using it to house heavy items.
Stenciling your custom crate creation
Scrub down the crate with sandpaper, and don't forget to treat the nooks and crannies between the slats. Brush away the dust, and give the entire surface a few coats of paint. Spray painting is easier, but brushing on paint can be an advantage for working pigment into the many angles of the crate's components. Plus, with brush-on paint, you can experiment with a lot of different fun techniques. Add common ingredients to paint such as salt, coffee grounds, or spices for an unexpected bit of texture and visual appeal. For an aged appearance, DIY a distressed painted look.
While this isn't a high-skill craft, the stenciling can be tricky. This is where a few tips can make the difference between successful stenciling and a swear-fest. Once your base color(s) have dried, line up your stencil where you plan on painting it. A tape measure could come in handy for centering the design and making sure it's perfectly situated. Spray the back of the stencil with repositionable spray adhesive, and press it onto the surface. This stuff is several notches above painter's tape, since it helps prevent the paint from bleeding.
Dip your sponge into a very small amount of paint, and remove any excess. Dab the paint lightly over the stencil's open spaces, using a blotting motion rather than brushing back and forth. Repeat this for two or three coats. Once it's dry, peel away the stencil, and touch up any flaws or gaps with a toothpick dipped in paint.