15 Tips, Tricks & Hacks To Get An Iron Sparkling Clean

We may receive a commission on purchases made from links.
Cleaning an iron: it's a chore that many of us put off, perhaps because we're afraid of doing something wrong. But is your iron skipping and scraping over fabric? Or dripping rusty water onto clothing rather than gently steaming them? It's probably time to bite the bullet and clean that iron.
The two main components of an iron that usually need cleaning are the bottom (called the soleplated) and the iron's internal water reservoir. At times, smaller parts need special attention, including the "anti-calc" vent attached to your iron's steam button and the steam holes lining the soleplate.
As crucial as it is not to let your iron get overly grungy, how you clean the iron is just as important. The materials used to coat the soleplate and the reservoir can be damaged if you're overly aggressive with the unit or use damaging cleaning agents. If you're still under warranty, the last thing you want to do is use a treatment the manufacturer doesn't recommend!
Use a commercial soleplate cleaning kit
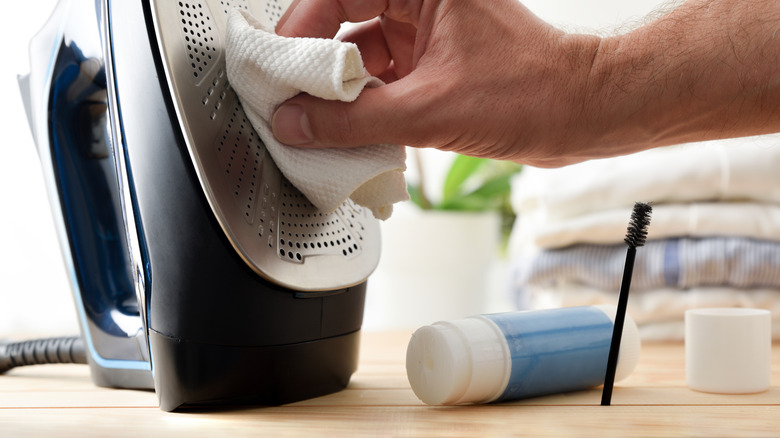
Often, the best way to keep to the terms of your iron's warranty is to use the kit created by the manufacturer, which will include a cleaning paste or similar product. There will also be specialty cloths to use with the paste. If you don't need a whole kit, you can find commercial cleaning paste created to clean the general type of soleplate that your iron has, such as stainless steel or ceramic surfaces. If possible, look online for a kit geared to the brand and model of your own iron — especially if it's still under warranty.
For example, the Rowena soleplate cleaning kit, available both through the iron's manufacturer and on Amazon, contains a tube of cleaning paste, a cloth for which to apply the cleaning paste, plus a second cloth for polishing the iron and removing any remaining paste. It specifically mentions that the kit helps improve the iron's gliding action after it has been repeatedly exposed to starched fabrics and melted synthetic fabrics. It is designed to be used with the iron on the cotton/linen setting, and with no water in the reservoir. Squeeze some of the paste onto the terrycloth application cloth and run the iron's dirty section over the cloth. Once most of the paste has been absorbed by the iron's heat, use the finishing cloth to remove the rest and polish the soleplate.
Hack the pricier pastes by creating one with baking soda and water
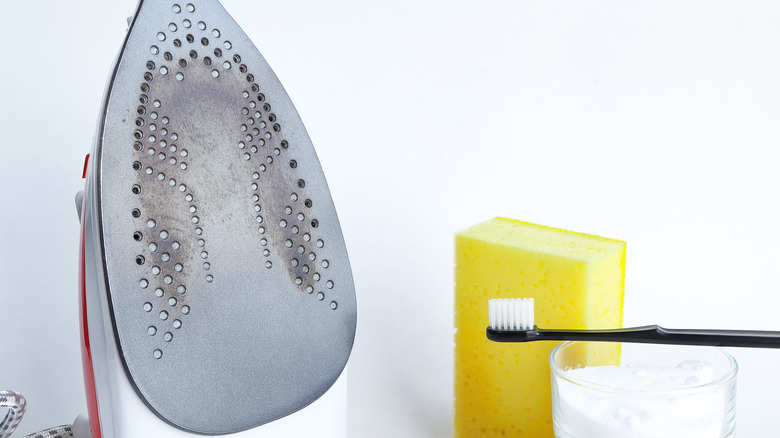
The drawback of those customized soleplate cleaning kits is that they're more expensive than basic cleaners. Plus, they're not always on hand when you need them! Products like baking soda, on the other hand, are almost always already hanging out in your kitchen. Much like the cleaning pastes created by manufacturers, a DIY creation of blended baking soda and water works on the same principle to clean the iron's soleplate. Baking soda provides a gentle texture without being abrasive. This household ingredient also has soap-like alkali properties to deal with grime and residue.
Start by blending baking soda with enough water to make a paste. The ratio should be about two parts baking soda to one part water. Use this mixture on a cool iron. Gently scrub the paste onto the soleplate with an old toothbrush. Concentrate on discolored or sticky areas. Buff the remainder away with a microfiber cloth once the bottom of the iron is clean.
Turn to toothpaste as yet another alternative to pricier iron pastes
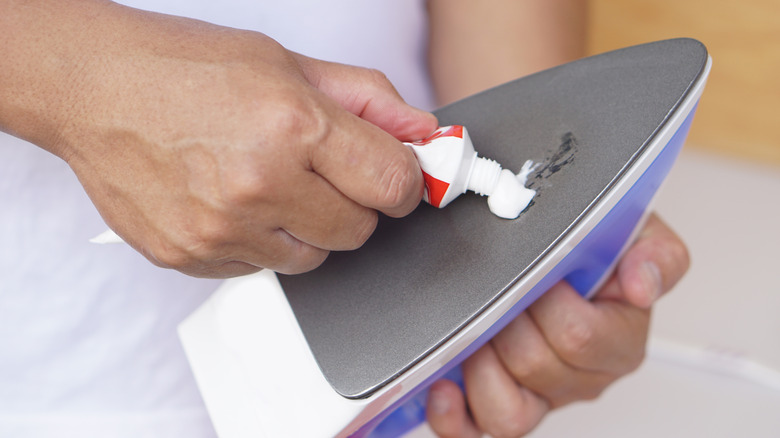
Much as toothpaste is trusted on delicate teeth and stainless steel braces, the bathroom staple can also be the key to cleaning the bottom of your iron. As with baking soda, toothpaste is mildly abrasive as well as a gentle cleaning agent. Go after the dirtiest sections of the soleplate with toothpaste and an old toothbrush. This method is better for common residue buildup rather than serious scorch marks or mineral deposit stains.
Start with a cold, unplugged iron. Put a couple of inches of toothpaste directly onto the soleplate. If there's one section that's dirtier than others, apply the toothpaste directly to that spot. Otherwise, center the toothpaste. With a soft, clean cloth, gently rub the paste into the soleplate using circular motions. Running the iron on the steam setting with a filled reservoir can dislodge the rest of the toothpaste if needed. Hold the steaming iron over the sink while pressing the steam button.
Iron a dryer sheet to freshen up the soleplate
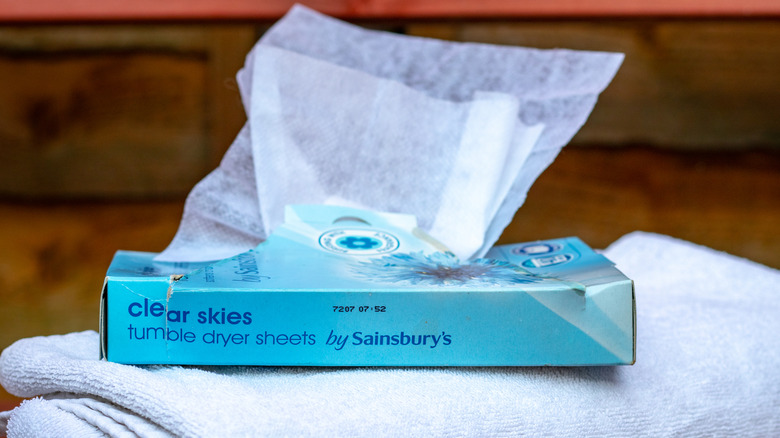
When you've got burned-on residue that won't come off the iron's soleplate, try the dryer sheet hack to remove stains from the surface. Dryer sheets are another household staple that can do double-duty when it comes to household irritants like gunky iron bottoms. The dryer sheet has just enough of a raised texture to loosen grit and wipe it away, while the ingredients added to the sheet that soften fabrics can do the same thing for build-up.
To use this hack, begin by laying an old towel on your ironing board. Set a dryer sheet flat over the towel. Turn the iron to the lowest setting, but don't fill the reservoir — you won't be steaming for this method. Once the iron has heated, begin "ironing" the dryer sheet with gentle pressure. You'll probably see a transfer of discoloration go from the soleplate to the sheet. After the iron's bottom is clean, let the iron cool. Wipe the soleplate with a clean cloth to remove any oily-feeling residue from the dryer sheet.
Frequently wipe down the soleplate with a sudsy cloth
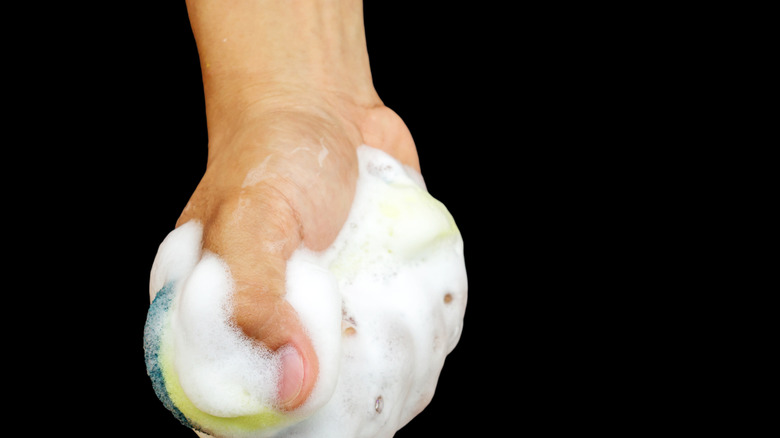
In an ideal world, we wouldn't need "hacks" to clean our irons because we all would be maintaining them after each use. Few of us live in that world, of course. But it can be helpful to do routine cleaning maintenance, at least when we think of it! Doing so keeps the buildup transferred to the soleplate from starchy fabrics or iron-on transfers from becoming a problem. Manufacturers such as Hamilton Beach recommend good ol' soap and water to keep residue from becoming a problem.
After most uses, run a damp, soapy cloth or soft sponge on the bottom of the cooled iron to remove any debris or buildup that might be there. Keep the iron vertical while you're doing this. Soap loosens up grime, while the dampness from the water lifts it up and away. Of course, make sure the cloth is reasonably wrung out. Immersion or great jets of water near the cord can short out an iron. Wipe the iron dry with a clean cloth after you're done.
Dip a cloth into heated vinegar to clean the soleplate
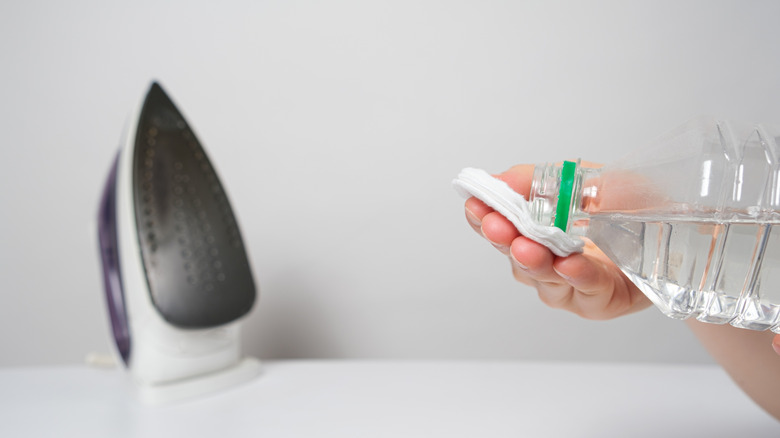
Vinegar is safe to use on the bottom of your iron, unless your manufacturer expressly warns against it. Use white vinegar for this cleaning hack, rather than non-clear types like apple cider or balsamic. Vinegar, an acidic liquid, is good at dissolving grime, and also neutralizes any mineral crustiness that might be on the soleplate. Reserve the vinegar method for when you have a smaller amount of residue, as opposed to thicker buildup that needs a more aggressive approach.
To best harness the natural ingredient's power, gently heat up the vinegar in a microwave or on the stovetop. Dip a clean cloth into the hot vinegar. Wipe the soleplate down with the heated liquid. This should be done on a cool, unplugged iron. Once the soleplate is free of residue, plug in the iron. Add some water to the reservoir and choose a steam setting. Run the iron over an old towel or cloth. Press the "spray" button several times to expel steam and get rid of any lingering residue and vinegar smell.
Use a special soleplate cleaning cloth to remove residue
Specialty cleaning cloths have already been imbued with buildup-softening ingredients, so you don't need to buy a kit with separate paste and terrycloth. These iron-cleaning cloths are designed to be used on a hot iron for maximum cleaning power. The dry cloths are infused with materials that dissolve residue. These are especially useful for "crafty" people who use their irons to transfer fusibles or have other iron residue issues from their specialty hobbies.
Look for the products in the laundry aisle at the supermarket, or order a product such as Bo-Nash Iron Clean Cleaning Cloths. The manufacturer suggests laying an unfolded cleaning sheet over a paper towel on your ironing board. Let some of the sheet hang over the side of the ironing board. Next, run a medium-hot iron over the sheet-covered edge, so that the soleplate is wiped clean as it goes up and down. Because you're essentially just using one horizontal section of the cloth at a time, each of the ten sheets can be used for several uses — just choose a clean section next time.
Wipe a hot iron down with tweezers-held acetaminophen
Tylenol relieves your ironing woes in more ways than one! Along with pain relief for minor burns, acetaminophen can remove scorches from the iron's soleplate. At least, that's the anecdotal wisdom passed on by crafters and even travel iron manufacturers! As the painkiller dissolves on the hot iron, the resulting gel seems to take the burn marks with it. Needless to say, you want to use acetaminophen tablets that are uncoated.
One traditional way to use this method is to use tweezers as a "handle" to apply the pill to a hot iron. Plug in and preheat the iron to a hot setting, but don't fill the reservoir. Pick up the painkiller with a pair of tweezers so that your hands aren't too close to the hot iron. Focus on one grimy section at a time, rubbing the melting acetaminophen tablet back and forth. If you have other areas to clean, pick up another tablet with your tweezers. After the soleplate is clean, buff out any remaining material with a clean cloth.
Alternatively, dissolve a couple of Tylenol (or similar brand) tablets in water. Soak a clean cloth in this material, and briefly set the hot iron on the wrung-out towel. Buff the soleplate dry when you're finished.
Gently buff the soleplate with steel wool
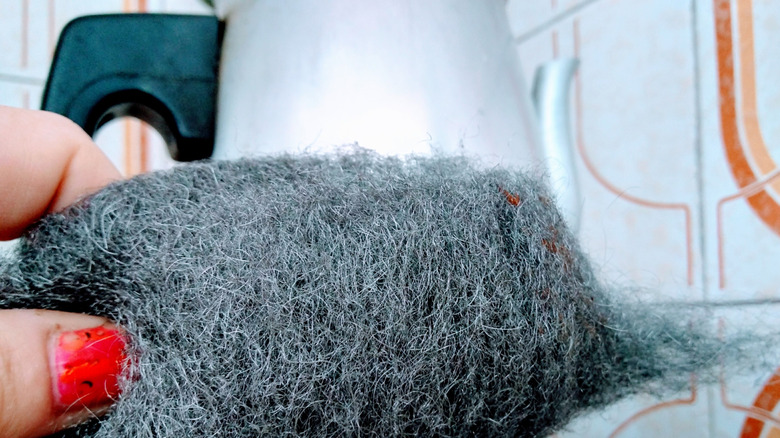
When you choose the right type, steel wool is surprisingly effective at removing scorch marks from the bottom of your iron. In fact, Braun's primary cleaning recommendation is to use steel wool on the soleplates of many of its models. Choose a steel wool product that's labeled as having an extra-fine grade. This precaution will give you just the right abrasive action to remove mild burn residue, but won't actually scratch the iron.
It's important to be gentle when using this method, and don't use it on nonstick type surfaces. Get out the iron, making sure it's unplugged and doesn't have water in the reservoir. Dampen a section of the steel wool with water. Rub scorch marks with gentle circles. Do just a little at first, to ensure that the steel wool grade is, indeed, fine enough not to leave scratch marks. Once the burn marks are removed, wipe away any debris with a dampened cloth.
Get rid of melted plastic with ice and a plastic scraper
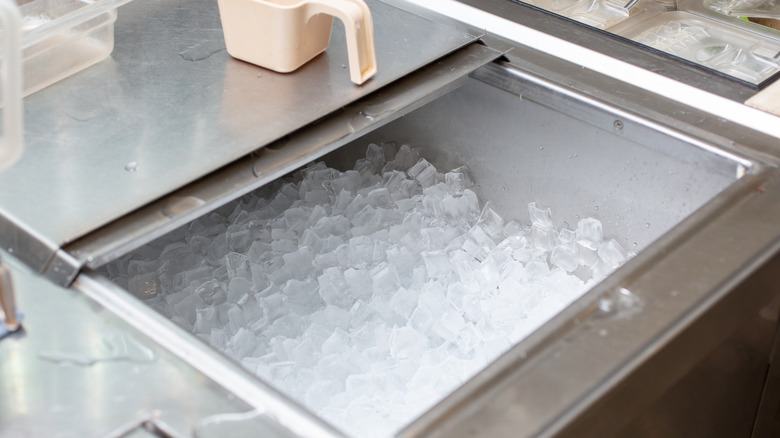
Have you inadvertently melted something onto your iron that's especially tricky to remove, such as plastic? We've all been there. Whether it was something left in a pocket, part of a craft, or a meltable component of your clothing, plastic and similar materials have a way of stubbornly clinging to your soleplate's surface. Surprisingly, ice cubes can often come to the rescue in these situations. The science behind it is much like running an ice cube over a shirt that has gum stuck to it. The freezing temperature helps solidify the "gunk," so that it can be more easily scraped or peeled away.
Empty an ice cube tray or two into a sink or bin that's roomy enough to fit your iron. (Make sure it's non-melted ice, rather than ice water, which would short out the unit.) Leave the iron face down on top of the ice for at least ten minutes. Next, gently scrape the melted bits off the cold soleplate with a plastic spatula or plastic knife. Buff the soleplate dry with a clean cloth.
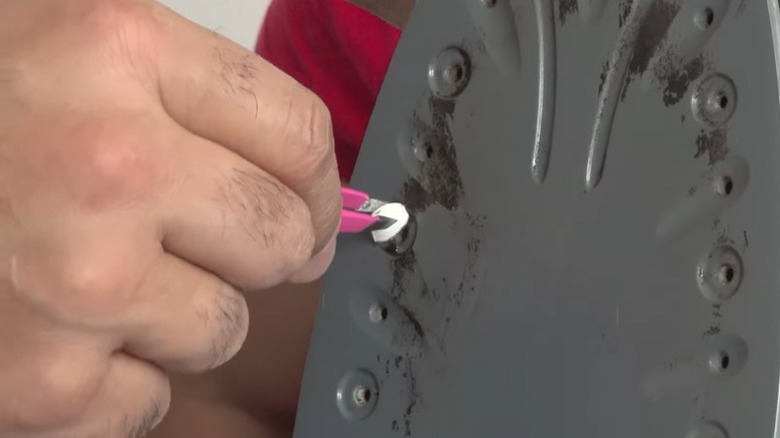
Clean the steam button valve with lemon juice
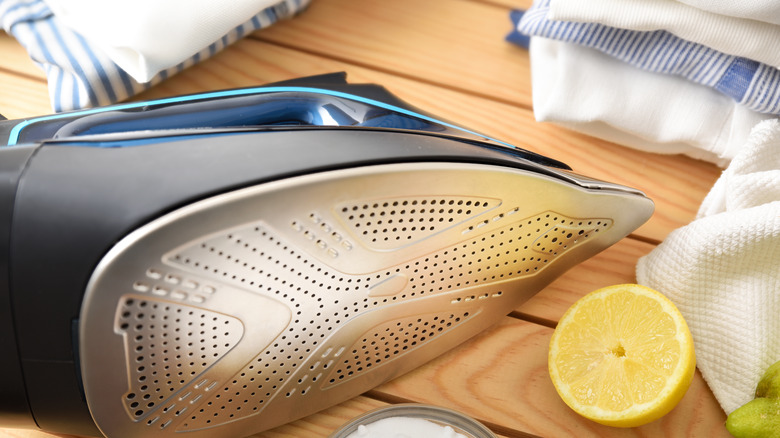
You may have never noticed it, but there is likely a valve attached to your iron's steam button that is meant to filter out minerals and prevent rusty steam water. As you might imagine, this "decalc valve" itself needs regular cleaning. You'll know when it's really in need of cleaning because the iron's steam output becomes reduced. Some iron models have a way of self-cleaning this valve. Others, such as Braun, suggest you remove the button and immerse it in lemon juice. Lemon juice, with its acidic content, helps dissolve these alkaline minerals.
Cut a lemon into sections and squeeze enough juice into a small bowl to cover the small steam button and attached valve. Carefully remove the steam button from your iron and immerse it in the lemon juice. Leave the valve immersed for several minutes, so that the lemon juice will soften lime deposits. Then, scrub the inside of the valve. Use a baby toothbrush or a Q-tip to get into the valve's nooks and crannies. Hold it under running water to flush out any remaining, loosened grime. Once the button with its attached valve has dried, snap the button back onto the iron.
Work a Q-tip into your iron's gunky steam vents
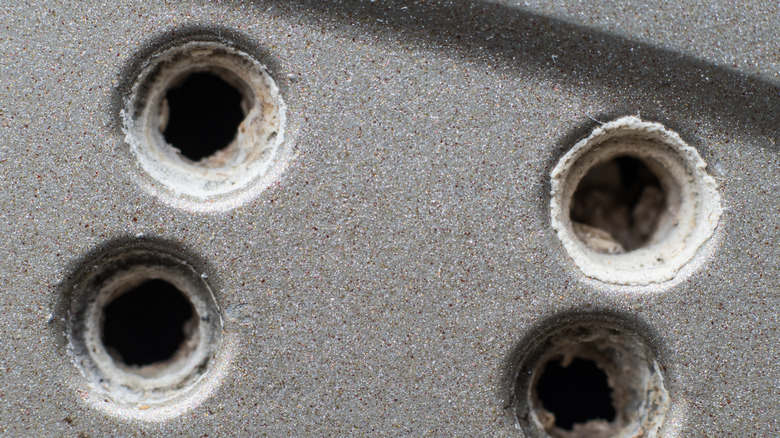
The holes in the iron's soleplate are a vital part of the appliance's functionality. Without them, the steam has no way to safely reach the fabric being pressed. But these hardworking mini-vents are also vulnerable to blockage. Not only can they become encrusted by mineral deposits, but they can also pick up residue from fabrics and crafts. Ironically, even cleaning an iron's plate can clog the holes with the cleaning product. Luckily, yet another household item – the humble cotton swab – comes to the rescue for de-gunking the steamer holes.
For best results, fill the reservoir and set the plugged-in iron to steam. Hit the button a few times and run the steam through the vents, which will help loosen up trapped debris. Empty the iron of water and let it get cool enough to comfortably work with. Put a clean Q-tip into the first hole, twisting it to remove as much trapped grime or crust as possible. Repeat with the remaining holes, moving on to clean tips of new swabs as necessary. As always, a clean cloth can whisk away any remaining gunk that seeped out of the hole and onto the surface.
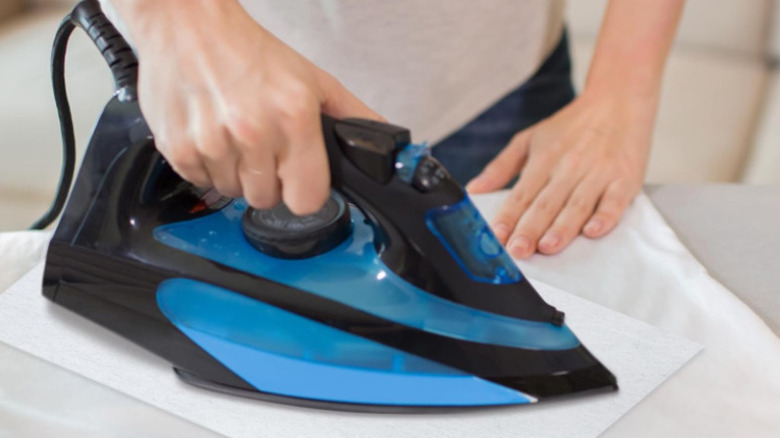
Use the iron's own self-cleaner function to purify the water reservoir

You may see tips involving putting vinegar into your iron, and not just wiping the bottom with it. Think twice before doing so! The acidic nature of vinegar can actually damage the water reservoir's special coating. Still, the inside of your iron definitely needs cleaning. So what to do? Follow the "self-cleaning" section in the directions that came with your iron in order to clean its internal parts.
In general, it's best to follow the manufacturer's instructions as closely as possible. Most irons have a button for self-cleaning. The steps typically involve partially filling the reservoir with water. Distilled water can be used if your tap water tends to be overly rich in mineral deposits. Heat the iron to the recommended setting, then let it stay on hot for a couple of minutes before unplugging. Next, turn the iron off, unplug it, and hold the iron over a sink, soleplate down. By pressing the self-clean button, the steamy water will stream out of the vent holes. Make sure all of the water leaves the now steam-cleaned reservoir.
Use (with caution) a descaling agent for super-scaly reservoirs

If your home's water is particularly high in mineral deposits, the iron's self-cleaning function may not be cutting it when it comes to the reservoir. There are commercial products available that may help. But if the iron is still under warranty, proceed with caution.
You may already be familiar with descalers if you've used them to get rid of hard water stains in your kettle or coffee maker. The same product can often be used on your iron. Look for ones such as Oust All Purpose Descaler, which explicitly lists an iron as one of the small appliances it can address. The process is much like that used in the self-clean section above, except you mix the powdered packet into the water before adding it to the reservoir. Of course, always double-check the instructions for the specific descaling product you choose before proceeding.
Try the last resort salt and foil method

If your iron is already old and you're trying to get a little more life out of it, the salt method may be helpful. Salt acts as an extra abrasive cleaner that helps blast off scorch marks and grime, and even removes tarnish. It's also great for removing leftover stickiness. The underlying foil — at least anecdotally speaking – is said to add firmness, so that the salt doesn't sink too far into a towel or cloth. This method will damage coated soleplate surfaces, so use it only on older and uncoated surfaces.
Set aluminum foil (or a paper towel or cloth) on the ironing board. The foil's surface should be long enough that you can move the iron back and forth comfortably. Sprinkle salt over the foil. Run the hot iron over the surface until scorch marks or caked-in grime begin to dissipate. You'll probably begin to see the salt become discolored as it takes on the marks from the soleplate. When the soleplate looks clean, allow the iron to cool, then wipe it down with a damp cloth. Make sure no salt is still clinging to the soleplate or the vent holes.