14 Home Upgrades That Don't Involve Remodeling
We may receive a commission on purchases made from links.
Remodeling is expensive and, even if you go the DIY route and avoid contractors, it's messy, awkward, and inconvenient. You can, however, still do some simple home upgrades that refresh and update the look and feel of your property without the difficulties or expense of full-scale remodeling. Cosmetic upgrades such as painting, refinishing, or replacing hardware can renew your home without the huge expense and disruption.
Fresh paint, better lighting, new trim, and a few carefully chosen fixtures and fittings can breathe new life into a tired home. You don't need to touch the structure or the bones of your home to update it, whether you're looking to boost your home's value and appeal to buyers or just improve its overall feel for yourself. Figure out your budget and then look at the key areas in your home that you really feel need an upgrade and start with those.
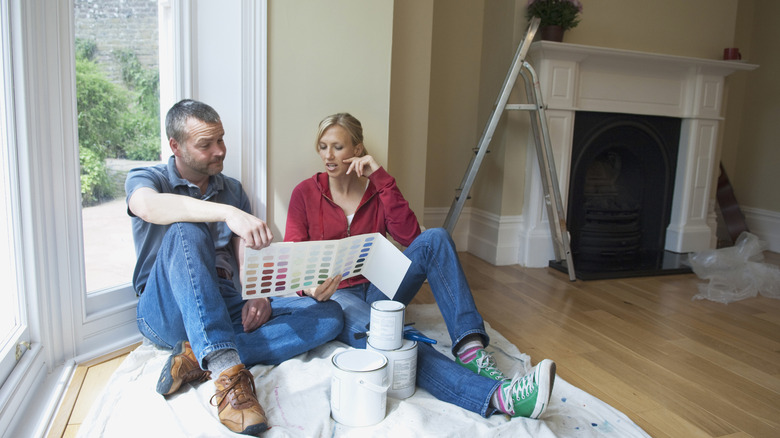
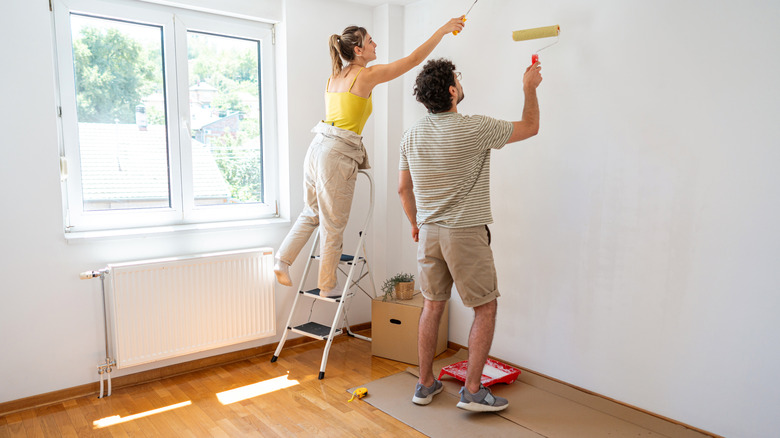
Refresh interior paint in key rooms
If the walls are dingy, scuffed, and generally grimy beyond what a simple clean can fix, your rooms will feel smaller and immediately look tired. The same applies if the colors are dated or overly heavy. While a single statement wall in a bold color has been a trend for many years, a room that has all dark walls will feel small and cramped. Even if the rooms were once a delightful neutral or pastel shade and even in the cleanest homes, paint can develop a yellow or grayish tinge as it ages. This makes the room obviously dated and in clear need of a refresh.
Real estate professionals commonly put adding a fresh coat of paint at the top of their list of low-cost recommended updates, as it tells buyers your home is well cared for, and it makes a space feel larger and brighter, both of which are selling points. While you don't have to paint your entire house, it's a good idea to focus on the main living areas, the hallways, and the bedrooms, and choose a light, cohesive palette. It makes the space flow and feel well put together and well laid out. Pale but warm neutral colors help to bounce light around and make the space feel brighter, lighter, and larger. If you want to add some color and personality without overwhelming this space, you can use slightly bolder colors on door trims, windowsills, and other accents. For high-traffic spaces, just make sure you choose durable, washable finishes so that they are easy to clean and will last for many years.
Upgrades to lighting in key areas, especially under cabinets and in closets
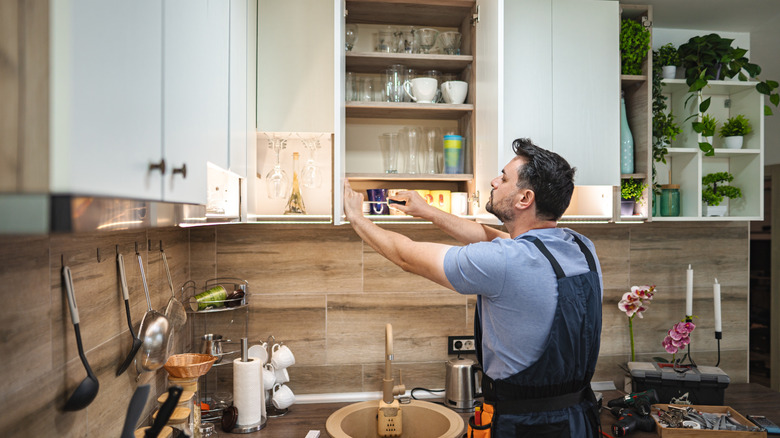
Basic, old-fashioned overhead fixtures provide inconsistent light and leave corners and farther away portions of the room in low light or shadow. They also tend to look super-dated. Using warm lights in these kinds of fixtures makes the inconsistent light worse and the shadows deeper. But using bright white light isn't great, either, as the center of the space gets a dazzlingly unpleasant and bright glare, while the farther reaches get some light but still have a lot of dullness and shadow. One of the most budget-friendly ways to upgrade your kitchen without remodeling is to add under-cabinet lighting.
Use multi-light fixtures with heads you can angle to fill the whole room with consistent light levels. Go for LED bulbs to keep costs and energy waste down. In kitchens and bathrooms, you can also add under-cabinet LED strips or pucks, like these DayBetter LED dimmable under-cabinet lights with remote. These provide targeted light on the countertops so you can see what you're doing while you're prepping. They also show off your pretty tile backsplashes and pick out design details to help make the space look more high-end. You don't necessarily need to hire an electrician for lighting strips, either, as you can get battery-operated ones.
Replace dated hardware on doors and cabinets
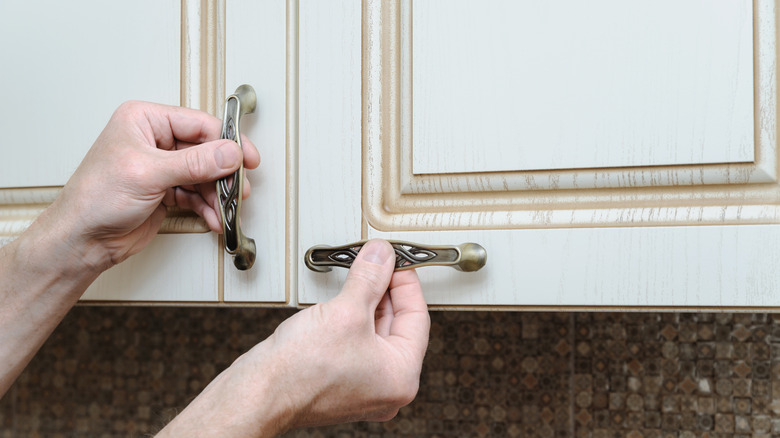
Even when cabinets and doors get painted, stained, or otherwise prettied up, not changing the hardware is a real giveaway that you're looking at something old and dated, especially if that hardware is rusting, pitted, or covered in paint flecks. For generations, people have painted their doors and refinished their cabinet fronts without bothering to remove the hardware first. Years of different colored paint flecks on doorknobs, handles, and locks make the space dated and slightly neglected, even if you've done a really nice paint job on the rest of the room.
While you can absolutely purchase new hardware for a really modern look, you can probably save the existing hardware if it is beautifully retro and fits with the style you're aiming for. You'll need to remove it and safely use a stripping compound, like Smart n' Easy paint and varnish remover gel, to take off the layers of paint, sealant, and grime and restore it to its original finish. In older homes, you may even find some beautiful cast iron under all those layers. Clean it up, seal it if necessary, and reinstall it.
Upgrade faucets and showerheads for a modern look
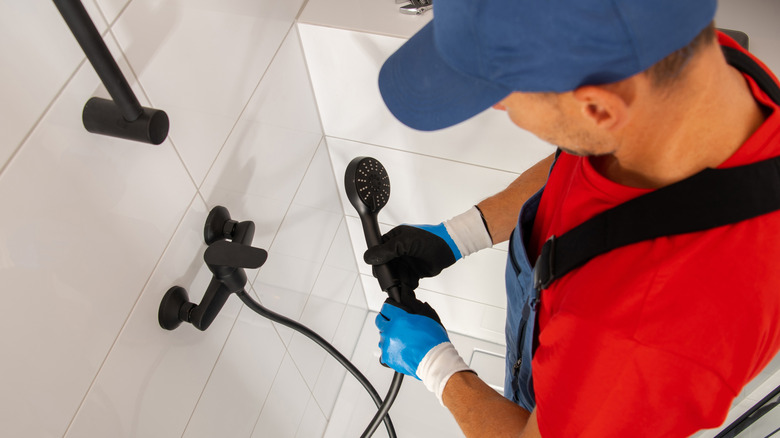
Chunky, pitted, and rusted faucets and showerheads as well as the old builder-standard budget model that was installed when the home was originally built can make a perfectly clean, serviceable kitchen or bathroom look like it's stuck in a previous decade. Old plastic heads or rubber hoses that are yellowing with age just do not look fresh, even if you spruce up the rest of the room. Peeling chrome plating, brittle hoses, and faucets that are covered in thick layers of limescale definitely don't make the bathroom feel clean and inviting.
New, sleek modern faucets and shower hoses and heads are relatively inexpensive and will immediately lift the look and feel of the room. For a really cohesive look, it's a good idea to replace bathroom faucets with matching ones throughout. At the very least, go for the same color and a similar style for a super-cohesive look. Contemporary, on-trend kitchen and bathroom plumbing fixtures tend to have simple, slim profiles and clean lines and come in brushed nickel, matte black, and warm brass. If you want to avoid actual remodeling, just make sure you choose products that fit your existing fittings, so you're simply swapping like for like, rather than having to make more substantial changes.
Pair vintage tile with complementary wallpaper or paint
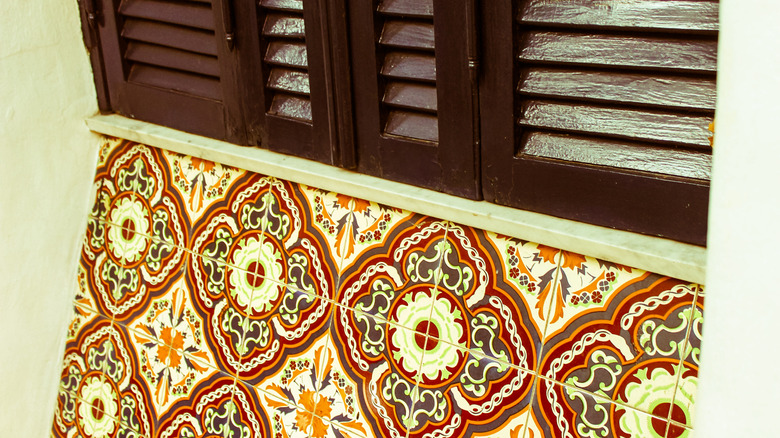
Lots of homes still have lovely vintage tiles, often in soft pink, minty-green, or mustard. And it's easy to write them off as dated decor that needs to be ripped out. However, you can pretty easily leave this tile in place, incorporating it into the wider design of the room to make it look like real intentional vintage style. Treat it as a feature to work with instead of a flaw you have to get rid of.
Design the rest of the room so that it highlights the tiles. For example, you could choose one wall and paper it with something dramatic that still has pops of the tile color in the design. Then, paint the remaining walls with a softer, lighter color that is a similar color, but perhaps a few shades paler, than the tiles. This is a fairly simple upgrade that pulls all the surfaces in the room together and makes those old mid-century tiles part of the overall theme. Just don't go overboard. If the tiles are already really bold, choose simpler wallpaper or paint colors. And, if you do go with wallpaper in the bathroom, make sure it's actually rated for bathroom use. The same goes for the paint and adhesive.
Refresh floors rather than try to replace them
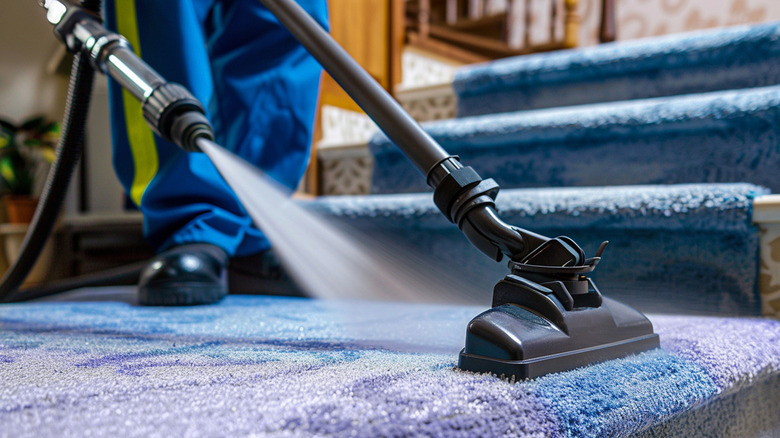
The idea of ripping up and replacing flooring fills many people with dread. Even re-sanding hardwood floors can make homeowners shudder. That's understandable because it's an expensive and long-winded process. But grody old carpet, scratched and chipped wood, stains, and patchy areas that obviously need some care make your home feel messy and a little bit grubby.
For carpets, the simplest solution is to give them a thorough deep clean. You can rent a carpet cleaning machine or hire a professional to tackle the job for you. You'll be able to lift many stains and generally refresh the carpets as long as they're not too worn to be saved. If the finish on hardwood floors is worn but isn't peeling and there isn't excessive damage, you can do a simple screen-and-recoat. With this process you essentially abrade the floor lightly (not a full re-sand) and then apply a layer of sealant and leave it to cure. This restores sheen and color and protects vulnerable areas. You can get wood floor refresh kits that let you even out light wear and add a protective layer over still-intact finishes. And where the flooring needs a bit of extra help, strategically place rugs that match the colors and design of other elements of the room. That way, they'll look like actual design choices rather than just rugs hiding an ugly bit.
Update your baseboards
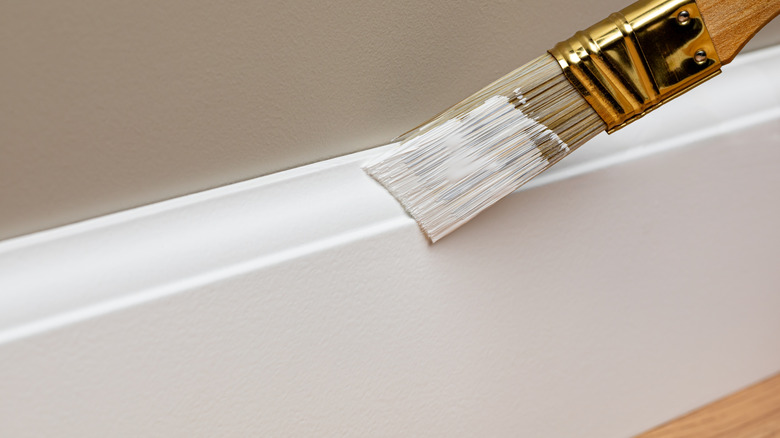
Baseboards take a lot of abuse. They get dinged by furniture as well as constant foot traffic and your pets. You probably don't give them much thought. They're just ... there. But if you freshen the walls and the floor but skip the baseboards, the room looks unfinished or low-budget.
Start with a good clean and maybe a paint touchup or even a full repaint of the baseboards. Small dings, dents, and gaps can be rebuilt with wood filler, then sanded and painted. If, however, the baseboards are badly damaged or they're mismatched in size and style throughout the house, then you may want to think about replacing them. Baseboard replacement is pretty DIY-friendly. Most old baseboards can just be pried off. Then you can add new, taller medium-density fiberboard (MDF) or wood baseboards with modern profiles. The most challenging part is getting a clean mitered join at the corners, so make sure you buy a foot or two more than you need so you can practice getting a beautifully angled cut.
Add crown molding
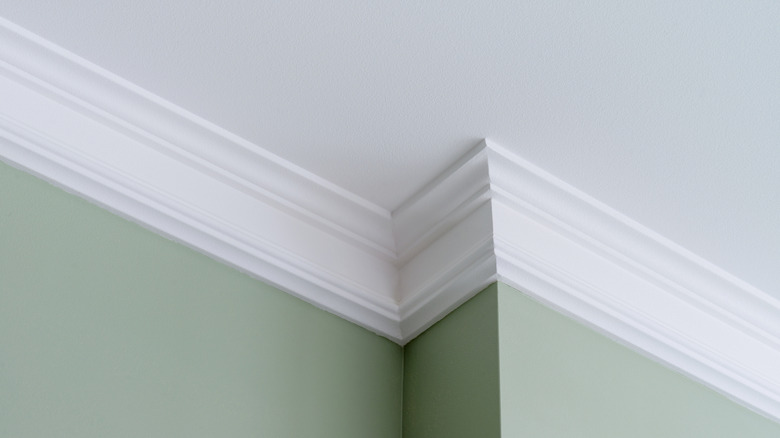
Without crown molding, a room can feel very box-like, as there's no gentle transition from walls to ceilings. The lack of crown molding can also leave a space feeling unfinished. Even the simplest crown molding can have a fairly big impact on how the room looks and feels. Installing crown molding ties the walls and ceiling together, has a strange increased perceived height effect, and hides imperfections, including dodgy paintwork, where the wall and ceiling meet.
If you've got a basic builder-grade home with boxy rooms, crown molding adds architectural interest and gives a room a more custom look. DIY installation is pretty straightforward, especially if you're not removing existing molding. You can get really lightweight foam or pre-primed medium-density fiberboard (MDF) crown molding that is DIY- and budget-friendly. Art3d's polystyrene crown molding has good reviews. These materials are easy to cut, install, and paint. You can also get higher-end materials like plaster or hardwood, but these cost more per linear foot and require more skill to install properly. Most people paint their crown molding to match other trim, but some use it to add a bright or bold element of color that matches something else in their room design for extra impact.
Paint interior doors to modernize them

Like old paint on walls, the paint on doors dates your house and gives in an air of neglect when it starts to yellow, gets dinged, or ends up covered in marks that just won't clean off. And, because doorways tend to draw the eye, updating those doors can have a big impact on the freshness of your home. Soft, neutral coats of clean, fresh paint make a room more welcoming, especially if you've also updated the hardware and freshened up the trim.
You can go for crisp white or pale neutrals, but you need to make sure you prep the surface first, especially if the existing coat is gloss. The same applies if the current door coating is badly damaged, has lots of runs and streaks from a previous bad paint job, or is particularly dirty. At the very least, clean and sand the surface enough so that new paint will stick to it. Smooth out old runs and fill them, then sand small dents and damaged spots. You may need to de-gloss the door, then use a primer to avoid peeling, beading, and bleed-through. Don't forget to remove existing hardware before you start and take the opportunity to refresh it while you wait for the door to dry.
Hide textured walls with joint compound
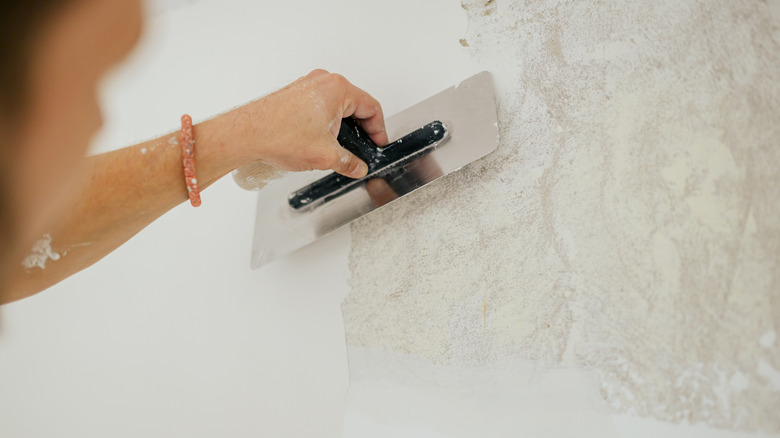
Woodchip, artex, popcorn, knockdown, swirls, and other textured wall and ceiling finishes look incredibly dated. They scream last century and not in a good way. Textured surfaces are also much harder to decorate, and they show every imperfection because of the way they cast shadows over their own surface. Many people end up doing significant work to remove and correct these surfaces, but actually, in many cases, you can get away with skim-coating them instead.
Skim-coating involves building up thin layers of joint compound over the surface to basically smooth out the texture until you've got something much less noticeable. Or, in the best-case scenario, you'll end up with a smooth, more modern-looking wall or ceiling. The trick is to get the compound to a pancake batter-like consistency and to only apply it in a thin, smooth layer. Let each coat dry completely before adding the next. Yes, this can be a time-consuming process, but a lot less messy and more cost-effective than fully replacing the textured surfaces.
Change light switches and plates to something more aesthetic
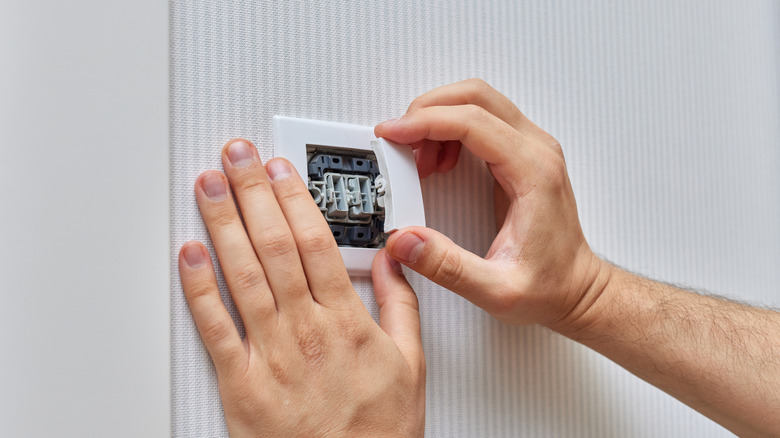
It's that old yellow plastic again. As plastic ages, it gets brittle and takes on a yellow tinge. It's often mistaken for nicotine staining, but unlike actual nicotine staining, the yellowing associated with ageing plastic can't be cleaned off. Whatever else you upgrade in a room, those telltale yellowish switches stick out like sore thumbs.
With minimal cost and effort, though, you can replace them with clean, contemporary plates with dimmers or rocker switches. Something simple and easy to clean, like a plain metallic finish and no fussy details, is a good option for kitchens and bathrooms. You can get a little fancier in the rest of the house, but for a truly cohesive look, either go for the exact same switch plates, or at the very least, the same color and finish. Just make sure you know what you're doing, turn off power at the breaker, and test to make sure there's really no live current before you start work.
Create or refine a small home workspace

Working from the kitchen table or on the couch isn't brilliant long-term, whether you're typing on your computer or practicing your art or craft. Uncomfortable positions and muscle pain are common issues with this kind of setup. Plus, of course, it blurs the boundaries between work and home life. If you're actually trying to get serious work done, the distraction of your "home" clutter gets in the way of your productivity, and when you're trying to relax, the sight of your laptop feeds anxiety and doesn't let you rest.
Even if you've only got a small home, you can at least clear out a corner or a little nook and squeeze in a compact desk, some shelving, and a comfy, ergonomic chair. Get the area set up to your liking with everything you need for a productive work or craft session. If you don't want it in your main living space, get a little unconventional and consider whether you have some usually wasted space on a landing or in a nook in the kitchen or hallway that isn't used for anything essential. Keep the space bright and well-lit, preferably with plenty of natural light.
Clean, touch up, and maintain exterior surfaces
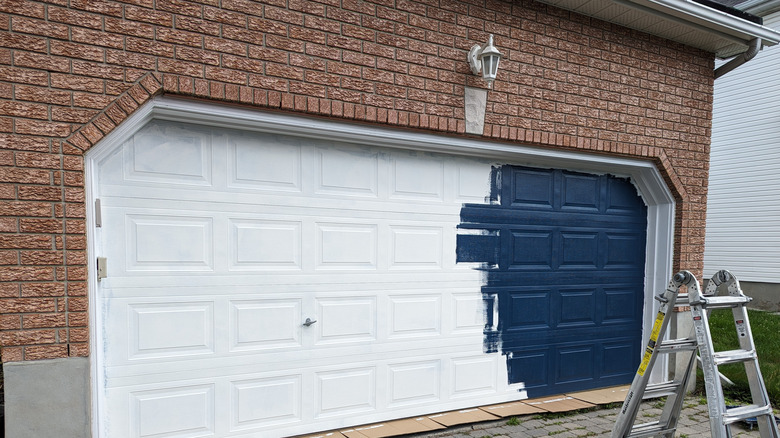
Exterior surfaces have a huge impact on your property's curb appeal. Dirt, mildew, peeling paint, clogged gutters, and old, corroded garage doors suppress your home's value and give a poor first impression. Many of these issues you can fix yourself, without any significant remodeling. Taking care of them enhances curb appeal and also prevents them from becoming more significant and costly issues.
Wash siding and trim with gentle low pressure and suitable cleaners to remove algae and mildew. Sand peeling and bubbling paint, then clean, dry, prime, and recoat the area. You can do the same with your garage door, using metal paint rated for exterior use. Sprucing up your front door and entryway can also boost your home value and create a strong first impression. Pressure wash decks and patios to remove algae, moss, and general dirt and debris that has built up and restore these surfaces back to their former glory. These are all jobs you can tackle yourself over a weekend and cost very little other than time and a bit of elbow grease.
Refresh your grout

Gray or moldy grout makes your kitchen or bathroom look gross and unhygienic. Plus, of course, you don't want mold or mildew in your home. And, if grout is sufficiently cracked or missing anywhere that there's lots of water, like behind the sink or around the bath and shower, water can get behind and cause damage.
There are several different ways to clean grout. For minimal effort, start by giving the existing grout a good scrub with a suitable cleaner that will break up soap scum and oil and hopefully help with surface stains. If this works well and the grout is still in good condition, then, once dry, you can go over the grout with a whitener pen to give it a fresh look. However, if the stains are extensive or the grout is crumbling, you'll want to scrape out the top couple of millimeters, then re-grout with a grouting compound rated for moisture. When scraping, just be super careful not to dislodge or chip any tiles.