Easily Turn Paper Cups, A Baking Tray, And Cement Into A Beautiful Plant Stand

We may receive a commission on purchases made from links.
So, you need a plant stand to display your new potted succulents, but you've had no luck finding something suitable in your cupboards or anywhere else in the home. Then why not make your own? To help you out, TikToker evebprojects has a super-simple DIY for building a plant stand from scratch. All you need are 4 paper cups, 1 baking tray, a little cement, and optionally, some sort of lining (for the tray).
To get started, gather your supplies. The paper cups and baking tray will be the molds for the plant stand: The cups will create the legs, while the tray will be the shelf. For the cement, you'll need it to be pourable so that the cups and tray can be filled. If you use something like Quikrete quick-setting cement, you'll just need to add water until it's the consistency you want (something like pudding).
For the cement tray, you could line it with some parchment paper first to make it easier to unmold once the shelf is dry. Alternatively, you might use something with a bit of texture, like scrunched foil or tissue paper, to create a pattern for the shelf's surface. This is an easy way to give your plant stand a bit more visual interest. Another way is to find some nice, large leaves in the garden, and place these on top of the tray's lining, so they can make an impression in the cement. (Learn about the differences between concrete vs. cement.)
Making and customizing your new cement plant stand
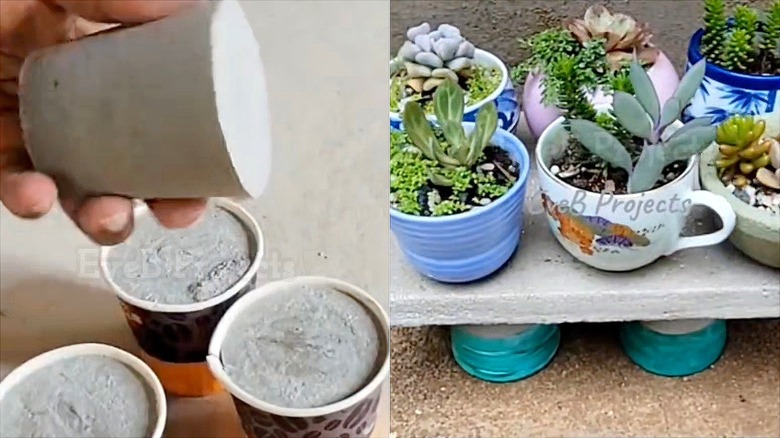
To begin, pour the cement mix into the paper cups and baking tray to build your stand's structure. Don't forget to add the lining to the tray first if you decide to use one. Tap the molds to settle the mix and remove any air bubbles. Leave these to dry. Note that the baking tray should not be used for food going forward. However, now you can use it for more molds or other DIY projects; in fact, a baking tray makes the perfect mold to create budget-friendly pavers.
@evebprojects A baking tray, some paper cups, and cement. That's it. 🌿 This is what I mean when I say you already have everything you need to start. No fancy tools. No experience. Just the will to make something beautiful. Beginner cement course → $29, link in bio 🔗 #cementdiy #diyplantstand #beginnercraft #handmadedecor #evebprojects
Once the cement is completely dried (note that the set time for Quikrete quick-setting cement is just 10 to 15 minutes), all you have to do is tear the paper cups away from the stand's legs, and then pop the shelf out from the tray. If you used a liner for the tray, and opted to add texture or objects, such as leaves, the top of the shelf should show your pattern or design. Next, assemble your plant stand, and you're done.
... Or maybe not quite, as adding some fun embellishments can really turn your new cement plant stand into a unique display piece. For example, you could paint it with something like Krylon Fusion satin spray paint. (If you do, you may want to first sand the pieces.) Or, if you're particularly creative, you could hand-paint a design on the top of the plant stand, using Chalky Chicks matte chalk paint, which comes in a range of colors. Customize your plant stand however you like, and then use any leftover quick-setting cement for a cute and easy DIY planter.