

She Turns An Old Tire Into A Rustic Patio Table With An Impressive DIY

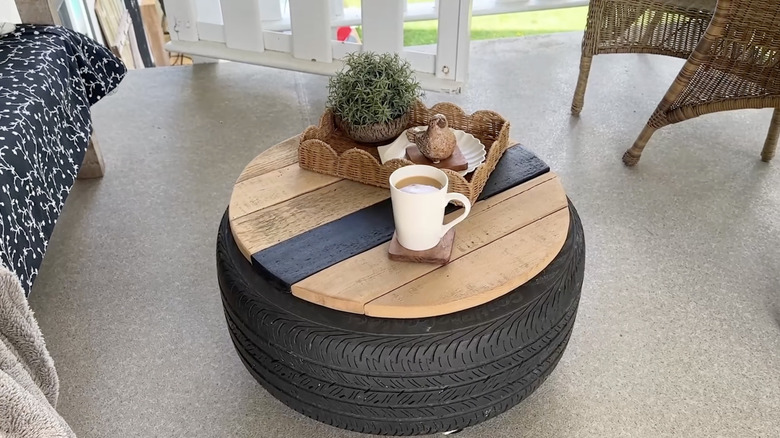
Replacing the tires on your car is never fun (or cheap), but if you're a DIYer, this dreaded task can provide you with some great materials to use for your next project. From swings to pet beds, there are all kinds of ways to repurpose old tires as funky furniture — and a particularly interesting idea involves turning one into a rolling patio table. We got the idea from the Hometalk YouTube channel, where a clever creator used a tire, wood, and a handful of other tools and supplies to create this rustic piece of outdoor furniture.
If you'd like to replicate the design, here's a rundown of what you'll need. Of course, it starts with a tire — either an old one from your car or a used one from a local shop. You might even be able to find free tires on Facebook Marketplace, Craigslist, or a similar website. Other required supplies for this DIY include two planks of wood, eight screws, four swivel casters (with screws for installation), and a circular tabletop. Optionally, if you want to decorate the wood, make sure to get paint, a paintbrush, and painter's tape, too. In terms of equipment, you'll need a pen or pencil, a ruler, a miter saw, a drill, and an electric sander.
While this table is perfect for holding drinks or displaying decor, that isn't the only way to use it. In fact, it could be your new favorite patio ottoman or footstool, an outdoor craft station for kids, or a place to keep gardening tools. And since it's on wheels, it's easy to move around and use throughout your yard.
Step-by-step guide to assembling your outdoor table
Get started by laying the two wood boards across the tire. They should be parallel, with each piece running fully across the tire's opening. Use a pencil and ruler to mark the ends of both planks at an angle, then use your saw to make miter cuts. Next, pre-drill two holes into the ends of each board (so there are eight in total) and connect them to the tire with screws. To make your table mobile, screw four rubber swivel casters into the planks.
Next up is preparing the tabletop. Use your electric sander to smooth out the surface and even out any rough spots, then clean off the dust with a damp cloth. (By the way, if you can't find a round tabletop that fits over your tire, you can make your own from scrap wood, pallets, or lumber.) If you're happy with the way it looks, you can leave it as-is and prop it on top of the tire. But if you want to paint or stain it, now is the time to do that. In the Hometalk video, the creator taped off a strip in the center of the wood, then painted it black. It matches the tire color, but you could also paint the whole thing black, use a different color, or add alternating stripes.
You don't necessarily need to screw the tabletop into the tire, since the rubber should keep it in place. However, if you plan on moving it around often or letting your kids use it, it's probably best to secure it. To do that, drive a few screws through the wood at even intervals. And there you have it, an impressive DIY that's perfect for any rustic-inspired home.