5 Tips For Installing Your New Granite Countertops Yourself
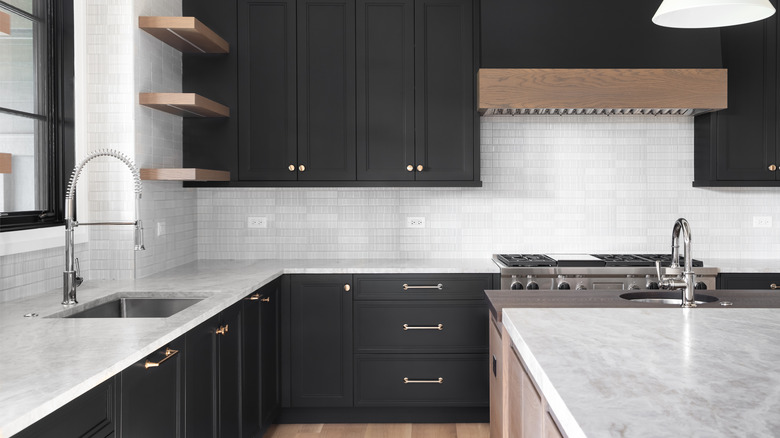
According to FeelsWarm, granite countertops are visually appealing, adaptive to heat, easy to clean, and value-adding. These are some of the reasons most homeowners choose them over the likes of marble, which are prone to scratches and stains. Quartz countertops, too, as they are damaged from exposure to excessive heat, as found on Marble.
However, granite countertops come at a hefty price, costing an average of $50 to $200 per square foot, as claimed by Badger Granite. For this reason, DIYers with a tight budget go down the route of installing their own granite slabs to cut costs. But there's one thing we should all know — unlike installing cabinets yourself or setting up curtains, granite slab installation requires a higher installation skillset, increased strength, attention to detail, and a lot of tools. If you think you have what it takes, we are here to team up with you by giving tips for successfully installing your new granite countertops. See them down below.
1. Collect all the installation tools you need

No project is successful without the proper application of every tool required for its execution. Before you pick a granite slab from your favorite home furnishing store, a list of the installation tools must come first. And when we checked that of the experts over at BuildDirect, it included a caulking gun, circular saw, putty knife, measuring tape, jig saw, level, a dye in the color of the granite, masking tape, seam stone, filler, and dry-cut segmented diamond blade.
The jig saw will be used to cut out the sink hole (though you might need to call a professional for this step), the masking tape for protecting the seam lines of the granite slab during operation, the putty knife for mixing the seam filler with a dye, and the diamond blade for the cutting and seaming of the slab. MSI added that you'd also need 0.75-inch plywood to reinforce the top of the cabinet onto which the slab is to be installed. They warned that this plywood must be protected from water damage with a waterproof membrane, so you better add those to your shopping list. And as you should already know, safety goggles and safety masks are as crucial for this job as every other tool.
2. Take the measurements meticulously
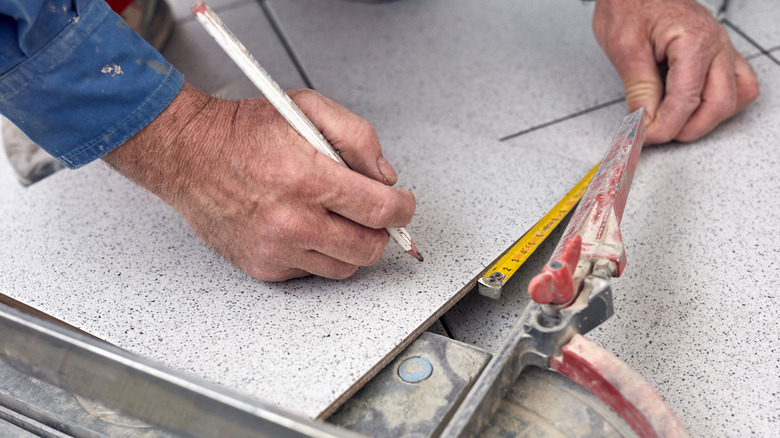
Installing a granite slab without knowing how much countertop space your kitchen needs is an ingredient for disaster. So, if your granite slab manufacturer would not send a technician to your home to take the measurements until you pay another $200, you must take all precautions to perform a stellar job. To help you get it right, let's explain the five-step guide written by the professional installers over at Arch City Granite & Marble Inc. The first thing you'll do is measure the length and width of the top of the counter, and this measurement should be recorded in inches. After this, multiply the recorded length by 25.5 inches to get an overhang.
As Ogden's Flooring & Design puts it, the overhang is the amount of legroom needed for sitting comfortably around the countertop while leaving room for human traffic or movement around the kitchen. After multiplying the length of the top of the counter by 25.5 inches, convert your result to square footage by dividing it by 144. After all, granite slabs are sold in square footage. In addition to this, the amount of granite needed for the backsplash should be added. Of course, this should be the same length and thickness as the countertop slab, but its height is different. The height of the backsplash is usually 4 inches but remember to convert it to square footage by multiplying 4 inches by 144.
3. Perform proper preparation

Don't let the thrill of revamping your kitchen make you forget the important thing. There's no success without proper preparation. So, to prep your kitchen for this project, RSK Marble & Granite said you should remove the old countertop and plumbing facilities, level the surface of the counter, and clear the space around the counter. Let's break it down for you.
First, clear out the space around the cabinet and uninstall the old countertop either with a nail puller or a screwdriver depending on how it was fastened. This should expose the surface of the counter for leveling. The importance of leveling the exposed counter is to ensure stability and enable an easy installation of the new granite slab. For the leveling, use plywood and shims because this combo is the most commonly used by experts to achieve pro-level results. When done leveling, go on to switch off the plumbing facilities and uninstall them to avoid an installation catastrophe. Remember also to pry off the old backsplash.
4. Cut and fit the slab with precision
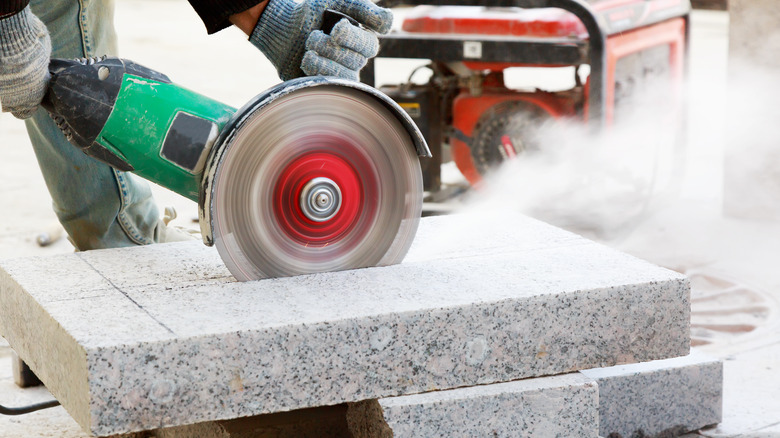
Precision Stone Design estimated the minimum cost of making sink edging and cut-out to be $300. This means cutting a granite slab to fit and look neat after installation is an important phase of the project, and it should be done with extreme care, as explained below — or you can have a pro complete this step for you. Prepare for dust by donning your protective gear such as goggles, ear plugs, gloves, and respirators. Move all kitchen items where dust won't land on them. With that out of the way, draw the layout of your countertop design to scale on a large piece of cardboard using a ruler and a marker. Cut out this layout and pattern carefully using a pair of scissors.
Moving on, follow in the footsteps of the experts at Marble by clamping the purchased granite slab with C-clamps and cutting it into the pattern in the cardboard using a saw. To do this precisely, attach the cardboard layout to the granite slab and carefully retrace the design onto the slab. After this, sharpen your saw blade and start cutting the slab along the pattern. As you cut, you'll notice heat and pressure rising. Put this under control by having someone on standby spraying water on the granite as you slice it. Also, keep your eyes on the saw as you cut to avoid injuries without forgetting to take a break at intervals to check your progress. After cutting, use an angular grinder to smoothen the slab's edges.
5. Seal the seams like a pro

Granite Tops Pro warns that people who seal the seams of their granite countertop the wrong way will incessantly deal with cleaning problems. You don't want that happening to you, do you? So, ensure you buy a professional-grade sealer in the right amount and color. If you'll be creating a sealer using a polyester-based resin, coloring, and hardener, choosing the mix of pigment that will make a blend that perfectly matches the color combination of your granite slab can be tricky. In this case, you may need the help of a talented color-matcher.
After getting your sealer ingredients, Precision Stone Design says to mix the dye with the resin until the color matches that of your granite slab, and the mixture becomes putty. You may do some trials by combining different pigments and resin in small amounts until you nail the perfect color combo. Once achieved, add your hardener to the putty resin-coloring mixture and swirl thoroughly. Finally, cover the seams in your homemade sealer and allow it up to 24 hours to harden.