Tips On How To Limewash Furniture
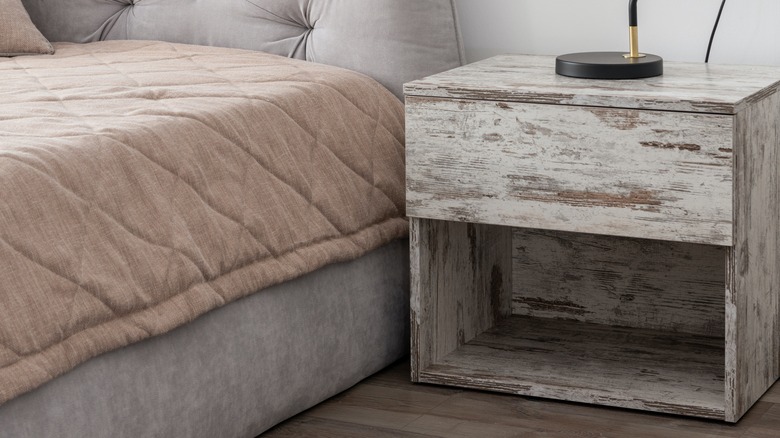
Limewashing is an easy and affordable way to transform your furniture from boring to breathtaking in just a few hours. Historically, limewash paint was used on plantations because it was practical, kept certain bugs and mildew at bay, and the ingredients were often easy to come by, according to the National Park Service. Simple everyday ingredients such as molasses, casein, and other oils were even used as binding agents in the paint, making it accessible for many. This historic technique has been around for ages, but recent trends have brought it back into focus.
If you've recently flipped through any design magazines or spent time on social media, you may have noticed that minimal décor and simple aesthetics have grown to the height of popularity over the past few years. This means plenty of neutral colors, and simple wood furniture is a must-have for designers. Whether it's your living room, home office, or bedroom, limewashing is the perfect, affordable way to achieve a minimalist look!
The clean but layered look that limewashing can create is great for end tables, dining tables, dressers, and so much more, especially if you want to upcycle and give your old furniture a modern touch. If you're tackling this DIY project for the first time, here are a few tried and true tips that will cut hours off of your project and yield expert results.
Safety first: Gloves and goggles shouldn't be overlooked
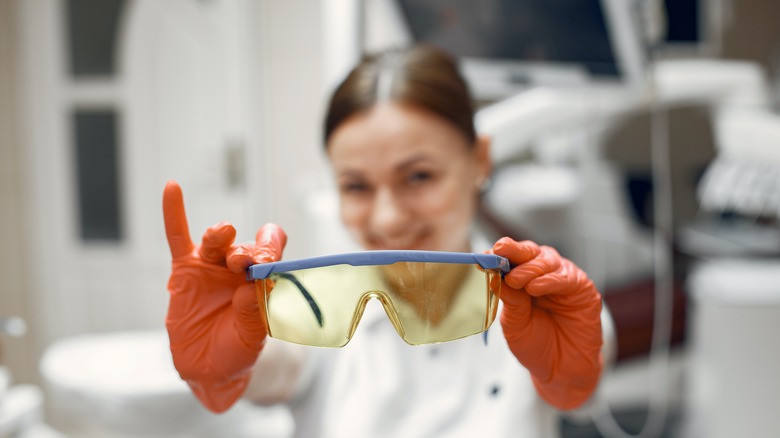
The great news about limewash paint and lime, in general, is that the naturally occurring substance is not harsh or loaded with dangerous chemicals usually found in other paints and finishes, as per The Mud Home. However, all projects, especially home and building projects, should be done with caution and care. A simple DIY project is meant to be fun, practical, and possibly save you money, and a trip to the emergency room is not on the agenda.
Therefore, gloves and goggles are recommended when using limewash paint. Goggles or glasses will keep any rogue splatter out of your eyes, and gloves will protect your skin where it's most likely to come into contact with the paint. Lime and limewash paint is caustic, and if it comes into contact with your skin, mouth, or eyes, it could cause burning and other skin irritation (via Children's Hospital of Philadelphia). More potent forms of lime can cause more severe injuries, and you should carefully read instructions and warnings on any product before use. However, if you come into contact with small amounts, you should wash the affected area thoroughly and immediately. If careful, limewash paint should not be hazardous.
Simple protective glasses should sufficiently protect your eyes while painting. However, remember that brushing too fast or using too much paint can cause dripping and splatter. Simple protective gloves will protect your skin, but you can also use thicker water/chemical resistance gloves if you're working with large quantities of limewash paint. Long pant legs and long sleeve shirts are also recommended and could limit your chance of exposure.
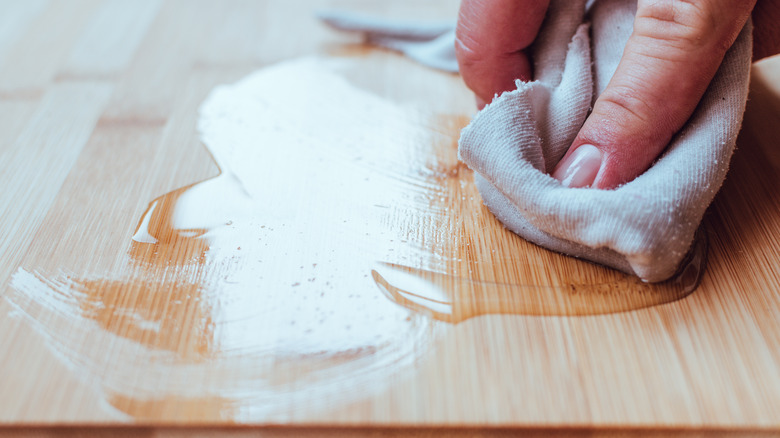
Remove hardware and strip away varnish or paint
A clean slate makes the perfect canvas for limewash paint. When revamping wood furniture, removing any unwanted debris is an important step that shouldn't be rushed. Debris could be anything from paint and varnish to cumbersome hardware that will be difficult to paint around. It can also be any adhesives, glues, stickers, and anything else that may prevent the limewash paint from adhering to the wood. The best way to apply limewash paint is to get down to the original wood.
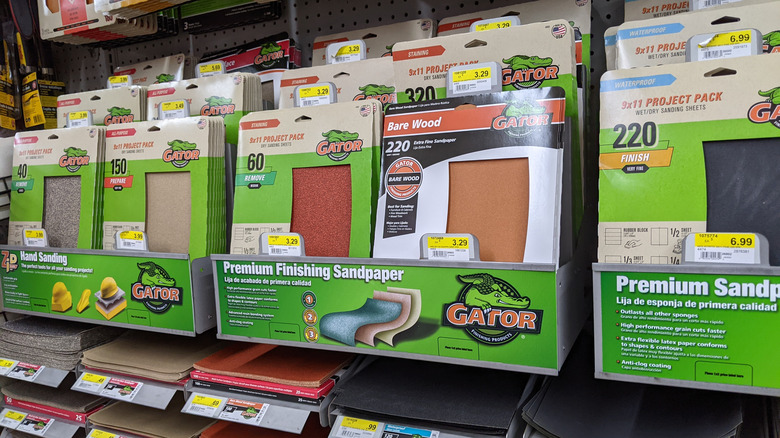
In order to strip away any old varnish or paint, start with a light sanding using coarse grit sandpaper to prep the wood, as noted by Our Home Made Easy. This does not have to be excessive, just enough to loosen the top layer. From there, you can apply the varnish and paint stripping gel according to the product's individual instructions. Citristrip is a popular product for this, and makes removing even those tough layers a breeze (via Woodworking Clarity). Cover the area completely, allow the gel to sit, and then use a rag, putty knife, or scraper to scrape away the paint and varnish with little effort. Once you've cleared away the old layers, wipe the excess gel off, allow it to dry, and use a wire brush to remove any leftover paint and varnish pieces.
If there are difficult spots, you may want to try paint remover or going back over the surface with an orbital sander. Once you are down to the bare bones of the original wood, allow the furniture to dry thoroughly before the next steps. This will ensure that the limewash paint bonds to the wood.
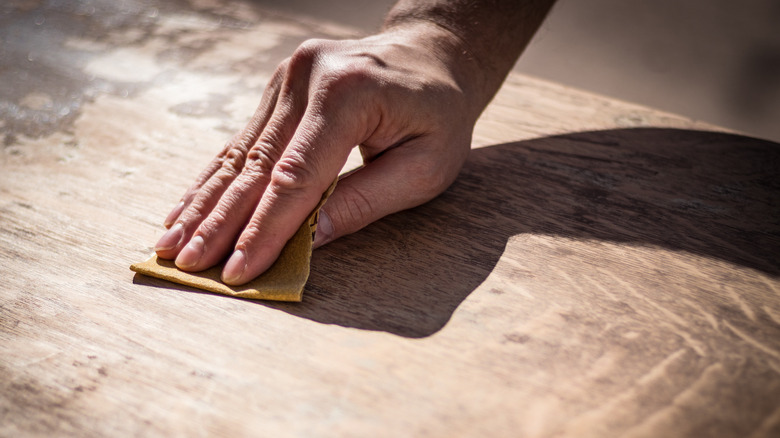
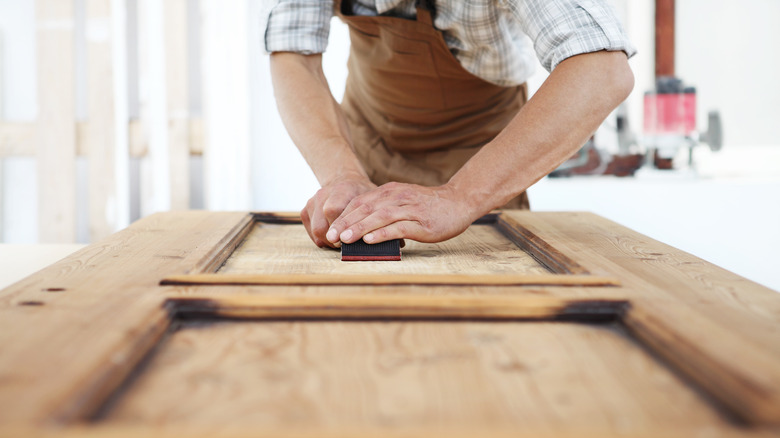
Sand your furniture with the right paper
DIY home projects can be fun and creative and can even help you save money or a piece of furniture from the landfill. But nothing is worse than putting hours of time and effort into a project, only to have it turn out poorly. Limewashing is a fairly simple way to spiff up old furniture that is either too dark or possibly outdated. However, there is one step that you do not want to skip over.
Once you've removed any paint and varnish, it's a great idea to do another round of sanding. You may have started with coarse grit paper to cut through old layers quickly, but now is the time to switch to fine grit sandpaper for wood, which is anywhere from 800 to 1,000-grit paper, according to Woodworking Clarity. Sandpaper like this is great for handheld sanding and will ensure you can get into the smallest nooks and crannies for a nice, even sanding. This extra detail will make a huge difference in your finished product. If the wood isn't evenly sanded, the limewash paint will not stick evenly, so you'll have a spotty paint job. Some areas will be more transparent, while others will be more solid, giving an uneven appearance.
Go with the grain of wood every step of the way
You may know the general steps to limewashing your furniture, but it's the small tips and tricks that will make the difference and give your projects a fine, finished look. Another detail to pay attention to is always going with the grain. According to Wood is Wood, whether you're cutting, sanding, scraping, painting, or staining, it's always recommended to go with the wood's natural grain, not against it.
The grain of the wood reveals the natural direction that the wood grew. When you fight against it, you can cause scratches and grooves, and the wood fibers can split and tear. The result will be a rough and ragged finish. If you're using an orbital sander, it will be difficult to avoid going against the grain completely. However, you can still move in just one direction with the sander rather than running across the surface in many directions. Orbital sanders are common because they are convenient, so it helps to start with a low or medium grit of about 80 and work your way up to finer grits to avoid tearing and creating more grooves in the wood (via Uneeda Sandpaper).
When applying limewash paint, the brush strokes will also blend in more naturally with the existing grooves that come from the wood grain. You may not notice this until you try going against the grain, but the small details like this can really make a difference when doing an at-home project.
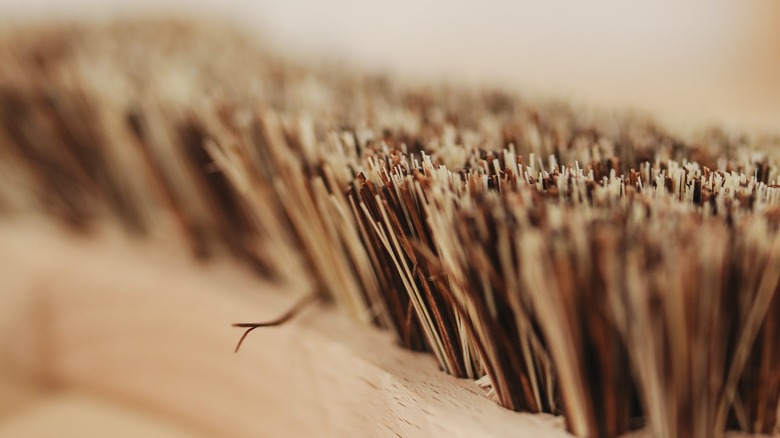
Use a bronze brush and steel wool to create pores in the wood
One of the great things about limewash paint is that it allows the wood to breathe, which means moisture does not get trapped in the wood, as per National Park Service. For limewash paint to truly adhere to and protect the wood, the pores — small holes in the wood that transport nutrients and sap while the trees grow — in the wood must be opened (via The Wood Database). Once they're open, the limewash paint can fill the pores creating a smooth layer and clean finish to your furniture.
Sanding is the first step to opening the pores in the wood since it strips away any debris like paint and varnish that may have closed them. However, for a refined look, you can brush the wood in the grain direction with a bronze brush (via Tools for Working Wood). You do not need to apply much pressure or brush excessively, but this small extra step can elevate your project from finished to fantastic.
In addition, steel wool can also help get that ultra-fine finish. Once you've applied your coats of finish and allowed them to dry, gently rubbing the surface #0000 steel wool can help buff away any dust caught in the finish, small brush strokes, and other blemishes in the final layer (via The Finishing Store). If you're nervous about buffing, be sure to add an extra layer of finish, begin slowly, and test a small area on the bottom of the furniture to determine the pressure you should use.
How to add color to your limewash paint
Limewashing and whitewashing are two different processes that yield different results. Limewashing often produces a lot of gray undertones and sometimes shades of blue rather than the stark white of whitewashing. This technique usually goes very nicely with the natural wood color underneath, but if you're feeling extra creative or ambitious, there are some variations to try. It's possible to add a little color to limewash and still produce a subtle, soft hue that will go great with your minimal or Scandinavian aesthetic. A soft green or even a light blue can still capture that natural feel. Even a light yellow or pink can highlight the color of the wood underneath nicely.
Depending on the color, limewash paint can be tinted with either liquid or powdered pigments, and should be approximately 10 parts limewash to 1 part pigment, according to Celtic Sustainables. Pigments can be mixed with a small amount of water to create a paste and then added to the limewash paint to keep the mixture smooth and prevent dust. Trial and error will be an important step when adding color to your limewash paint. Because of the whiteness of the lime, it will be challenging to determine the true color until it dries thoroughly. A few test runs and samples are a great way to achieve the desired color. Limewash, in general, may appear thicker or darker when wet in comparison to how it will dry.
Consider a quality wood grain enhancer
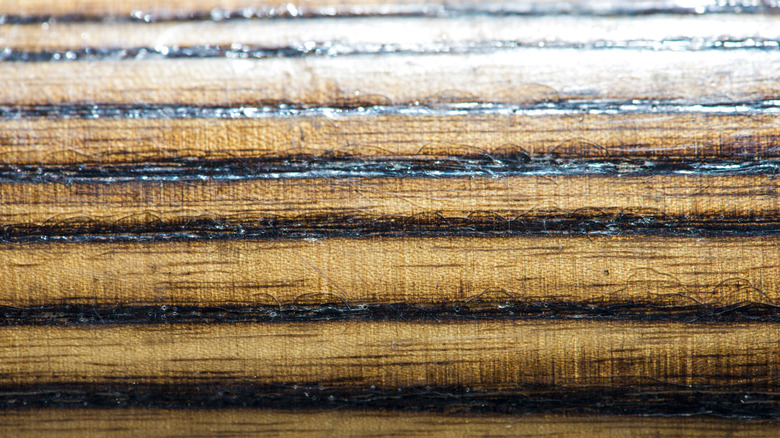
These tips are all about taking your project to the next level, and a grain enhancer might be what's missing from your toolbox. Part of the appeal of limewash paint is the more natural appearance of the wood. It doesn't feel over-polished or plastic. When you can see the original wood poking through, it can give your whole décor an authentic, imperfect look that still satisfies your minimalist taste.
Enhancing the grain in your wooden furniture is another small detail that will add to a stunning final project. Several products and techniques can bring the grains of wood to the surface, giving your piece a more textured, raw appearance. As noted by Wood is Wood, the burning method is when the surface of the wood is actually charred with fire. You then use a metal brush to scrape away most of the blackened wood, leaving the grains with a darker appearance that stands out. There are also several colored stains and waxes that can create contrasts between the wood and grain once applied. However, some of these waxes and stains may make it difficult for the limewash paint to adhere to the wood. A simpler method, which yields subtler results, is to wipe the wood down generously with denatured alcohol and let it dry. The alcohol dries out the wood between the grains, leaving a nice textured appearance that shows off the natural lines in the wood.
Skip the roller and grab a paintbrush or an old t-shirt

Painting furniture often includes many rounded edges, small creases, tight corners, and grooves that can be hard to get to with a paint roller. You may think that a roller will give you a nice smooth coverage, and this may be true, but when it comes to limewash, you're striving for a more natural look that can't always be achieved with a roller or a foam brush. In addition, foam brushes and rollers can often hold a lot of excess paint, and when you're working with lots of nooks and crannies, the paint can pool and drip in the corners if there is too much. A smaller brush will also be easier to maneuver around edges and corners.
According to Craftwork Training Center, a natural bristle brush is an excellent choice for applying limewash paint. These brushes are typically made with real animal hair, such as badger or hogs, and can help create that slightly worn, antique look that makes limewash so transformative (via The Finishing Store). If you're still having a hard time getting into the smaller corners, try using an old cotton t-shirt to get full coverage.
Don't forget the finishing oil and sealant
If you are familiar with DIY projects, you may have experienced the frustration of spending all day on a project, only for a tiny hiccup to derail the entire project. This is why it is important to find the right finishing oil or sealant and apply it correctly. Even if the piece of furniture you are working on is mainly decorative, or if it's going to be tucked in a corner with low traffic, you should still apply a finishing coat.
One bump with the vacuum cleaner or one stray water glass and all your hard work will be overshadowed by peeling paint, a ring, or a scuff mark that will always draw your eye. According to HowStuffWorks, oil finishes are perfect for limewashing because they bring out the beauty of the wood even more. It can also protect your furniture from those annoying nicks and bangs, and they're water and alcohol resistant, which can be found in many household cleaners.
Oil finishes should be applied to a clean surface with a dry cloth. You can continue applying coats until the wood stops absorbing the oil after drying for 12 to 14 hours. Note that most oil finishes create a nice shine or sheen on wood furniture. This can be a nice finishing touch, but you should reconsider if you hope for a more flat appearance.
For wooden furniture, consider a water-based sealant or clear coat with a flat or matte finish (via General Finishes). This way, you can avoid a shine, retain the natural look of the wood, but also protect your layer of paint and prevent chipping and wear and tear.
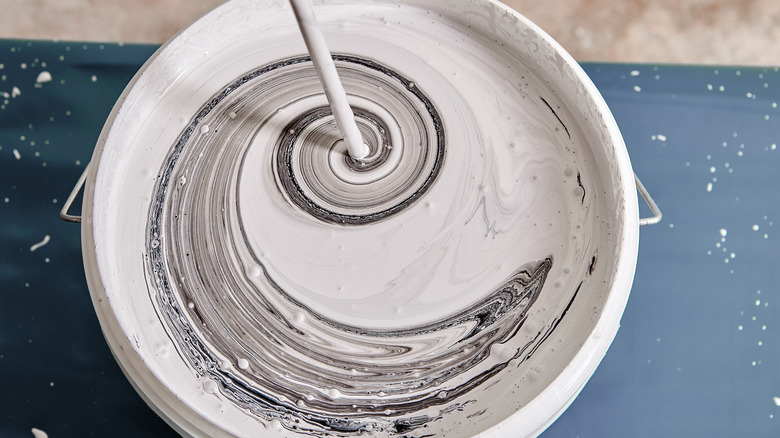
DIY your own limewash paint

If you're committed to this DIY project, you can even go as far as to make your own limewash paint from scratch! The best part is that it's affordable, and most of the recipes for limewash paint are non-toxic, which is uncommon for most paints. You'll need a few simple ingredients found at most hardware stores. Hydrated lime or lime putty, lots of water, and alum salt are the basics for almost every recipe. You'll also need protective gloves and goggles, a large bucket for mixing, a large paint stick or drill mixer with a long attachment, and natural mineral pigments if you want to add a little color.
Hydrated lime can either come as a dry powder or as lime putty, which is paste-like and can be less messy. The ratio should be 1 part alum salt to 10 parts lime putty or hydrated lime powder to 40 parts water. You can also add 1 part of pigment if you're adding color. First, add the alum salt to a small amount of boiling water, enough to dissolve the salt. Once the mixture is cooled, carefully combine all ingredients, pouring and stirring slowly so as not to breathe in lime particles and dust. A face or dust mask should be used when mixing your own hydrated lime powder (via Earth Pigments).